views
Adjusting Recliner Tension
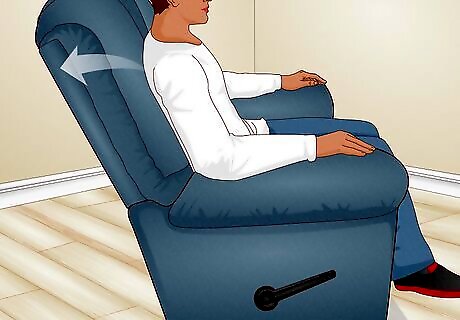
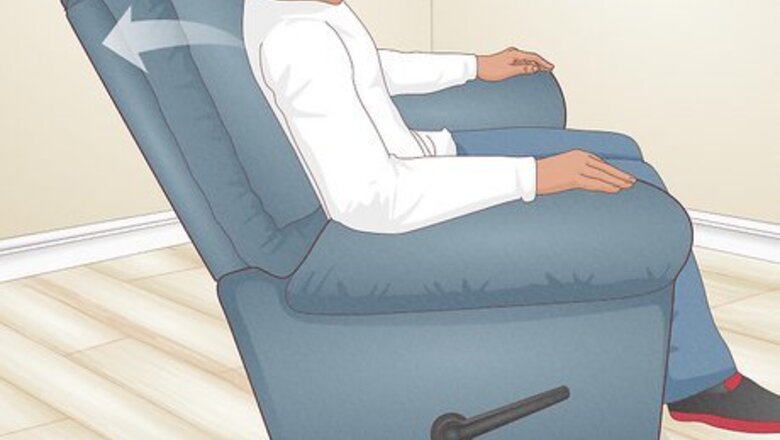
Test your recliner's tension. "Recliner tension" refers to how easily the backrest of the recliner leans backward. Sit in the recliner and lean back against the backrest. If it's too difficult to lean back, you'll need to decrease the recliner tension. It can also be a good idea to decrease the tension if you have a petite build since reclining the chair will then require less strength. If the recliner leans too far back for comfort, or if it leans back too easily, you may need to increase the recliner tension. This is usually a good idea for heavier individuals, taller individuals, and people needing firmer back support.
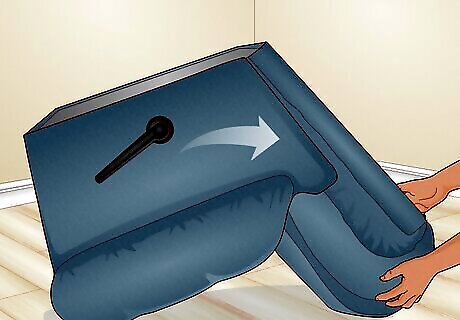
Tilt the recliner forward. Make sure the back is in the upright position and the footrest is closed, and carefully tilt the entire recliner forward, to expose the underside of the chair. Rest the recliner on the front of the armrests and the top of its back. You may need both hands to adjust the tension, and the process will be difficult to complete if you attempt to hold the chair the entire time.
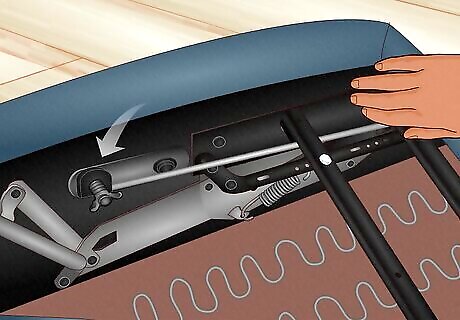
Look for an adjustment mechanism. Recliners with adjustable recliner tension should have a pair of thumb wheels or wing nuts beneath the seat. If no mechanism is present, you may not be able to adjust the tension. Look for a thumb wheel or wing nut on the right and left of the underside of the chair. Each one should be positioned at the end of a bolt, and tension springs should be connected to the same bolt from the other side. The exact placement of the mechanism may vary by manufacturer and model, but in most cases, the mechanism can be found beneath the seat and toward the back of the recliner. In some instances, the mechanism might be positioned more toward the bottom center.
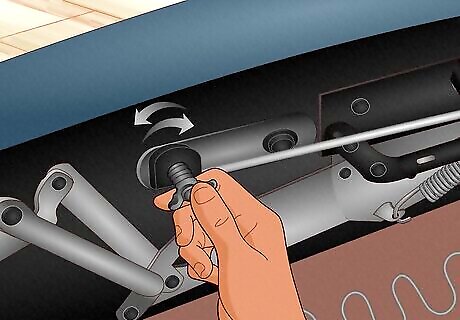
Rotate the mechanism. Turn the thumb wheels or wing nuts clockwise to increase the reclining tension. Turn them counterclockwise to decrease the tension. Both wing nuts and thumb wheels should be adjusted in the same way when you're dealing with recliner tension, so the basic instructions should remain the same. Try turning the mechanism with your fingers. If it feels too tight, you may need to use sturdy pliers instead. Work in small increments. Only turn each wheel or nut by a quarter turn each time, and repeat each adjustment on both sides of the chair to keep the tension even throughout.
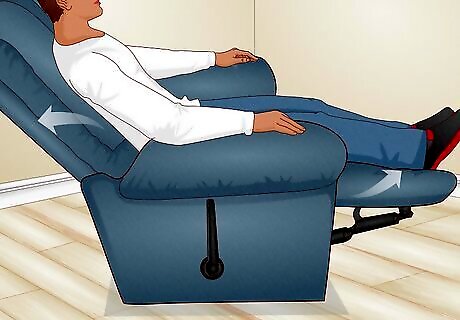
Test the adjustment. Return the recliner to its upright position. Sit in the chair and check the recliner tension by extending the leg rest out and leaning back in the chair. If the recliner tension feels comfortable enough, you can end the process here and relax in your newly adjusted chair. If the recliner tension still feels too loose or too stiff, further adjustments will be needed.
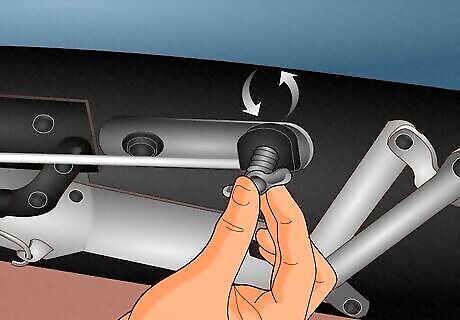
Repeat as needed. Continue adjusting the recliner’s tension as needed by following the same steps. Close the footrest, tilt the chair forward, and rotate the adjustment mechanism in the proper direction. Only adjust the tension by one-quarter turns each time. It might seem tempting to make larger adjustments, but doing so will usually cause you to overcompensate and may adjust the tension too far in the other direction. Never loosen or tighten the adjustment mechanism all the way. Doing so can cause permanent damage to the tension spring. The tension spring should be unable to move on the bolt after your adjustments. If it does move around, it is too loose, and you should turn the mechanism at least one clockwise half-turn. Similarly, if the spring becomes completely compressed and too tight, turn the mechanism at least one counterclockwise half-turn to remedy the problem.
Replacing Tension Springs
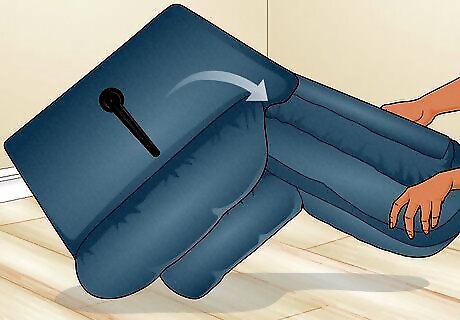
Turn your recliner over. With the footrest down and the back in an upright position, gently flip the recliner forward to reveal the frame underneath the seat of the recliner.
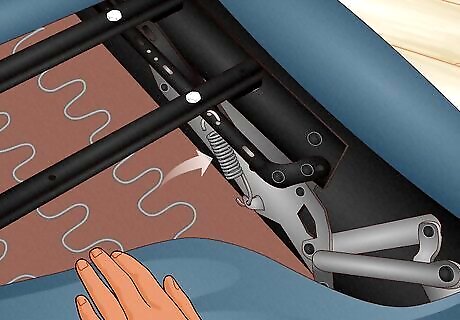
Identify the attachment points for the tension springs. Look on either side of the recliner for clips or tabs where springs attach. If the springs are still present, you just need to locate where they attach to the frame on either end of the spring.
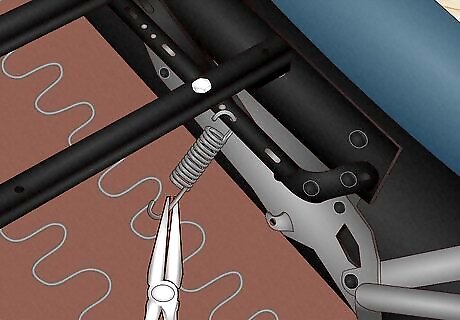
Remove the old, damaged springs with pliers. Firmly grasp one end of the spring and disconnect the spring from the frame by pulling and twisting it loose with pliers. Be careful when removing the spring as it will be under high tension. Wear safety goggles to prevent eye damage from potential flying metal.
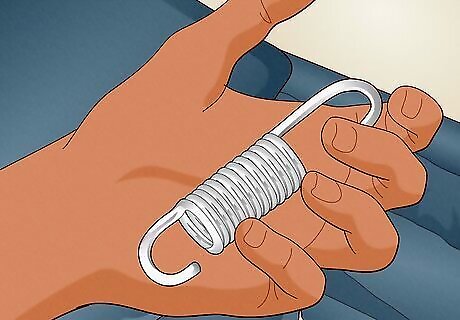
Purchase heavy duty replacement springs. The best springs to use in a recliner would be manufacturer replacement parts made for your recliner model. Contact a local recliner retailer to inquire if they provide replacement parts. Search online for recliner repair or parts dealers. If exact matches can’t be found, ask a retailer which springs would be compatible with your recliner model.
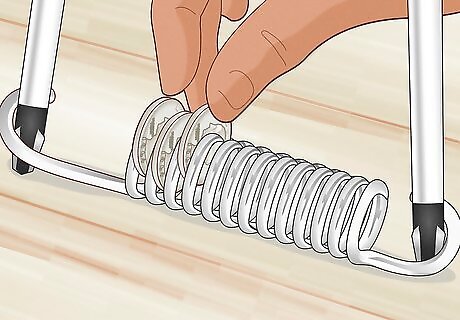
Stretch the springs. Place a screwdriver through the loop on each end of the spring. Pull the spring apart gently. Slide a nickel in between each coil of the spring to separate the coils. You can also use washers in place of nickels.
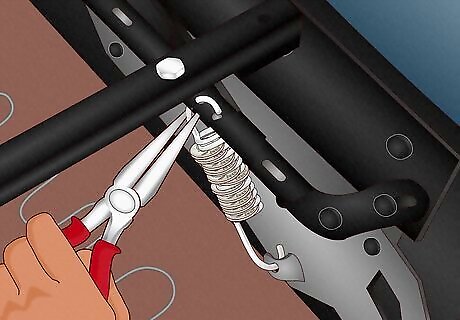
Install the springs. Connect one end of the spring to the attachment point of the frame. Using a pair of pliers, pull the spring to attach to the frame at the other end. Be extremely careful when working with springs under tension. Locking adjustable pliers are good to ensure you have a solid grip on the spring.
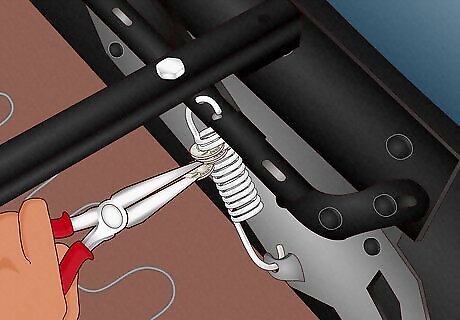
Remove the nickels separating the coils. Gently pull the nickels from between each coil with a pair of pliers. Once the nickels are removed the spring will return to its normal tension. Ensure the spring is securely attached at both ends prior to removing the nickels.
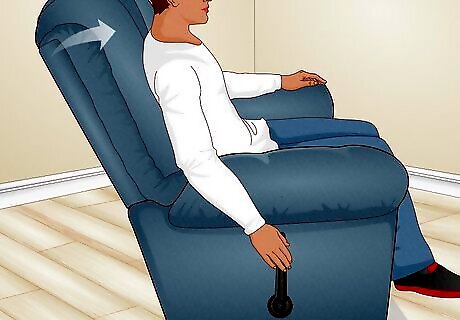
Return the recliner to the upright position to test the springs. Flip the recliner back over and sit in it. Lean against the backrest to test the tension of the springs. There should be some resistance when you lean the backrest back. If the resistance isn’t right, you may need to try another set of springs.
Changing Recliner Pitch
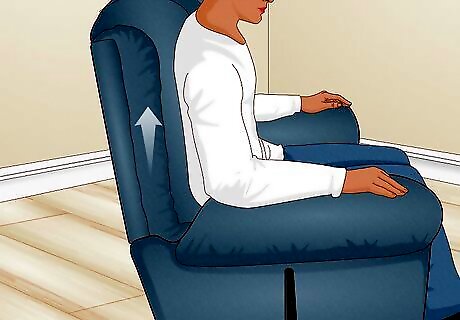
Sit in the recliner in the upright position. Place your back against the backrest without reclining. Evaluate your recliner’s pitch for optimum comfort. "Recliner pitch" refers to the height of the chair front when the recliner is in its closed, upward position. You can usually adjust the pitch by altering the appropriate bolts at the bottom of the chair. If the recliner pitch is too high, your feet won't be able to touch the floor when you sit down. Adjust the pitch downward. If the recliner pitch is too low, your knees will bend upward and above the seat when you're sitting down, which may lead to discomfort and an unhealthy posture. Consider adjusting the pitch upward.
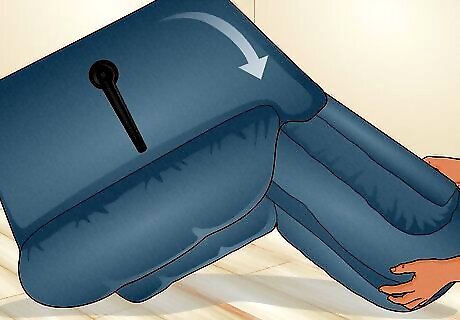
Tilt the recliner forward. With the back in an upright position and the leg rest closed, lean the entire recliner forward to expose the underside of the chair. Allow the recliner to rest on the top of its back and the tips of its armrests when you lean it forward. Doing so frees up both hands, making it easier to make the necessary adjustments to your chair.
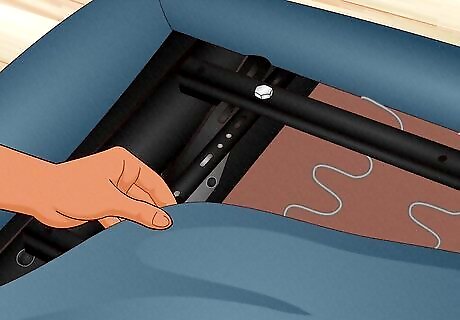
Locate the cam bolts. You'll need to adjust the bolts holding the cam, or full base mechanism, securely in place. These bolts are typically located toward the center bottom of the chair. Note that these bolts are not the same as your recliner tension bolts. Your recliner tension bolts feed into the recliner spring, but the cam bolts are located in the metal frame of your base mechanism. Typically, there should be a total of four bolts holding the frame in place. Look for two bolts at the back of the frame (one on either side of the chair) and two bolts at the front of the frame (one on either side of the chair).
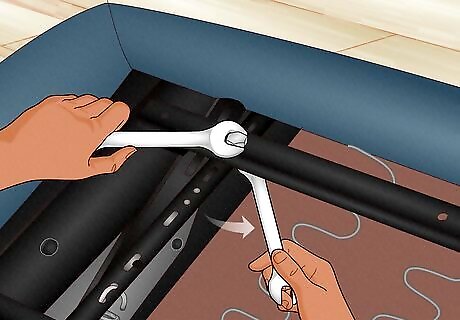
Loosen the back bolts. Use an appropriately sized wrench to loosen the cam bolts on either side of the bottom mechanism. Make the bolts loose enough for you to wiggle the chair around, but do not loosen them completely. Do not remove the bolts or allow them to drop out of the frame. Note that cordless power ratchets might be easier to use than mechanical wrenches for this task. Either option should be acceptable, though.
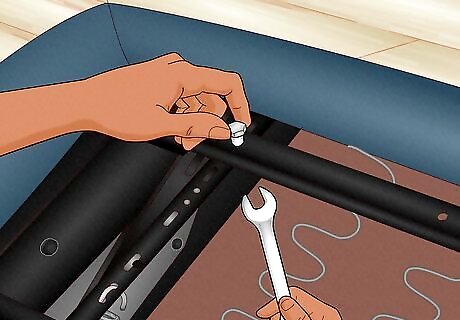
Remove the front bolts. Using a wrench or cordless power ratchet, loosen and completely remove the two cam bolts at the front of the bottom mechanism. Unlike the back bolts, the front bolts must be completely removed. Keep them nearby and in a safe place, however, since you'll be needing them again soon.
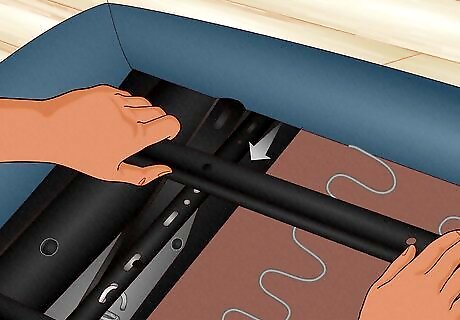
Adjust the frame. Move the front of the frame up or down to adjust its position. Doing so will also adjust the recliner pitch. Slide the frame up and back to bring the front of the chair closer to the ground, to increase its front pitch. Push the frame down and forward to draw the front of the chair further away from the ground, thereby increasing its rear pitch. Look at the slot at the front of the cam. This area is where the front cam bolts fit. For most recliners, the slot has grooves that allow for five different settings, and two sets of holes for the bolts to fit through. In total, you can usually alter the pitch to as many as nine different settings. Even small adjustments can make a big difference in the pitch of the recliner once you test it out, so it's best to work in small increments.
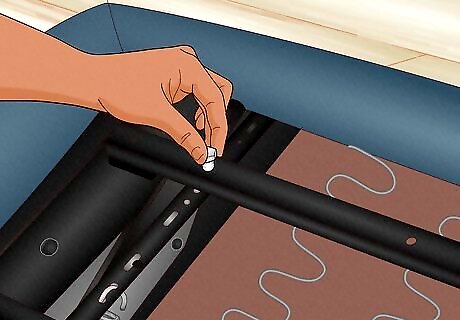
Return the front bolts. Once you've positioned the cam as desired, insert the front bolts back into the bottom frame. Loosely twist the bolts into the correct holes using your fingers. Check the positioning before you continue. Both bolts should be fitted into the same position on either side of the chair. Once the bolts are properly positioned, use a wrench or power ratchet to tighten them securely in place.
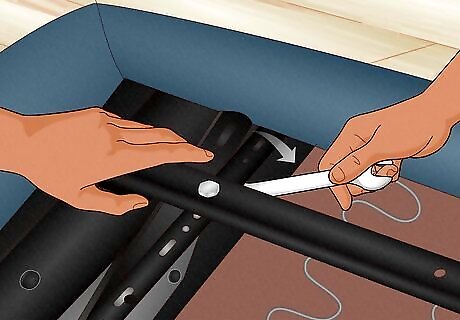
Tighten the back bolts. Using a wrench or cordless power ratchet, completely tighten the back bolts of the recliner. Try to wiggle the bottom mechanism or frame after tightening all four bolts. It should remain firm and stationary. If not, check and re-tighten the bolts as needed.
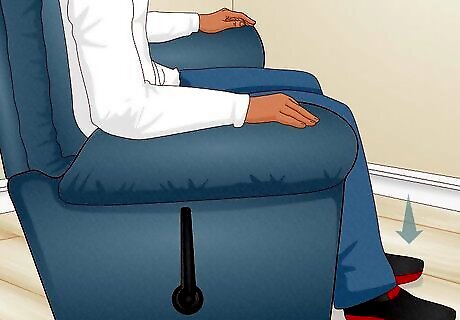
Test the pitch. Return the chair to its upright position and sit down. Your feet should be able to touch the floor and your knees should be bent at an approximate right angle. To maintain proper posture, your body should be positioned in right angles at the knees, hips, and elbows. You should also have approximately 2 to 3 inches (5 to 7.6 cm) of space in between the edge of the chair and the back of your calf. If the pitch is correct, no further adjustments are needed. You can stop here and relax in your newly adjusted chair. If the pitch is still incorrect, continue adjusting it as needed to fix the problem. Repeat the same sequence of steps to make these additional adjustments.


Comments
0 comment