
- Use a ball that fits your fingers in your preferred grip. Hold it out in front of you with both hands—it should be light enough to hold for a few seconds.
- Place your non-dominant toe on the center dot on the board. Aim for the second arrow from the gutter on your dominant side and swing the ball.
- If you miss, adjust your starting position in the direction of your miss to keep the ball dead on next time.
Selecting equipment

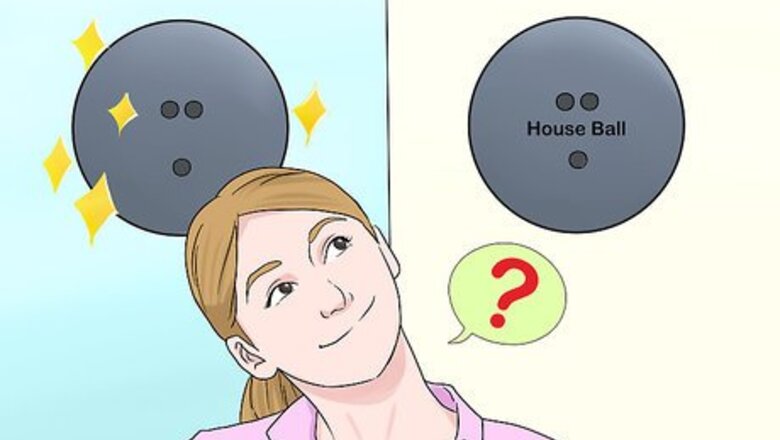
Determine whether you will be using a "house ball" or will be buying your own. Most people start with a "house ball" and "house shoes" as this is the cheapest option. There are normally many "house balls" to choose from and these are supplied, free-of-charge, by the bowling alley. Shoes may be rented for one price which covers your entire bowling session. The other option is get your own ball and have it custom-fitted to your hand for your individual swing and release. The fitting and drilling can often be accomplished on the spot (if the resident pro is in the bowling center at the time). The pro will be able to advise you on the best ball composition and weight for your skill level, budget, bowling style, and aspirations. You might be able to find a bargain ball online or in a local store, but you will likely have trouble sorting all the options and should expect to pay the pro to fit you and drill the ball. It is not recommended to get your ball fitted and drilled at a box store unless they specialize in sporting equipment, and, in particular, bowling supplies. If you buy from the pro shop, though, you will have free advice and free drilling.

Decide on your grip. If you purchase your ball, you will have two basic choices: The conventional grip where the middle and ring finger go into the ball up to the second joint of each finger. This is the only grip option if you are using a "house ball." In this option, a custom ball is drilled to accommodate the natural slant of your fingers in relation to each other and to the radius of the ball. Don't worry about this, though—the pro will take care of all the measurements and should make adjustments over your next few bowling sessions. There should be no charge for the adjustments, but ask just to be sure. The fingertip grip in which the middle and ring finger go into the ball only up to the first joint. The fingertip grip affords more leverage at release, allowing you to put more "juice" on the shot—that is, impart more revolutions on the ball per unit time. Normally, with a fingertip grip, there will be rubberized inserts in each finger hole. These afford a surer grip. Again, the pro will set you up and should make adjustments gratis.

Get your ball fitted and drilled. If you are purchasing your ball, the pro will take care of measuring your hand. Have the pro watch a couple of your shots. That way the fit will account for your natural delivery style. If you have not bowled before, you might want to get a bit of instruction before showing the pro your shot. If you ask, the pro will give you a quick run-down on the basics and get you started off on the right foot. In the meantime, finish reading this article to get a basic idea of the fundamental bowling swing which will get you strike after strike after strike. Undoubtedly the pro will offer you the opportunity to purchase a bag and recommended accessories. You can purchase these on the spot or wait and see what turns up in the local thrift shops. Often bowling equipment shows up in good shape and you can pick up a ball for the kids and a bag for yourself. Really all you need at this point is a bowling ball sling, also known as a buffer bag.

Pick your bowling shoes. It is mandatory that you use shoes specially designed for bowling. These have medium-soft, rubber heels which stop you smoothly, but quickly at the release point. The soles are of leather and are designed to slide smoothly across the approach boards as you prepare to release your shot. Rental shoes are available at the desk and are normally paid for when you get your lane assignment. If you plan to join a weekly bowling league, house shoes are often included with the weekly fees. Ask about this. If your center does not include free shoes for leagues, you will save money, overall, by purchasing your own shoes right away. They will be available in the pro shop or you can shop for bargains around town and online. A word of caution about the shoes: Take care not to step in any liquid or spills. Bowling shoes are designed to slide smoothly right until the release. If you step in water, for example, your slide will stop soon as it starts, which is dangerous and may cause injury.

Choose a house ball. Balls come in various weights which will likely be stamped into the balls. Alternatively, the balls will be color-coded. For the color-coded option, the key should be posted conspicuously in the bowling center. If not, ask at the desk. Determine the proper starting weight. Pick a ball which seems fairly light. Holding the ball cradled in both hands, extend your arms fully in front of your chest. If you can hold the ball for only a couple of seconds without straining, you have found a good starting weight. If the ball wants to drop as soon as you push it away from your body, the ball is too heavy—try something a bit lighter. If you can hold the ball at arm's length for quite some time, the ball is way too light. You want the heaviest ball that you can reasonably control. If it is too light, you will be able to jerk it this way and that during the swing and you will have inconsistent results. Select a ball with the proper span. Support the ball with your non-dominant hand underneath. Insert the thumb of your bowling hand (your dominant hand) into the largest diameter hole and drape your middle finger and ring finger over the two remaining holes. Look for something where the crease of the second joint of both fingers is just over the edge of each hole. If the finger holes are too far away and the edge of the hole falls between your first and second joint, you will not be able to seat your fingers into the holes all the way—the span is too great. On the other hand, if the span is too small, the palm of your hand will not rest on the ball surface and you will, necessarily, adopt a pincher grip. This is not a power grip and will result in a weak shot and relatively few strikes. Take the time to find at least one ball with a proper, comfortable span for your hand. If you are having a truly difficult time finding a ball of your targeted weight that has the proper span, there is a strong possibility that you have picked a weight that is too heavy or light. The heavier balls will normally have a larger span, so you will need to look at balls that are heavier or lighter according to your needs. If you are having trouble, ask the bowling center staff for assistance. They will help you arrive at a reasonable compromise for weight and span. Select the best finger hole size. If you have identified several balls of the proper starting weight and span, look for the one with the snuggest, most comfortable finger holes. Typically, the finger holes are drilled over-large. If you are finding that your fingers do not fit in the balls, you have chosen a weight that is too light, perhaps a kid's weight with proportionately smaller finger holes. You want holes which are fairly snug, but release your fingers easily.
Choosing the proper starting position
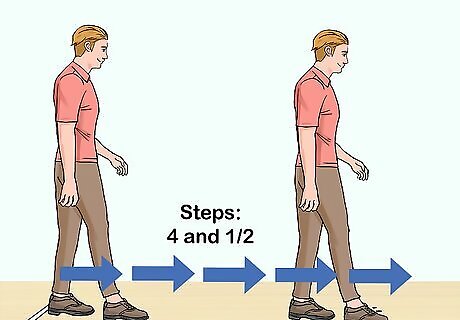
Determine your starting distance from the foul line. Stand with your back to the pins and your heels at the foul line. Take four and a half normal steps toward the scoring area and note the location where your toe-tip ends. Generally this will be between the five round dots and the start of the approach. If you find that your normal steps take you off of the alley, your will have to start with your heels hanging a bit off the raised approach area and start with smaller steps, building your pace and the length of your steps as you get closer to the foul line. In this way you will avoid going over the line which stretches from gutter to gutter (at the start of the gutter). If you go over the foul line or any part of your body touches the lane past this line, your pin fall is not counted and the pins are reset. However, you still lose your shot (two per frame, maximum, but possibly three shots in the tenth frame only.)
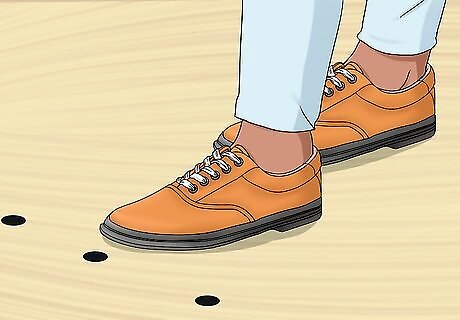
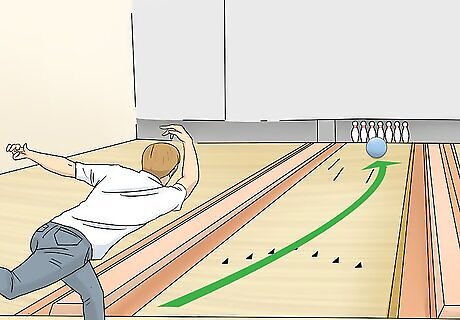
Start with the toe of your on the board with the center dot. Before you start rolling strikes in every frame, you'll need to figure out the best possible position from which to start your approach. Your non-dominant foot will be whichever is opposite your bowling hand. If you bowl right, this will be your left foot. Put your left foot forward, aligned just behind the center dot. Eventually, you can adjust your starting alignment based on your natural tendencies, but to start out and gauge your aim, try starting in the center.

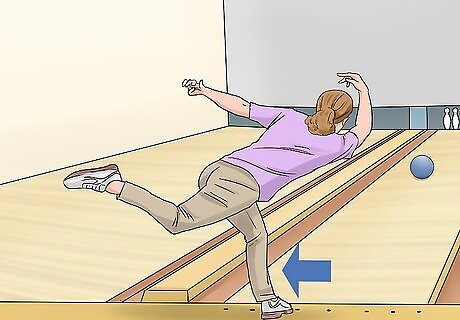
Aim for the second arrow from the gutter on your dominant side. About fifteen feet from the foul line, you'll see the directional arrows that help you aim. The center of the lane is generally the most oily part. Keeping the ball somewhat to the side is a good way to maximize your traction on the lane.

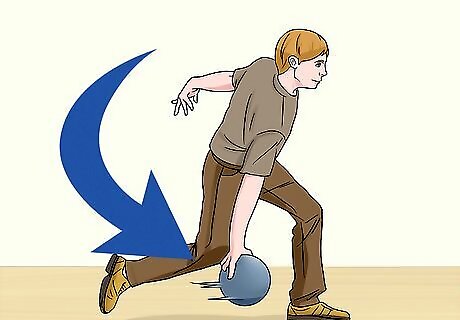
Take several practice rolls to see where the ball goes. Bowl naturally, keeping your shoulders parallel with the foul line and swinging your arm forward as straight as possible. Follow through when you release. Your hand should extend as if you were going to shake someone's hand. Pay careful attention to where the ball lands. The "pocket" is the area immediately to one or the other side of the lead pin, and is the area you want to hit to consistently roll strikes. Did you hit the pocket? If so, you've found the correct starting position for your swing. You'll want to align your non-dominant foot with the center dot.
Move in the direction of your miss. If you missed right, start your next throw a dot to the right of the center point. If you missed left, do the opposite. While this may seem counter-intuitive, missing to one side means that your ball is hooking too early or too late. Keep the ball dead on by moving toward your miss. After several practice throws you should be able to find your optimum starting position from which to bowl. From there, you can tweak your throw to improve your chances of hitting a strike every time.
Improving Your Accuracy
Practice your curve. Pro bowlers all bowl with some "English," or curvature on the ball. Because the pocket you're aiming for is somewhat on an angle, the best way to hit it is to curve the ball in toward the pocket from the edge of the lane. This is why you aim for an arrow to the side of the center. The best way to ensure English on your throw is to maintain good "handshake" position on your follow-through. After you release the ball, your hand should be up in the air as if you were going to shake the hand of the pin you're aiming toward.

Find the right bowling ball. Using a ball that is too heavy or too light can drastically affect your accuracy. Experiment with balls that are slightly heavier than what feels normal and balls that are slightly lighter than you would normally use. Does your accuracy improve in either direction?
Find the right speed. Firing the ball from the rocket launcher that is your bowling arm may seem like a good idea at first, but it's not necessarily the most accurate way to throw. Extra force will often leave pins on the floor that softer and more accurate throws will pick up. In general, though, you should throw the ball with as much force as you can throw accurately. Some modern alleys track the speed of your ball. Try to reduce the speed of your shot in small increments if you are blowing the pins off the lane. Slower, precise pocket hits will keep the pins on the lane and allow them to mix, improving your chance of clearing the deck and producing a strike.

Adjust your grip on the bowling ball. Gripping too tightly, particularly with the thumb, can hook the ball in an inaccurate direction. Insert your fingers into the ball first. If you've got an appropriately fitted bowling ball, they should go in as far as your big knuckle. Use your non-bowling hand to steady the ball on your approach. You'll typically want the thumb to release the ball a split second before the fingers. Make sure your fingernails are neat and trimmed to avoid catching on the fingerholes and throwing wonky balls.


Comments
0 comment