
Cable (Genie Interface)
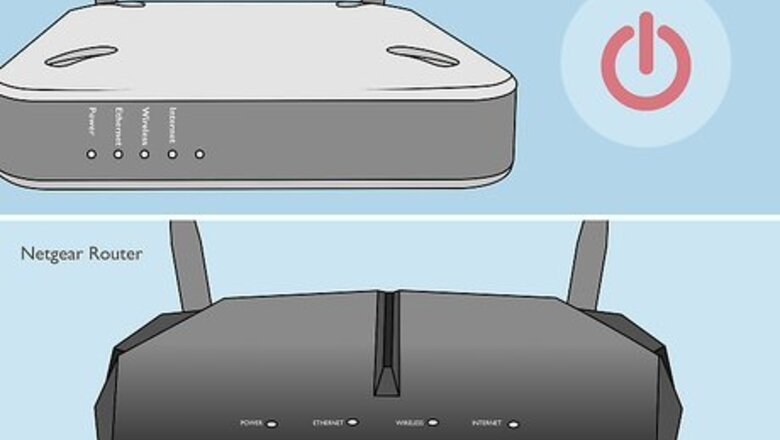
Power off your modem and Netgear router.
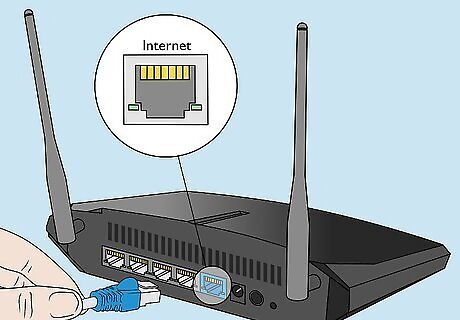
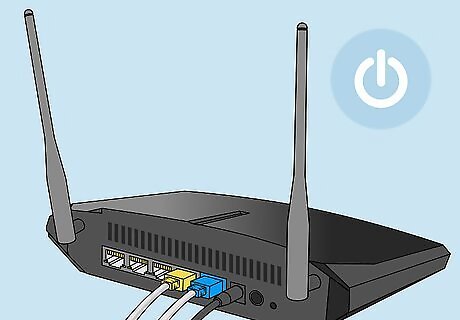
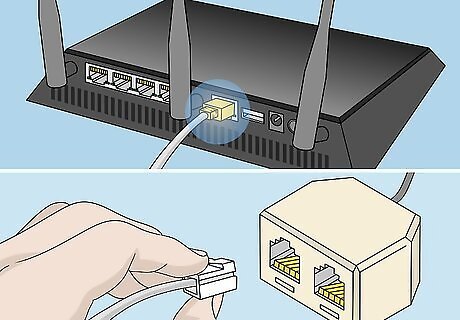
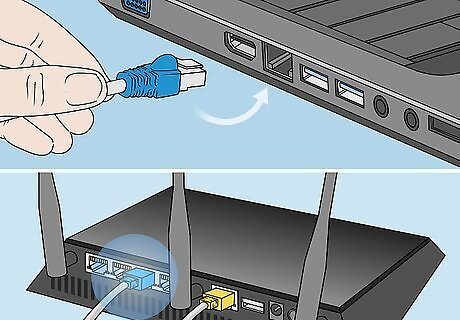
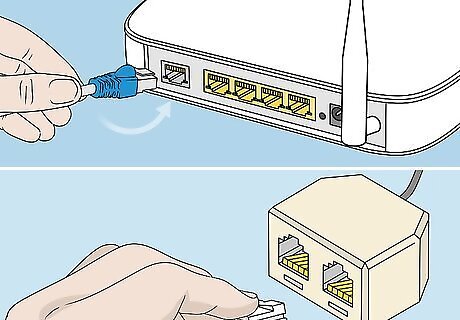
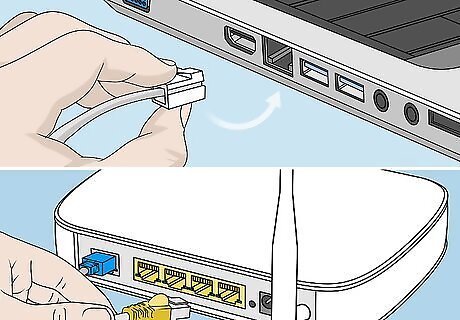
Connect the router to the modem. Use an ethernet cable to connect your modem to the port labeled “Internet” on your Netgear router.
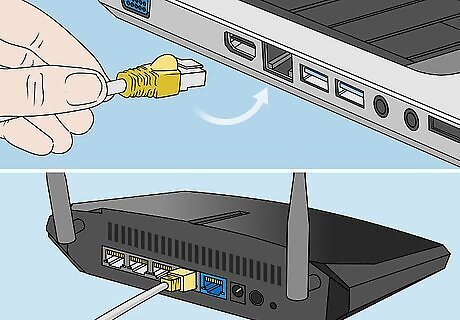
Connect the router to your computer. Use a second ethernet cable to connect your computer to any port labeled “LAN” on your Netgear router.
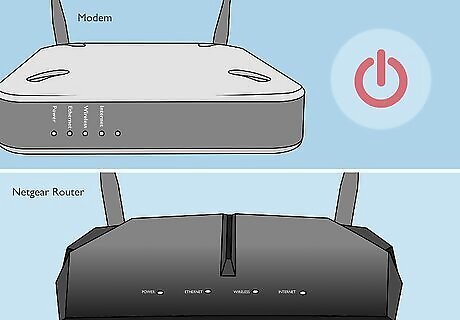
Turn on your modem. Power on your modem and wait for all the lights to remain stable.
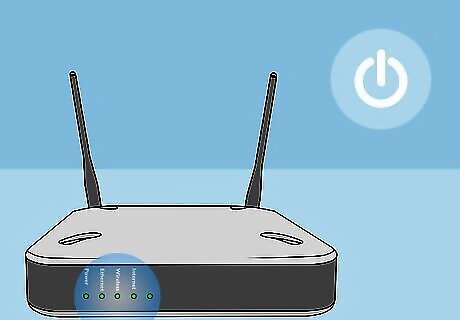
Turn on your router. Power on your Netgear router and wait for the “Power” light to remain solid green.

Go to the router's admin interface. Launch an Internet browser on your computer and type one of the following URLs into the address bar: www.routerlogin.com, www.routerlogin.net, or http://192.168.1.1. The correct URL will bring up the router login dialog box. Examine the label on your Netgear router to determine the correct URL if none of these URLs bring up the router login dialog box.

Log in to your router interface using “admin” for the username and “password” for the password. These are the default login credentials for Netgear routers. The Netgear Genie setup wizard will display on-screen. If “Netgear Smart Wizard” displays on-screen in place of “Netgear Genie,” skip to Method Two in this article to finish setting up your router using the Smart Wizard interface. The Smart Wizard interface is only available on older models of Netgear routers.
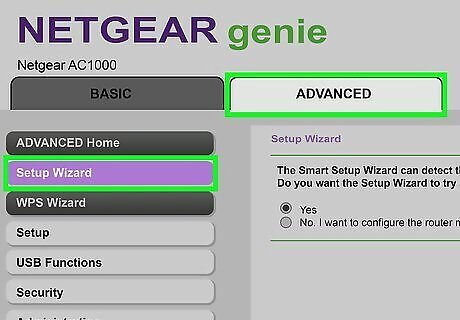
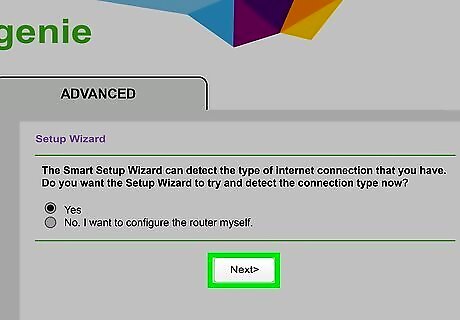
Click on the {{MacButton|Advanced tab and select Setup Wizard.
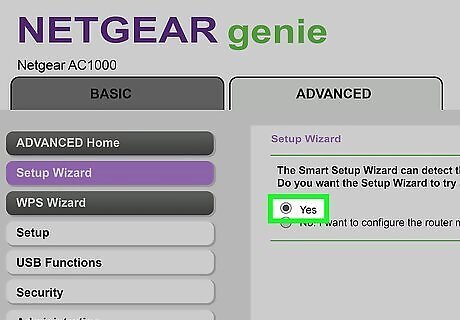
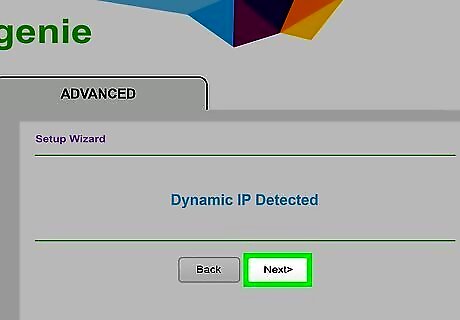
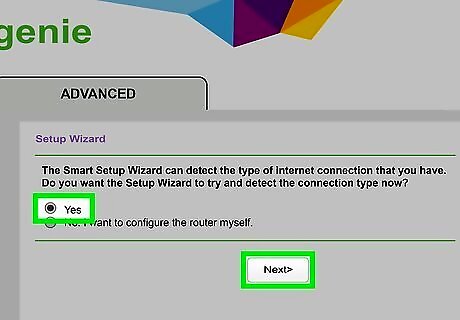
Select Yes and click Next. The setup wizard will take a few minutes to detect your Internet connection and display the “Congratulations” page when complete.

Click on Take me to the Internet to verify your Internet connection is working. Your Netgear router will now be configured for use with your ISP.
Cable (Smart Wizard Interface)
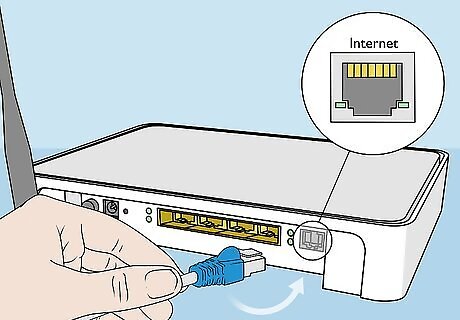
Connect the router to the modem. Use an ethernet cable to connect your modem to the port labeled “Internet” on your Netgear router.
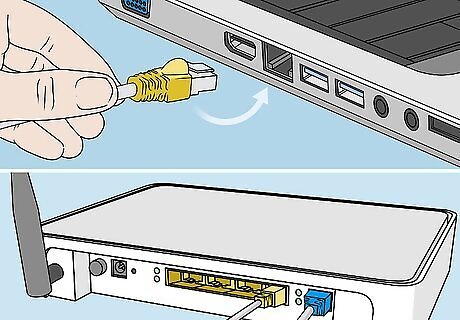
Connect the router to your computer. Use a second ethernet cable to connect your computer to any port labeled “LAN” on your Netgear router.
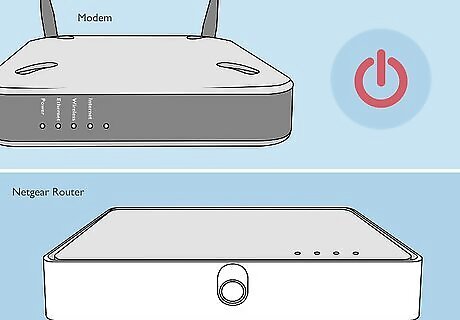
Turn off all of your equipment. Power off your computer, modem, and Netgear router, then power all three devices back on.

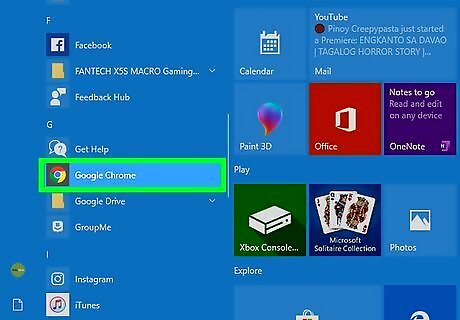
Open a web browser. Allow a few minutes for all devices to power fully back on, then launch any Internet browser on your computer.
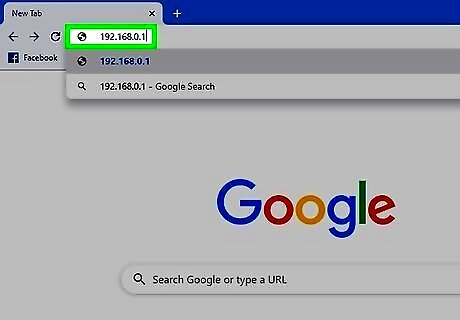
Go to your router's admin panel. Type one of the following URLs into the address bar of your browser, then press “Enter:”http://192.168.0.1 or http://192.168.1.1. The correct URL will bring up the router login dialog box.

Sign in. Log in to the router interface using “admin” for the username and “password” for the password. These are the default login credentials for Netgear routers. You will now be logged into your Netgear router.

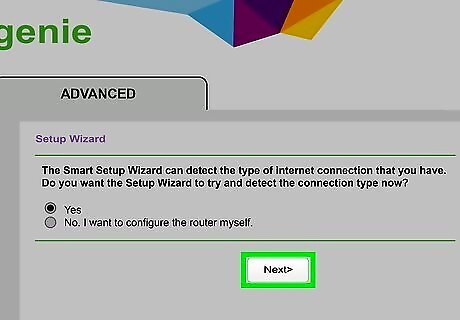
Click Setup Wizard and then click Yes. Select “Yes” when asked if you want Netgear to detect your Internet connection.
Click on Next.” Netgear will take a few minutes to detect your Internet connection.
Click on Next again when your Internet type is detected. Your Netgear router will save your settings and be configured for use with your ISP.
DSL (Genie Interface)
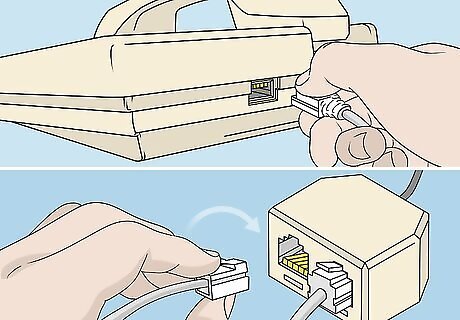
Connect the Netgear router to your telephone jack using your DSL microfilter. The DSL microfilter is a small box that connects both your router and telephone to the telephone jack.
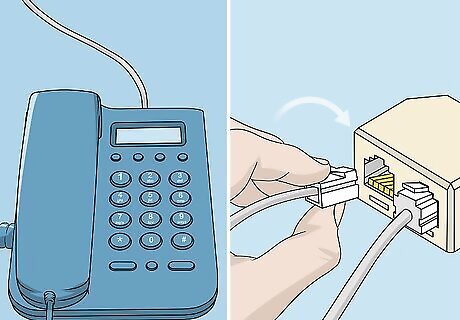
Connect your telephone to the DSL microfilter using a small telephone wire.
Connect the router to your computer. Use an ethernet cable to connect your computer to any port labeled “LAN” on your Netgear router.
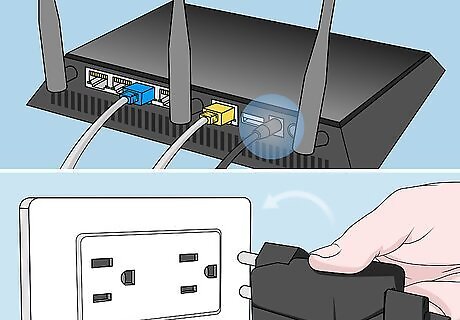
Power on the router. Connect the Netgear router to its power supply unit, then power on the router. The router will take approximately one minute to fully boot up.

Launch any Internet browser on your computer. The Netgear Genie setup wizard will automatically display on-screen. Type one of the following URLs into the address bar of your browser if the setup wizard fails to automatically display on-screen: http://192.168.0.1 or http://www.routerlogin.net. These URLs will take you to the Netgear Genie setup wizard.
Select Yes and then Next. '
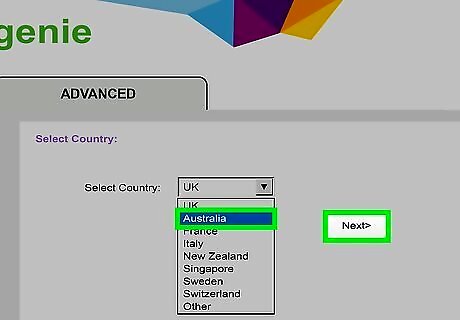
Select your country from the dropdown menu, then click on “Next.” Netgear will take a moment to detect your Internet connection. When complete, the router login screen will appear.
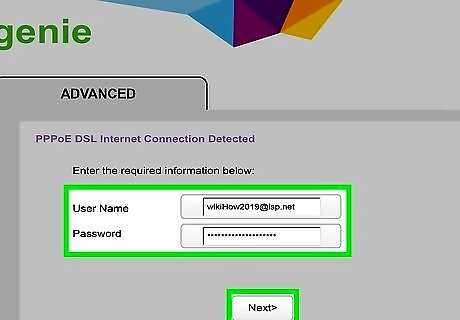
Type the username and password supplied by your ISP into the fields provided, then click on “Next.” This allows you to access your ISP’s network. Contact your ISP directly if you need help obtaining the username and password for your network.
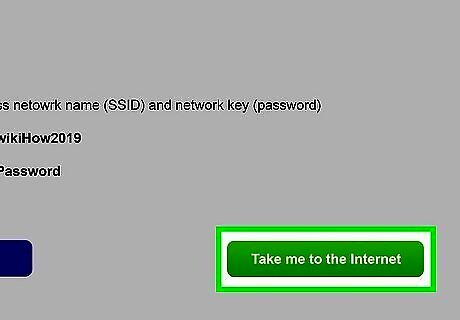
Click on Take me to the Internet to verify your Internet connection is working. Your Netgear router will now be configured for use with your ISP.
DSL (Smart Wizard Interface)
Connect the Netgear router to your telephone jack using your DSL microfilter. The DSL microfilter is a small box that connects both your router and telephone to the telephone jack.
Connect your phone to the DSL filter. Connect your telephone to the DSL microfilter using a small telephone wire.
Connect the router to your computer. Use an ethernet cable to connect your computer to any port labeled “LAN” on your Netgear router.
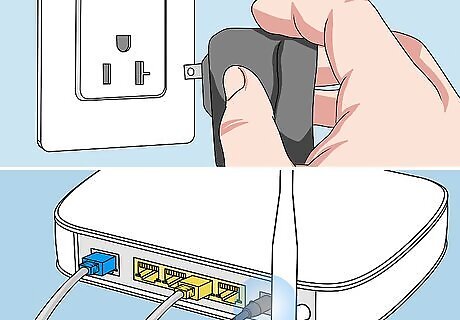
Turn on the router. Connect the Netgear router to its power supply unit then power on the router. The router will take approximately one minute to fully boot up.
Go to the router's admin interface. Launch any Internet browser on your computer and type one of the following URLs into the address bar: http://192.168.0.1 or http://192.168.1.1. These URLs will take you to the router login screen.
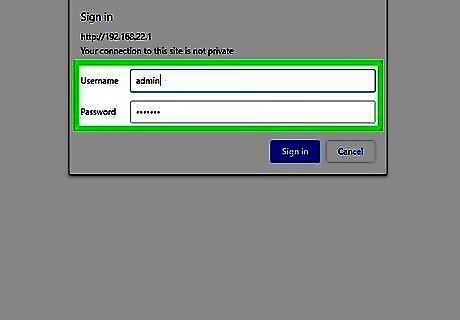
Type “admin” into the username field, and “password” into the password field. These are the default login credentials for your Netgear router.

Click on Setup Wizard. Then, select Yes when asked if you want Netgear to detect your Internet connection.
Click on Next. Netgear will take a few minutes to detect your Internet connection, and display the appropriate configuration page based on your network type.
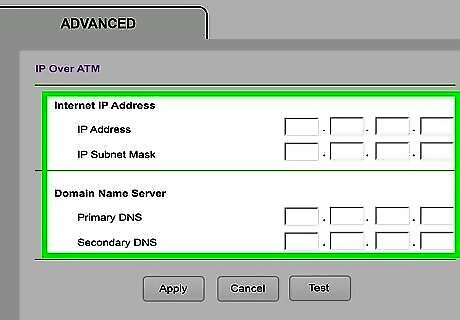
Apply the detected network settings so Netgear can complete the configuration process. The steps will vary depending on your type of Internet connection. Enter the login and password supplied by your ISP if using a PPPoE or PPPoA connection type. Click on “Apply” if using a dynamic IP address for connection type. Enter your IP address, IP subnet mask, primary DNS, and secondary DNS if using an IP over ATM or fixed IP connection type. This information must be supplied to you by your ISP.
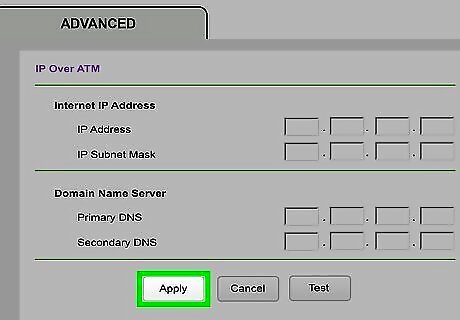
Click on Apply after entering the necessary credentials based on your Internet connection type. Your Netgear router will now be configured for use with your ISP.
Troubleshooting
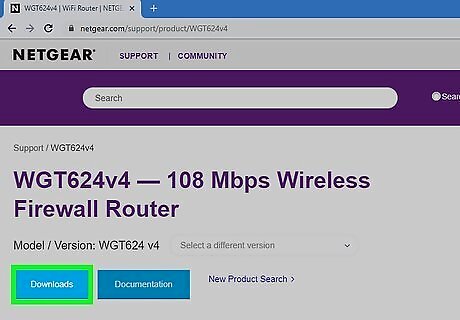
Download the latest firmware from http://support.netgear.com. In some cases, outdated firmware can prevent you from being able to establish an Internet connection.
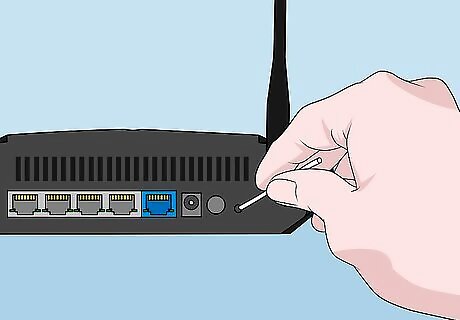
Reset your Netgear router if you can't connect to the internet. A reset will restore your router’s default factory settings and can help resolve software problems associated with your router.
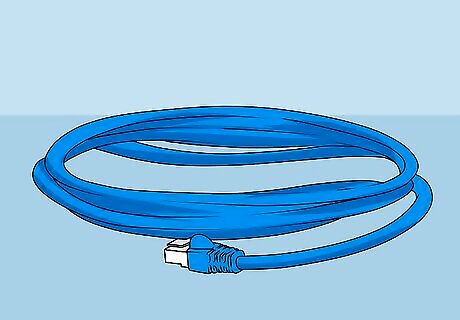
Try different ethernet cables or phone wires. Faulty cables and hardware can prevent you from being able to effectively set up your router.

Contact your ISP for further assistance. If you can't sign in to your Netgear router, your ISP can help you log in.


Comments
0 comment