
Daisy Chain Your Monitors With DisplayPort

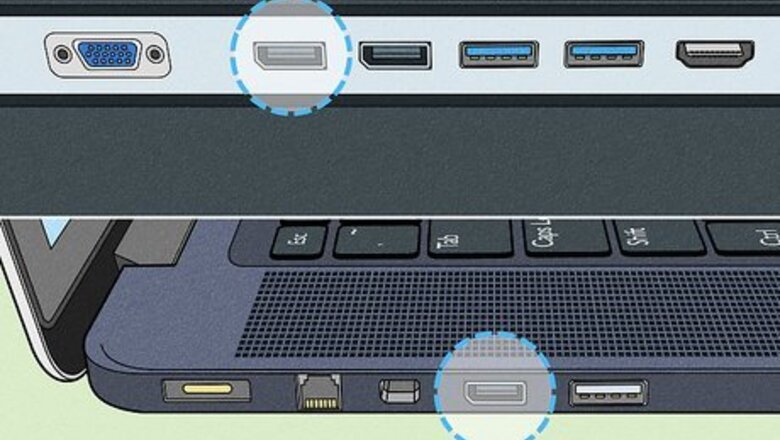
Check the hardware on your monitors and laptop. To use this method, your monitors must have DisplayPort v1.2 or higher In and Out ports. Additionally, your laptop must have either a DisplayPort Out port or a USB-C port that supports DisplayPort. If your monitors were purchased after 2010 and each have a DisplayPort In and Out port, you should be able to daisy chain them. If your laptop has a USB-C port, confirm it supports DisplayPort, then make sure you have a USB-C to DisplayPort cable.

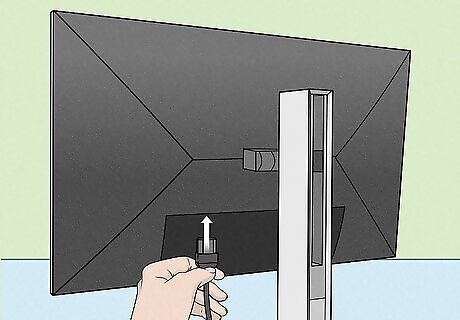
Provide power to your monitors. Plug in the power cable for each of your monitors.
Connect the two monitors with a DisplayPort cable. When connecting your monitors, be sure to run the DisplayPort cable into the DisplayPort Out of one monitor and the DisplayPort In of the other.
Connect your laptop to the appropriate monitor. Depending on your laptop’s ports, use either a DisplayPort cable or a USB-C to DisplayPort cable. You should connect your laptop to the DisplayPort In of the monitor that already has a cable plugged into the DisplayPort Out port.
Turn your laptop and monitors on. Even if your monitors are not currently displaying your laptop’s screen, their screens should still light up as an indicator that they are turned on.

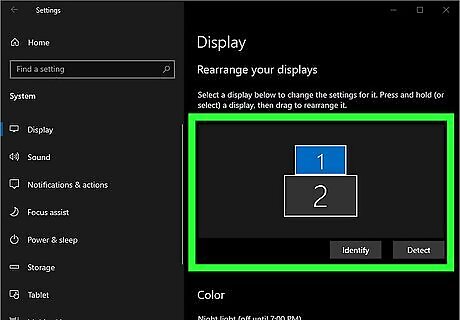
Configure your displays. To organize your workspace so it works best for you, adjust your display settings. You have now successfully connected your laptop to both of your external monitors!
Daisy Chain Your Monitors With Thunderbolt or USB-C

Verify that your monitors and laptop are compatible. To daisy chain with Thunderbolt or USB-C cables, one of your monitors must have two Thunderbolt ports, while your laptop and other monitor only need one port. Thunderbolt and USB-C ports use the same connectors, so if your laptop has a USB-C port that can output video, that will work too!
Plug the power cords into your monitors. Before the monitors can be used, they must be connected to power with the provided cables.
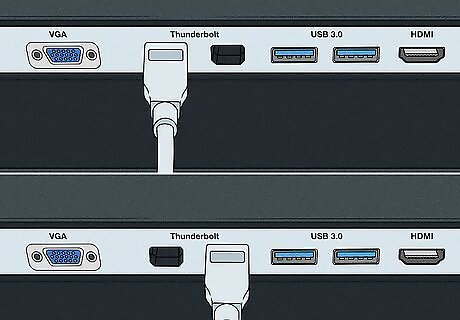
Connect the two monitors with a Thunderbolt or USB-C cable. All Thunderbolt ports have the capacity to both input and output video, so if your monitor has multiple ports, it does not matter which port you use. If your monitor instead has USB-C ports, make sure you are using a port that supports video input and output. You can try to verify this by looking up the specifications of your monitor and checking to see if the ports support “Alt Mode”.
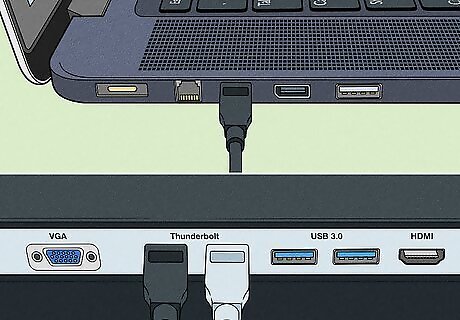
Connect your laptop to either monitor with another Thunderbolt or USB-C cable. If one of your monitors only has one port, connect your laptop to the other monitor.

Turn your laptop and monitors on. Even if your monitors are not currently displaying your laptop’s screen, their screens should still light up as an indicator that they are turned on.
Set your display preferences. To organize your workspace so it works best for you, adjust your display settings. You have now successfully set up your laptop and two monitors with Thunderbolt cables!
Use a Docking Station

Find a docking station that is compatible with your laptop and monitors. Depending on your laptop, your dock will need to use different connectors. For example, if your laptop has USB-C ports, your dock should connect via USB-C. Additionally, make sure the video output ports are compatible with your monitors, or that you have the appropriate adapters. Some laptops connect to docking stations by sitting on top of the station, then being locked into place, so there will be no connecting cable.
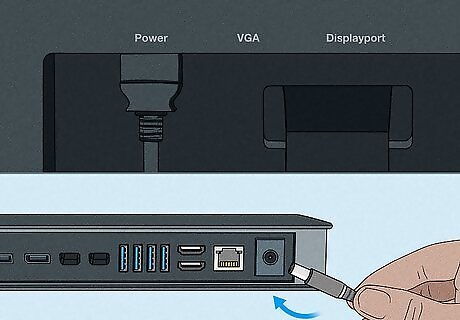
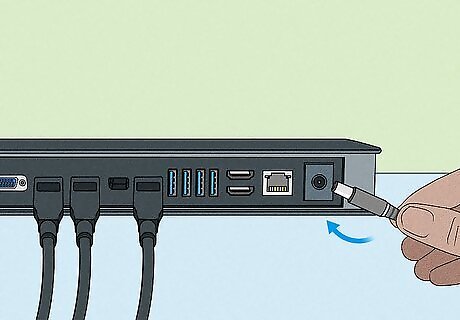
Plug in the docking station and monitors. Be sure your monitors’ power cords are secure and your docking station is receiving power; otherwise, your setup likely will not work.

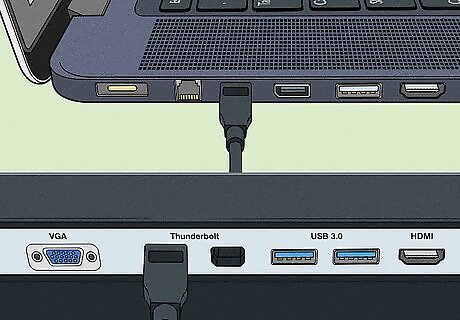
Connect the docking station to your laptop. Since the connection method will vary depending on your laptop and docking station, follow the instructions included with your dock if you are not confident you know how to connect it. The two most common connection methods will be setting your laptop in a specific position on top of the dock or connecting the dock with a built-in cable.

Connect each monitor to the docking station. Using the appropriate cables, plug one end into the “In” port on each monitor and the other into the “Out” port on your dock.
Plug your laptop charger into the docking station (optional). Some docking stations can also charge your laptop, so consider plugging your charger directly into the dock to maximize your cable management.
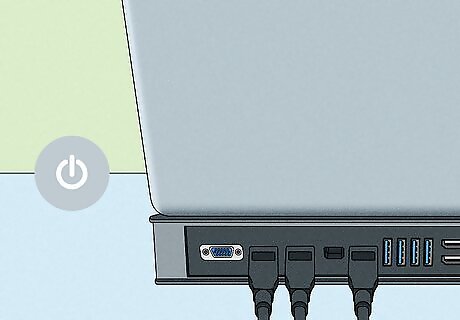
Turn on your laptop, monitors, and dock. If your dock does not have power, your setup will not work, so do not forget to turn the dock on!

Configure your displays. To organize your workspace so it works best for you, adjust your display settings. You should now be able to use your new setup!
Connect Your Laptop Using Multiple Ports

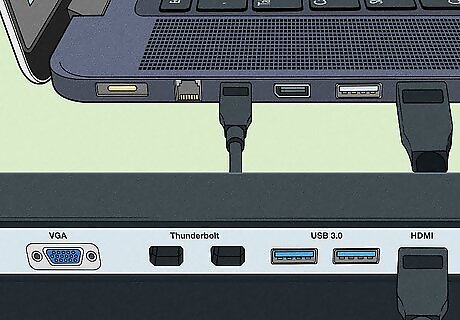
Check the ports on your laptop and monitors. If your laptop has multiple ports and you do not want to or are unable to daisy chain, you can simply connect a port to each monitor. Make sure that the ports are compatible with those on your monitor. If they are not compatible, you will need to purchase adapters, such as USB-C to HDMI, or cables with different connectors, such as an HDMI to DisplayPort cable.
Provide power to your monitors. Your monitors must be connected to power before use.
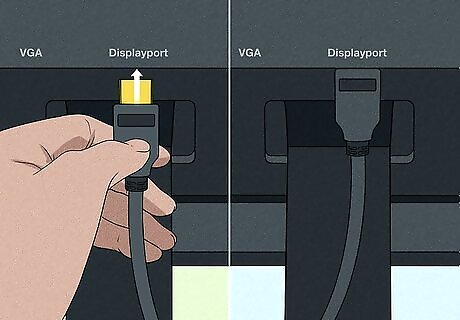
Connect your laptop to one of the monitors. In most cases, you will need either an HDMI or DisplayPort cable to connect your computer to the external display. Depending on the age of your computer or monitor, you may instead need a VGA cable.
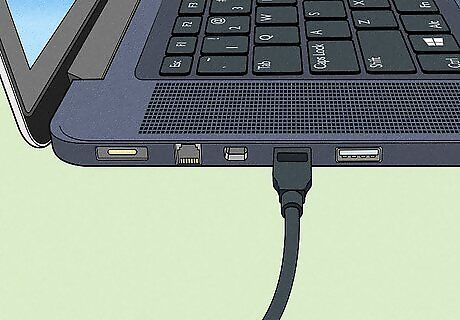
Connect your laptop to the second monitor. Be sure that the cables are snug in their ports!

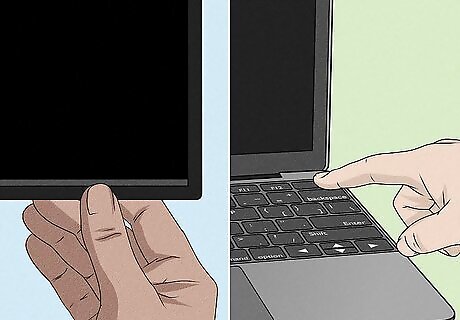
Turn your laptop and monitors on. Even if your monitors are not currently displaying your laptop’s screen, their screens should still light up as an indicator that they are turned on.

Customize your display settings. Adjusting your display settings will let you change how many monitors you are using, whether they are mirroring your laptop or acting as separate screens, and more. Once your preferences have been changed, you are now ready to start working on your multi-monitor setup!
Use an HDMI or DisplayPort Splitter
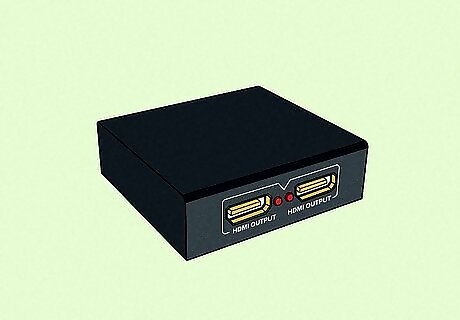
Determine what type of splitter you need. If your laptop has an HDMI output, you need an HDMI splitter. If your laptop has a DisplayPort output, go with a DisplayPort splitter. Double-check that you have enough cables to get everything connected! You will need two HDMI or DisplayPort cables.
Plug the power cables into your monitors. Be sure the power cables are securely connected before proceeding.
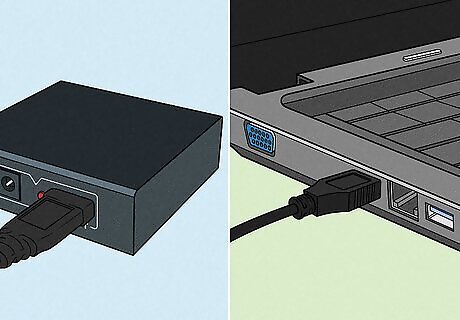
Plug the splitter into your laptop. The connector for the splitter should now be in the HDMI or DisplayPort output of your laptop, while the HDMI or DisplayPort outputs of the splitter itself are unoccupied.
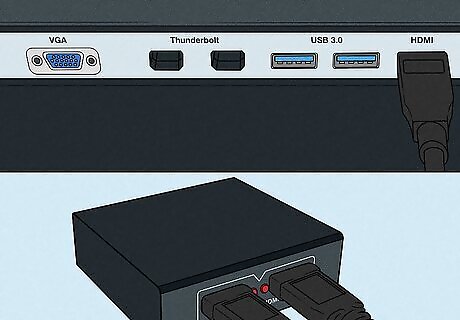
Connect each monitor to the splitter. Run either an HDMI or DisplayPort cable into the “Out” ports of the splitter, then connect the compatible ends into the “In” ports on your monitors.

Turn on your laptop and monitors. Even if your monitors are not currently displaying your laptop’s screen, their screens should still light up as an indicator that they are turned on.

Adjust your display settings. Set up your displays so they work best for you. Your digital workspace is now ready! Both Mac and PC have an option to allow you to view the number of each monitor. That way, you can then see the numbers on the little picture inside the screen and you can also see them on the physical monitors. You can then drag the monitors around with your mouse and put them in exactly the orientation they are in your screen. For instance, if one is two inches higher than the other ones, put it two inches higher on the screen so things work smoothly between them.


Comments
0 comment