
X
Expert Source
Jeremy YamaguchiLawn Care Specialist
Expert Interview. 21 January 2019.
If you prefer the DIY approach, though, you can also use a commercial testing kit, or even perform your own simple pH test using common household items like vinegar, baking soda, and red cabbage.
Using a Commercial Soil Testing Kit
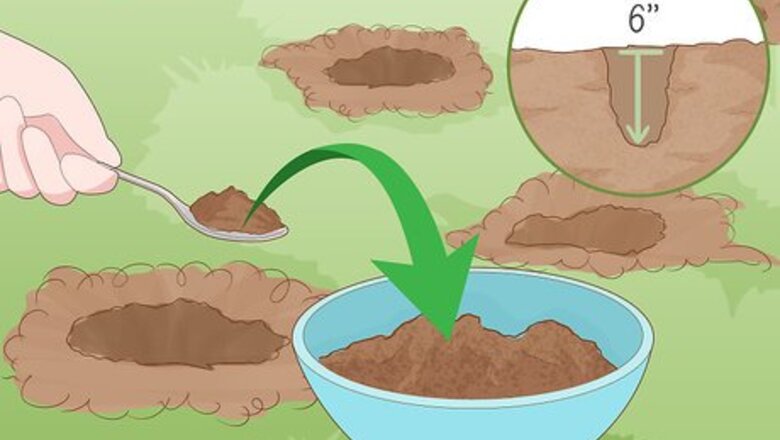
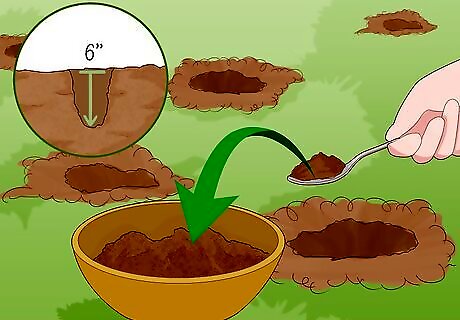
Collect a soil sample from different parts of your yard or garden. Dig 5 separate holes, each roughly 6–8 inches (15–20 cm) deep, within the same concentrated area. Take 1-2 scoops of loose soil from one of the sides of each hole and place them inside a large, open container. Make sure you use a clean stainless steel trowel or similar implement to dig for your sample. Otherwise, you may accidentally contaminate the soil and throw off your results. Compiling an aggregated sample from multiple areas will give you a better sense of the overall soil composition in your garden. If your soil smells like rotten eggs or sewage right off the bat, there’s a good chance that it’s overly acidic.
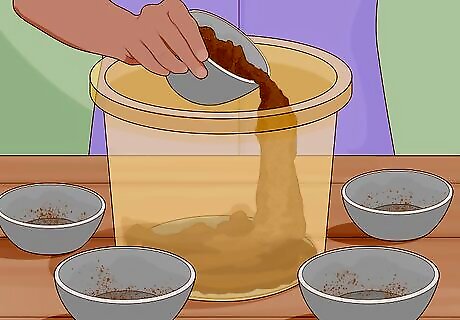
Combine your samples in a single large container. A plastic, paper, or stainless steel container will work best, as these materials are guaranteed not to leech any substances into the soil that may skew your reading. Stir the soil thoroughly using the same tool you used to do your digging. For the same reason mentioned above, it’s best to avoid touching the soil with your bare hands as much as possible.
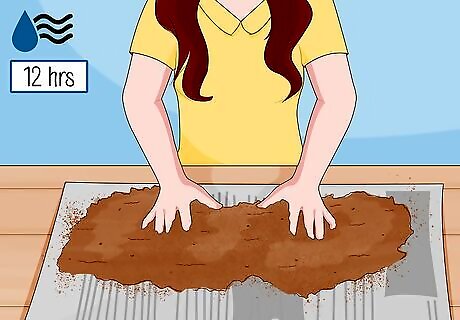
Place your soil sample on a sheet of newsprint and allow it to dry for 12 hours. Spread out the soil so that it forms a thin, even layer—this will help it dry out faster. Leave the sample in a warm, well-lit, enclosed area until most of the naturally-occurring moisture has had time to evaporate out of it. If you don’t have a newspaper handy, you can also use another type of clean, absorbent surface, such as a layer of folded paper towels. Resist the temptation to speed up the drying process by placing your soil sample in the oven or microwave. High heat can also impact its general makeup.

Mix 1 cup (150 g) of soil with about 5 cups (1,200 mL) of distilled water. Transfer the soil to a large measuring cup, then pour the water in on top. Again, use a clean plastic or stainless steel utensil to stir the soil into the water. Allow the soil to “steep” until it begins to settle at the bottom of the container. Don’t begin testing your soil until it’s had time to separate from the water. In order to ensure accurate, easily-comprehensible results, it’s important that your sample water be as clear as possible.
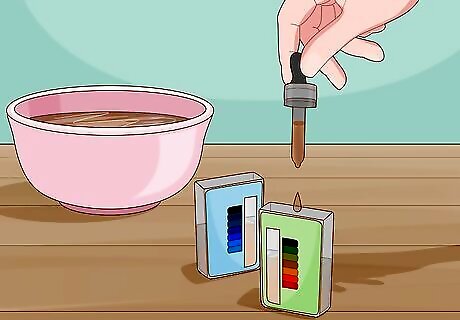
Fill both chambers of the test containers included with your testing kit. Many testing kits come packaged with a small dropper tool to help you suck up just as much water as you need without making a mess. If yours didn’t, you can also use a normal eyedropper. Add the fluid to the fill line located near the top of the uppermost colored square, but avoid under- or over-filling either chamber. The testing kit you use should include for each of the 4 main chemical factors that influence plant growth: nitrogen, potassium, phosphorus, and pH. While all soil testing kits essentially work the same way, there are many different products on the market, each with their own specific test equipment and instructions. Be sure to follow the directions for the testing kit you’re working with to the letter.Tip: You can pick up a commercial soil testing kit at any hardware store, greenhouse, or gardening center. One of these kits will contain everything you need to check the nutrient levels in the soil around your home.
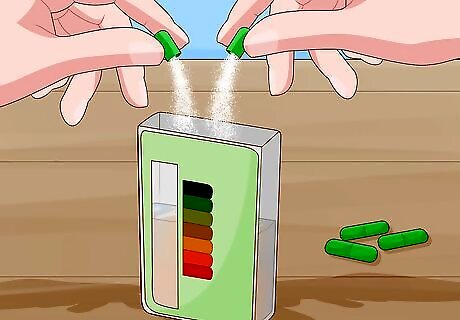
Add each capsule of test powder to its matching container individually. Carefully pull apart the plastic capsule corresponding to the nutrient you want to test and shake its contents into the viewing chamber of the testing container (the side with the window opposite the color chart). Repeat this process for each of the other chemical factors you plan on testing. Take care not to spill the test powder. It may help to open the capsules in a covered area, or to wait for a windless day to test your soil. Don’t get your test powders mixed up by mistake. If you do, the results you get may not accurately reflect the structure of your soil. Some soil testing kits come with vials of liquid reagents rather than test powders, which means you’ll need to add your soil to the testing container while it’s still dry.
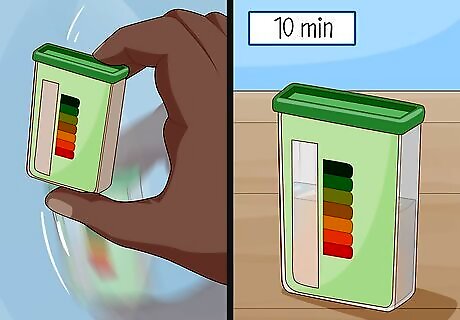
Shake the container vigorously and allow it to sit for 10 minutes. Keep the container moving until the test powder has dissolved completely. This should only take a few seconds. Once there are no more visible particles floating in the solution, wait at least 10 minutes before you begin reading the results. Set a timer to make sure you’ve given the test powder adequate time to mingle with your sample water. As the sample water sits, the reagents in the test powder will react with the chemicals in your soil, causing each container to turn a different color.
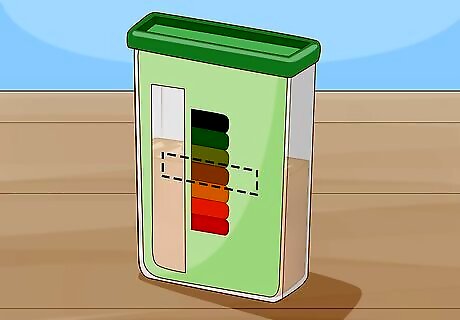
Check the color of your sample water against the included color chart. Look through the viewing window on the open chamber of the testing container and note the hue of the water inside. Compare this color to the color boxes on the opposite chamber. In most cases, the darker the shade, the higher the chemical content. The color keys for your testing kit may be printed on a separate card rather than on the testing containers themselves. Some kits even have labelled boxes with terms like “Surplus,” “Sufficient,” “Adequate,” “Deficient,” and “Depleted” to tell you exactly how much of each nutrient is found in your soil.
Testing pH with Vinegar and Baking Soda
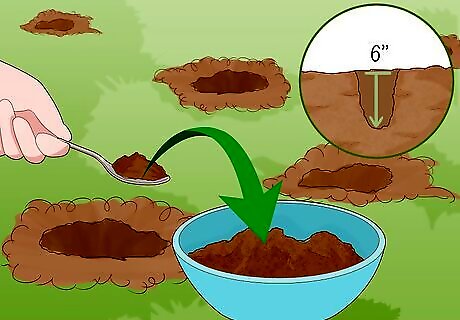
Take a soil sample from several spots throughout your yard or garden. Dig 4-5 holes to a depth of about 6 inches (15 cm). Take 1 or 2 scoops of loose dirt from each hole and throw them all into a large container. Mix the soil together with the same implement you used to dig your holes. Make sure you dig deep enough for your sample to reflect what lies beneath the surface of your soil. After all, this is where the roots of your plants will be taking in their nutrients.{{greenbox:Tip: A soil sampler tool can make it easy to collect multiple samples quickly and efficiently. One of these tools will come in handy if you’re in the habit of testing your growing soil regularly (which you should be).
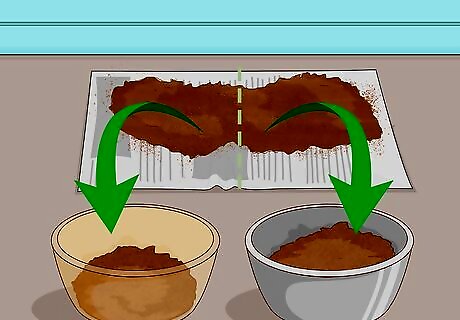
Divide your soil sample up into 2 non-reactive containers. Split the mixed soil in half and transfer each portion to a separate container made from plastic, stainless steel, ceramic, glass, or enamel-coated metal. Do your best to distribute the soil equally between them. Ideally, there should be at least ½ cup (30 g) of soil in each container. Use a clean plastic or stainless steel utensil to pick up the soil and move it to your pair of containers. In order to determine the approximate pH balance of your soil, you’ll be performing 2 nearly identical tests.
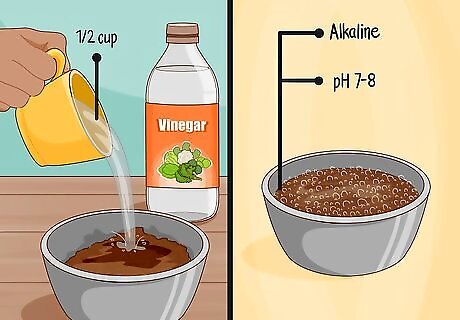
Add ⁄2 cup (120 mL) of vinegar to the soil in the first container. If it starts to fizz, it means that your soil is on the alkaline side. In this case, it most likely has a pH somewhere between 7 and 8, high enough to react to the acid in the vinegar. You can use any type of vinegar to perform this test, so long as it has an acidity of at least 5%. Luckily, this includes most varieties of vinegar sold in stores, including white, wine, apple cider, and balsamic. If you discover that your soil is alkaline, there’s no need to conduct a second test—you can jump straight to adding helpful amendments like ammonium nitrate, peat, or compost to lower the pH of your soil to a more agreeable level.
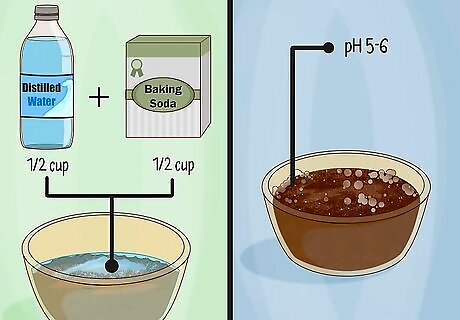
Wet the soil in the second container and add ½ cup (100 g) of baking soda. If your first sample doesn’t produce a reaction, it’s likely that your soil is acidic and not alkaline. Pour just enough distilled water onto your second sample to make a thick slurry, then dump in your baking soda. If it bubbles, you can reliably estimate that your soil’s pH is between 5 and 6. You can raise the pH of overly-acidic soil by enriching it with amendments like limestone or hardwood ash. No reaction at all means that your soil has a neutral pH, which is perfect for cultivating a wide variety of plants. Consider yourself lucky!
Performing a pH Test Using Cabbage
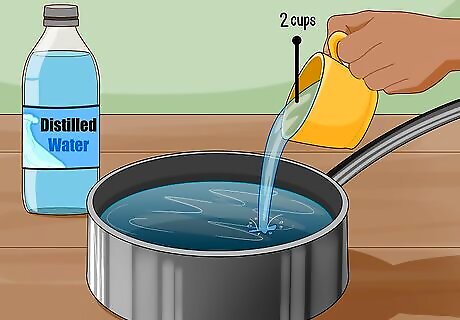
Fill a saucepan with about 2 cups (470 mL) of distilled water. It’s important to use distilled water, as ordinary tap water is full of chemicals, minerals, and other substances that can throw off your test results. You’ll find bottles of distilled water at any supermarket. You can also use your own water if you have a purifier at home. Just keep in mind that your final analysis may not be quite as reliable if you decide to go this route. Distilled water has a neutral pH, which makes it ideal for tests designed to gauge the acidity of a given substance.
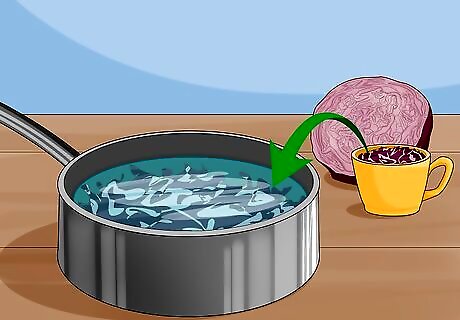
Add 1 cup (150 g) of chopped red cabbage to the saucepan. Don’t worry about cutting the cabbage up too fine—you just need to reduce it to a size that will easily fit inside your saucepan. Once you’ve cut your cabbage, drop it into the water and allow it to start soaking. Only red cabbage will do for this experiment. It’s the only kind that contains anthocyanin, a type of natural pigment that will serve as a reagent when exposed to the chemicals in your soil.
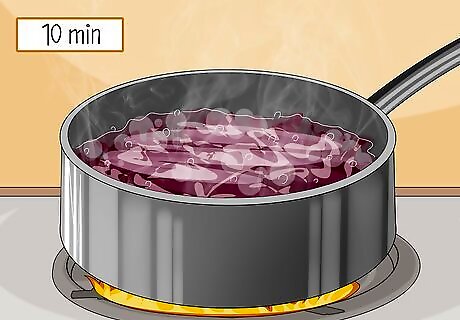
Boil the cabbage in the distilled water for 10 minutes. Place the saucepan on your stove and turn on the cooktop to medium-high heat. Be sure to set a timer so you’ll know when the cabbage is ready to come off of the heat. You should notice the water taking on a deep violet color within a couple of minutes. Simmering the cabbage will turn the water into an all-natural, color-changing test solution without altering its pH. The longer you simmer the cabbage, the more of its pigment will bleed into the water. You don’t want it to get too dark, however, or it may make the final color of the water hard to differentiate.
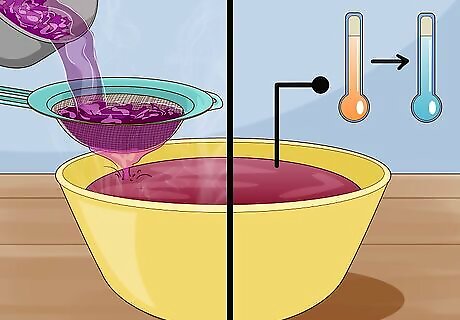
Strain the liquid from the cabbage into a spacious container. Place a colander or wire strainer over the opening of the container and pour the contents of the saucepan out into it to separate the cabbage leaves from the now purple water. Allow the water to cool for another 10 minutes or so, or until it’s just slightly warm to the touch. Grab a potholder or kitchen towel when you go to transfer the water to your testing container. Both it and the saucepan will be extremely hot.Tip: It’s best to use a transparent container, if possible, since you’ll be assessing your soil sample visually.

Place a soil sample in the cabbage water and watch for it to change colors. Sprinkle 2-3 spoonfuls of soil from your yard or garden into your homemade test solution, then wait a few moments for it to take effect. If the water turns pink, it means that your soil is acidic (most likely somewhere in the range of 5-6). If it turns green or a turquoise color, it’s alkaline (7-8). How nifty is that? Don’t forget to throw out the soiled water when you’re done. It could have a slight staining effect, so be careful not to get any on your hands. Once you know the approximate pH of your soil, you can take the necessary steps to raise or lower it and create a more hospitable growing environment for your favorite plants.


Comments
0 comment