views
- Most people don't have to enter a subnet mask manually—the router you're connected to assigns it automatically using DHCP.
- If your device has a static IP address that is not assigned automatically, you can manually update your subnet mask on your computer, phone, or tablet if needed.
- If you don't know which subnet mask to use, you can figure it out based on the range of IP addresses from which your IP address was assigned.
How do I find the subnet mask for an IP address?
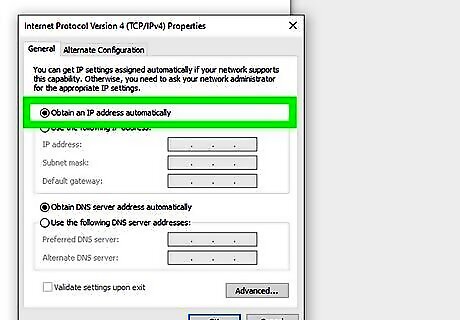
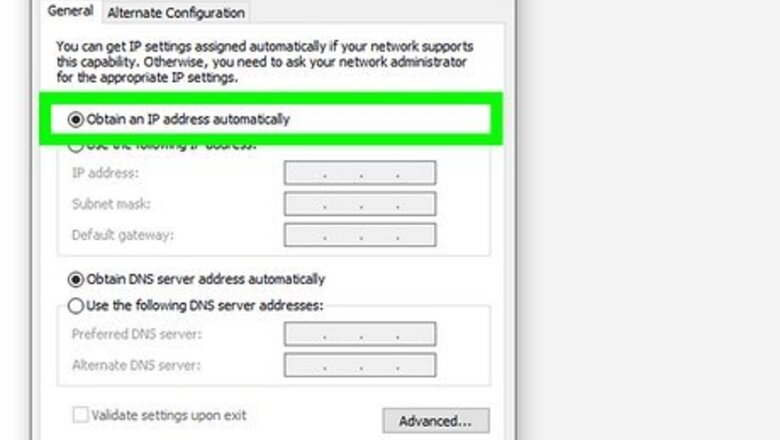
You'll need to know the range your IP address is a part of to find its subnet mask. Unfortunately, you can't determine the correct subnet just by looking at an IP address. Each IPv4 subnet has a subnet mask, also known as a netmask, which is basically an alias for the range of IP addresses allocated to that network. If you use a subnet mask that isn't correct for your IP range, your device won't be able to access the internet. If your IP address is assigned automatically, so is your subnet mask. In this case, if you're connected to the internet, don't worry about finding or changing your subnet mask. But, if you're setting up a static IP address that isn't assigned automatically, you'll need to find the right subnet mask to get online. The easiest way to find out what subnet mask you should be using is to ask your network administrator. If that's not possible right now, read on!
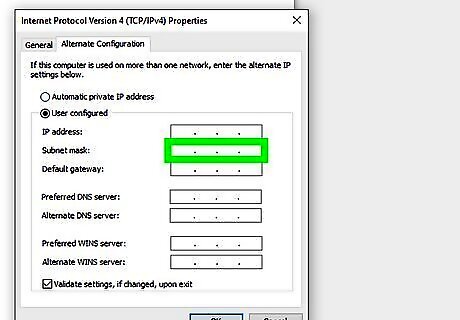
If there's another device you're sure is on the same subnet, try its subnet mask. You can use the instructions in this article to find the IP address and subnet mask for other Windows, Linux, macOS, Android, and iOS devices on the network and simply use the same subnet mask. This is not foolproof, as network administrators can divide up IP ranges into many subnets. But for smaller networks, this might be all you need to do to find the subnet mask. Once signed in, compare the other device's IP address to your static IP. Do they appear to be in the same range or from a similar-sized range? If so, using that device's subnet mask might work. For example, if your static IP address is 192.168.0.5 and the other device is 192.168.0.12, having the first three octets in common means you're likely on the same subnet. However, subnets can be broken up in a multitude of ways so there's a chance your network administrator has sub-divided the network even further.
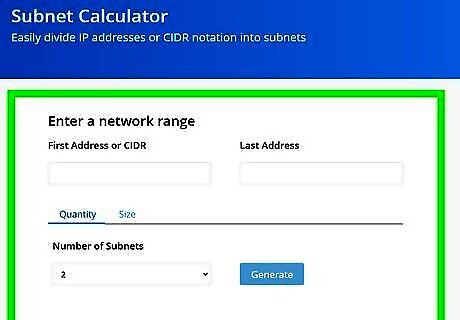
Once you know the range of IP addresses (or you think you can guess it), use a subnet calculator or cheat sheet to find the subnet mask. There's no need to do complicated math to calculate the subnet mask once you have the range thanks to these handy tools: Spiceworks' Subnet Calculator is easy to use if you know the IP range. Just enter the first and last IP addresses in the range, then choose 1 as the number of subnets (if you're sure the range you've entered is a single subnet). Subnet Calculator and Cheat Sheet provides a subnet mask based on a starting IP address and its associated CIDR notation, which is a special value that explains how many addresses are in that range. If you're not sure what to enter here, just refer to the CIDR cheat sheet at the bottom of the tool. For example, if you're working with a range of 256 IP addresses (a common subnet size for homes and small offices), you'll use /24. For /24 ranges, the subnet mask will be 255.255.255.0. The cheat sheet at the bottom is also helpful if you just want to try to guess the subnet mask based on the presumed size of the subnet. For example, you'll see that when a subnet contains 1024 IP addresses, its mask will be 255.255.252.0, which is /22 in CIDR notation.
Find the Subnet on Windows
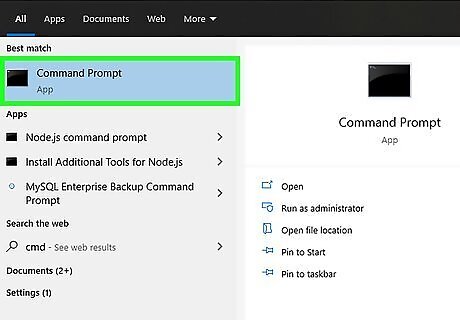
Open the Command Prompt. The easiest way to find your subnet mask on Windows is to use a quick command in the command prompt. Press the Windows key, type Command, and then click Command Prompt in the search results.
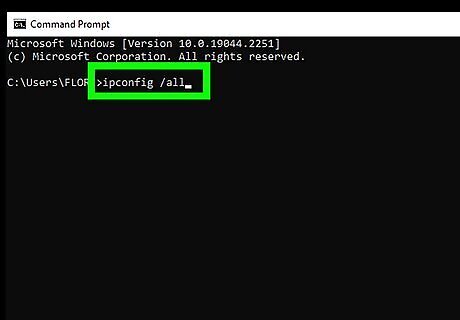
Type ipconfig /all and press ↵ Enter. This displays the details of all of your active TCP/IP connections.
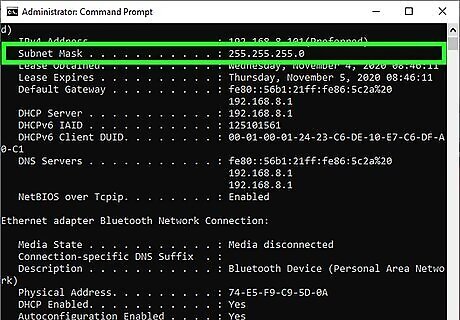
Find the subnet mask for each connection. Look for "Subnet Mask" in the section below your network adapter. For example, if you're connected to Wi-Fi, you'll typically see an adapter called "Wireless LAN adapter" (or similar)—the subnet for your wireless connection appears here. The address you're looking for begins with 255.
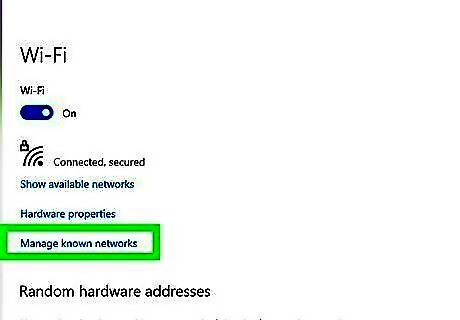
Change your subnet mask. If you need to update the subnet mask on your PC due to changes in your network, it's easy. Note that you should only do this if you're using a static IP address that isn't assigned automatically: Open your Windows Settings and select Network & Internet. For Wi-Fi, select Wi-Fi > Manage Known Networks. For Ethernet, select Ethernet, then choose your network. Click Edit under "IP assignment." Select Manual, then choose IPv4. Update your subnet mask and other details and save.
Find the Subnet on Mac
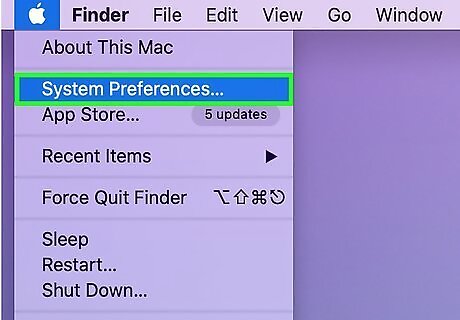
Click the Apple menu and select System Preferences. You'll find the Apple menu at the top-left corner of your screen.
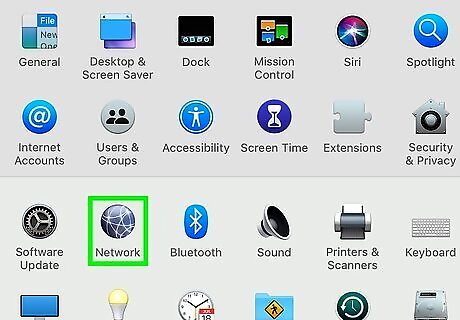
Click the Network icon. It's the globe icon in your System Preferences.
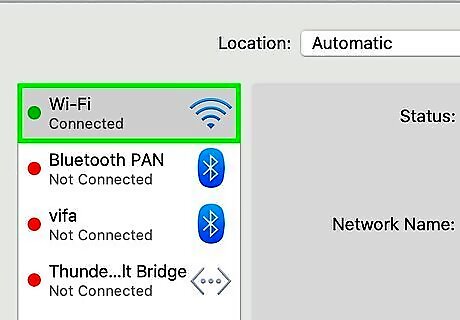
Select your internet connection. For example, if you want to find the subnet for your wireless connection, select Wi-Fi here. If you're using an ethernet connection, you will now see your IP address and subnet mask in the right panel. If you're using Wi-Fi, continue with this method to find your subnet mask.
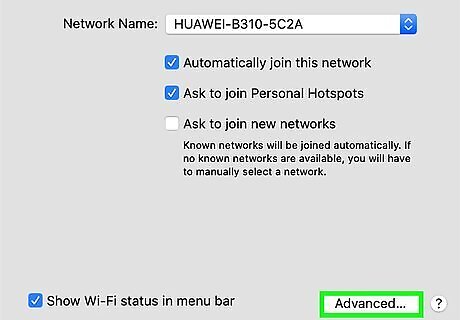
Click Advanced if you're using Wi-Fi. You'll see this button at the bottom-right corner.
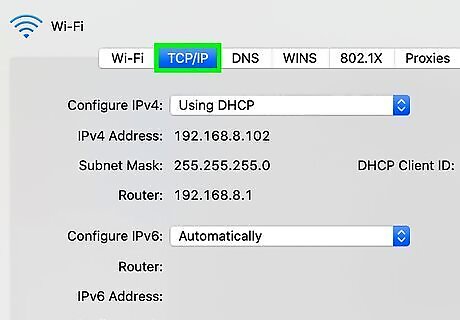
Click the TCP/IP tab. You'll see this at the top of the window. Here you'll find your IP address and subnet mask clearly labeled. The address you're looking for begins with 255. If the only numbers you see are on the lower half of the screen underneath "Configure IPv6," you are on a local IPv6 network which does not use subnet masks. If you're having internet trouble, select Using DHCP from the drop-down menu, then click Renew DHCP Lease to receive a new IP address and subnet mask.
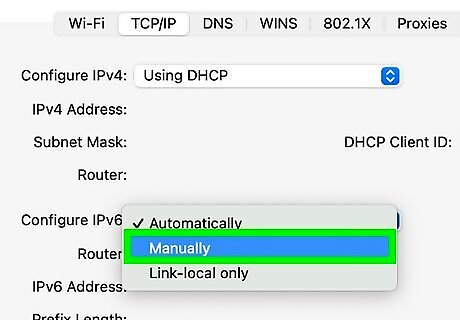
Change your subnet mask. If you need to update the subnet mask on your Mac due to changes in your network, it's easy. Note that you should only do this if you're using a dedicated (static) IP address that must be configured manually: Select the network in the Network panel of System Preferences. Click Configure IPv4 in the menu, then select Manually. Replace the current subnet mask with the new one and save your changes.
Find the Subnet on Linux
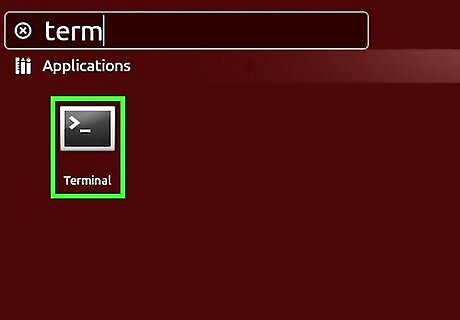
Open a terminal window. You can open a terminal by pressing Ctrl+Alt+T or by clicking the Terminal icon in your app list.
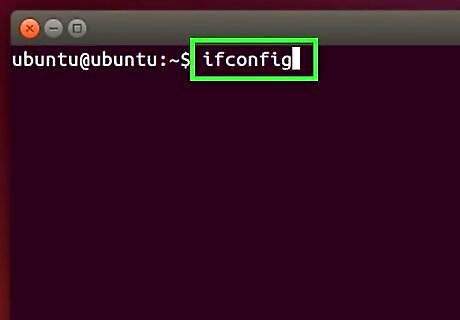
Type ifconfig and press ↵ Enter. This displays the name of each of your network interfaces along with information about each connection. If you see "command not found," type whereis ifconfig to get the full path, such as /sbin/ifconfig, then simply type the full path to ifconfig and press ↵ Enter.
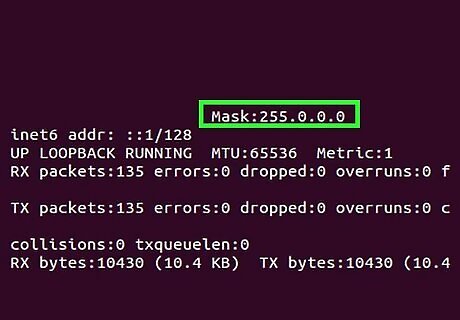
Find the subnet mask. Look for the "Mask" value next to the interface you're curious about, such as eth0 for ethernet or wlan0 for Wi-Fi. The subnet mask is typically labeled "Mask" and begins with 255.
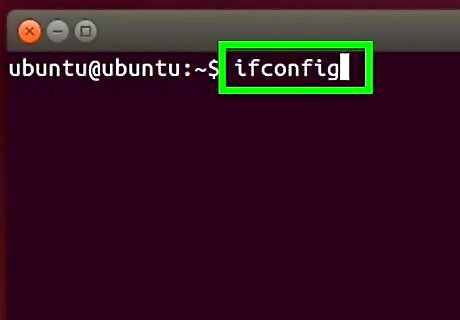
Change the subnet mask. If your Linux workstation or server has a static IP address that isn't assigned automatically by the router by DHCP, you can use ifconfig to change the subnet mask. Here's how:
Find the adapter name for the connection you want to modify using ifconfig. For example, eth0 for your ethernet connection.
If the subnet mask is the only thing you need to change, use sudo ifconfig
Find the Subnet on Android
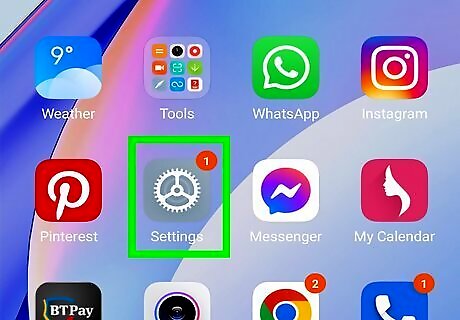
Open your Android's Settings Android 7 Settings. You can do this by tapping the Settings icon in your app list or by swiping down from the top of your Home screen and tapping the gear icon. The steps to view your subnet mask on Android will be a little different depending on your platform, such as Samsung Galaxy or stock Android.
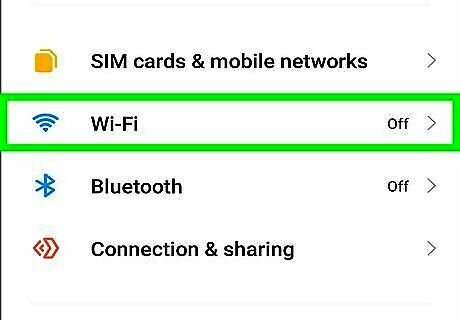
Tap Wireless & Networks or Connections. This option displays Wi-Fi information, such as whether you're connected and if any other networks are available. If you don't see this option, tap Network & Internet (or similar) and select Wi-Fi instead.
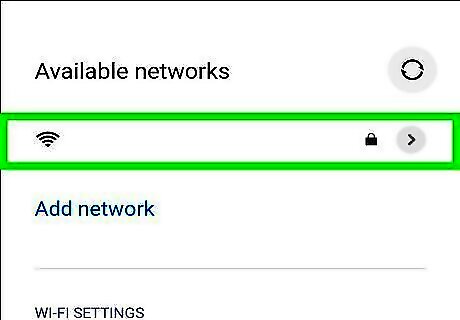
Tap the network you're connected to. Depending on your model, you may need to tap a gear icon to view the details. This displays your connection details, including your IP address and subnet mask, which begins with 255. If you don't see your subnet mask, tap Advanced or similar to show more options. Some Androids connected through DHCP may not display the subnet mask at all. If you're not able to find the subnet mask with these steps, download Termux, a free terminal app, from the Play Store. Once downloaded, open the app, type ifconfig, and press Enter. You will see your subnet mask under "wlan0."
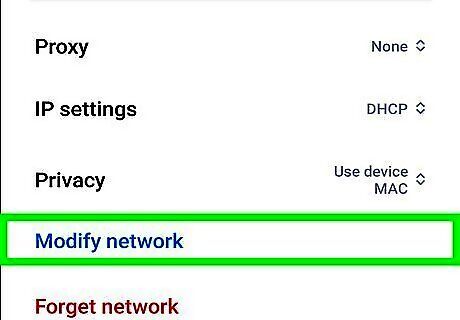
Change the subnet mask. If your Android has a static IP address and you need to update the subnet mask, it's pretty easy to do: Select the Advanced or Manage option in your network's settings. If you don't see it, tap and hold the name of your wireless network in the list of networks, then tap Modify network. Tap the IP Settings option if you see it—this is common on Samsung Galaxy models. If DHCP is selected, you'll need to change it to Static. Then, you'll be able to modify the subnet mask, IP address, gateway, and other details.
Find the Subnet on iPhone & iPad
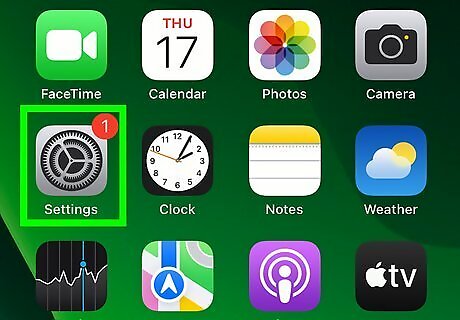
Open your Settings iPhone Settings App Icon. You'll find this gear icon on your Home screen, in your app drawer, or by searching.
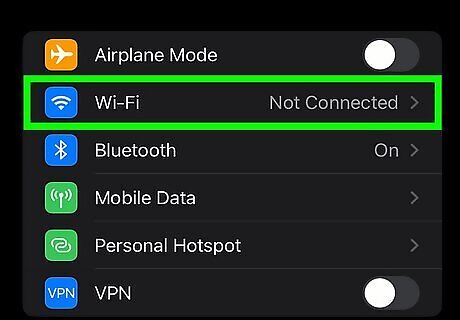
Tap Wi-Fi. This option is near the top of the list.
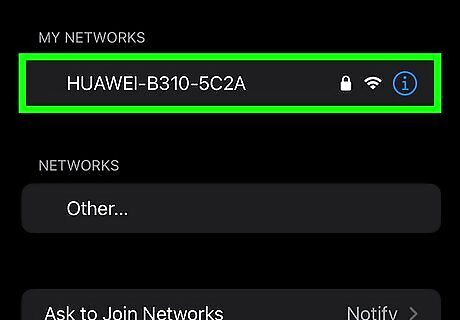
Tap your current connection. You'll see it at the top of the screen below the "Wi-Fi" button.
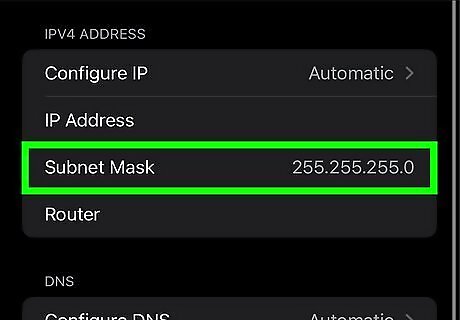
Find your subnet mask. Your subnet mask begins with 255 and is just below your IP address about halfway down the page.
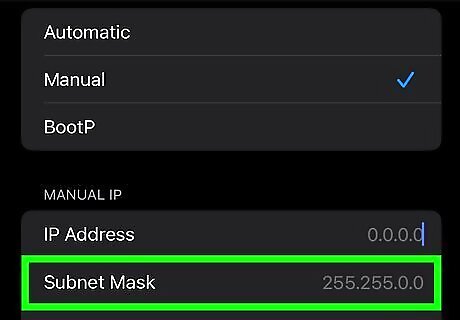
Change the subnet mask. If your iPhone or iPad has a static IP address and you need to update the subnet mask, it's pretty easy to do from this screen: Just above your IP address, tap Configure IP. If you have a static IP address already, you'll see the option to modify the subnet mask here. If not, you can tap Manual and enter your new static IP address information, including your subnet and gateway address (referred to here as "router").


Comments
0 comment