views
Creating a New Administrator Account

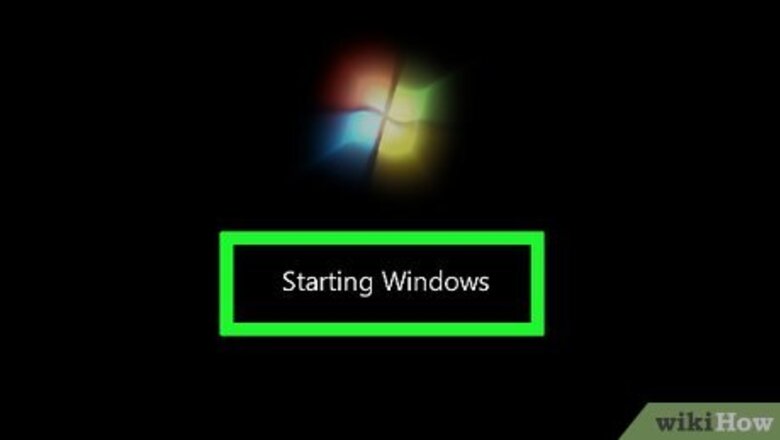
Wait for the login screen to load. Once your computer finishes restarting, you should be back at the login screen.

Click the "Utility Manager" icon. It's a dial-shaped icon and arrow in the bottom-left corner of the screen. Since you replaced the Utility Manager app with Command Prompt, clicking this icon will open the Command Prompt window.
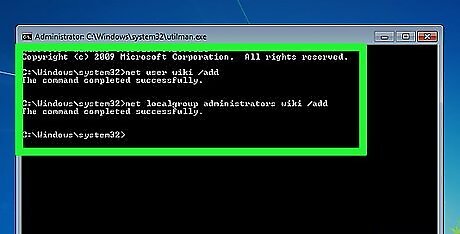
Create a new user. Once Command Prompt opens, do the following: Type in net user name /add making sure to replace "name" with a username of your choice. Press ↵ Enter. Type in net localgroup administrators name /add again replacing "name" with the name of the user you just created. Press ↵ Enter

Restart your computer one more time. Click the Windows Power Power icon, then click the Restart option. This will prompt your computer to restart.

Select your new user. Click your new user's name, then click the Sign in button. Since you didn't create a password to go with your account, you won't need to enter one.

Allow Windows to set up your account. Your account is new, so Windows 10 will need a few minutes to finish setting up your files and folders. Skip this step on Windows 7.
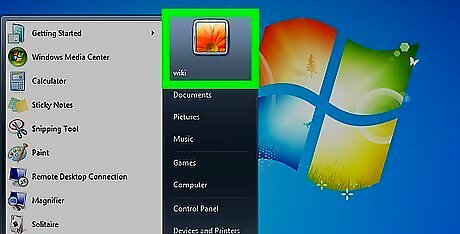
Browse with Administrator privileges. Now that you're on an account which has admin privileges, you can use your computer's system services and programs without restrictions.
Enabling Command Prompt on Windows
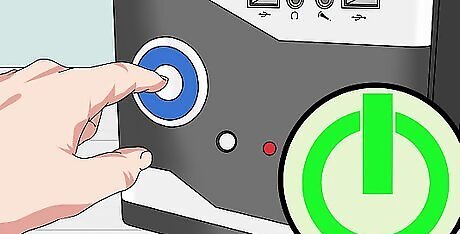
Restart your computer via the Power button. Press and hold the Power button on the school computer until your computer turns off, then press the Power button again to turn it back on.
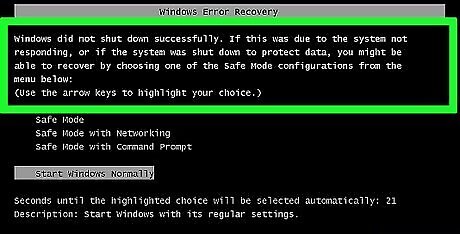
Wait for the startup screen to appear. In most cases, your computer will alert you that Windows didn't shut down properly, and you'll have a few startup options which you can select with the arrow keys.
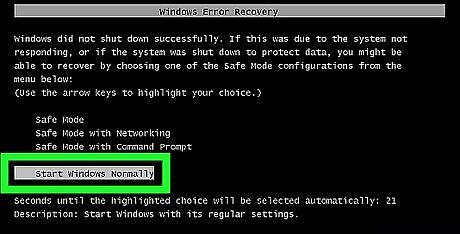
Select Start Windows Normally. It's in the middle of the screen. To confirm your selection, you'll press ↵ Enter.
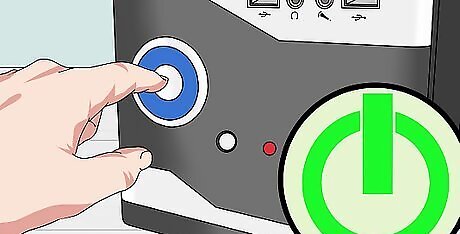
Restart again via the Power button. Your computer will reboot like it did before, and you should arrive at a startup screen again.
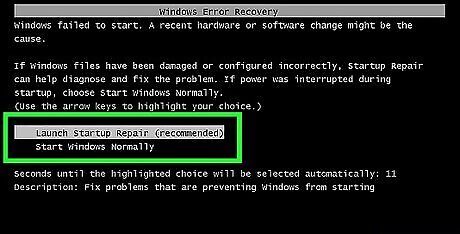
Look for the "Startup Repair" screen. If the startup screen has repair options (e.g., Launch Startup Repair) listed, proceed to the next step. If the startup screen has the standard startup options listed, select Start Windows Normally again, then restart it again via the Power button. You'll need to keep doing this until you arrive at the "Startup Repair" screen.
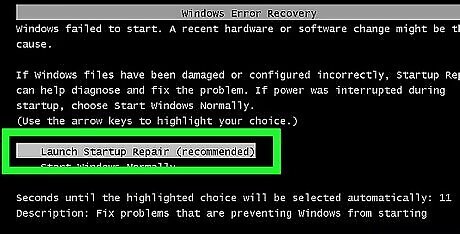
Select Launch Startup Repair (recommended). It's in the middle of the screen. Doing so will prompt the startup repair sequence to begin running.
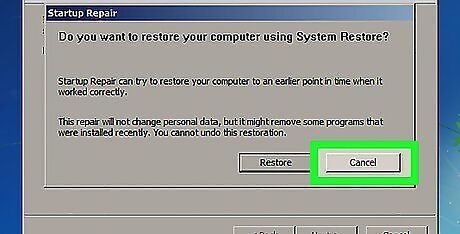
Click Cancel when prompted. You'll need to wait for about 10 minutes after doing this before you can proceed.
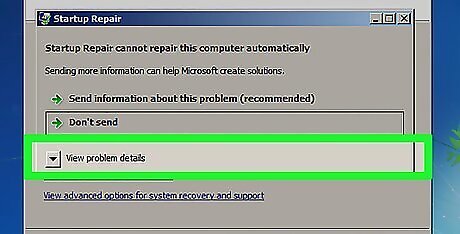
Click the "View problem details" drop-down box. It's in the bottom-left corner of the error message. A drop-down list of notes will appear.
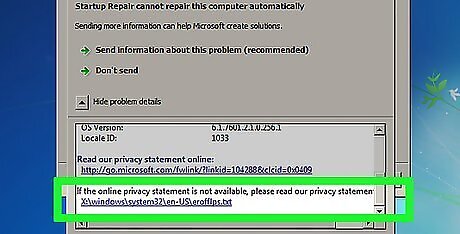
Open Notepad. Scroll down to the "If the online privacy statement is not available..." heading, then click the link below it.
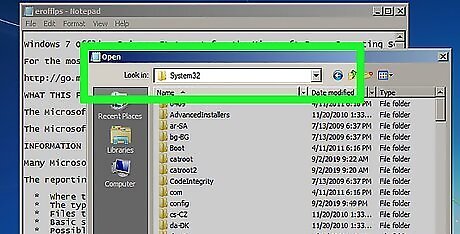
Open your computer's system files. Once Notepad opens, use it to do the following: Click File in the top-left corner of Notepad. Click Open... in the drop-down menu. Double-click Computer in the window which opens. Double-click your computer's hard drive (usually C:). Double-click the Windows folder. Scroll down and double-click the System32 folder.
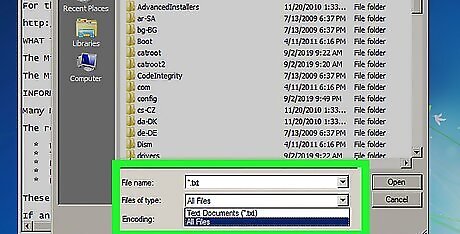
Change the file type you can see. Click the "File type" drop-down box, then click All Files in the resulting drop-down menu.
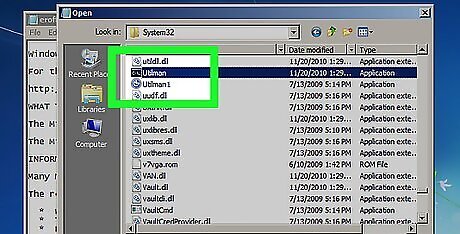
Replace Utility Manager with Command Prompt. This will allow you to access Command Prompt even if it's blocked on your computer: Find the "Utilman" shortcut in the "U" section of files (not folders). Right-click "Utilman", then click Rename Type in Utilman1, then press ↵ Enter. Find the "cmd" file. Right-click the "cmd" file, then click Copy Press Ctrl+V to paste in the copied file. Right-click the copied file, then click Rename, type in Utilman, and press ↵ Enter.
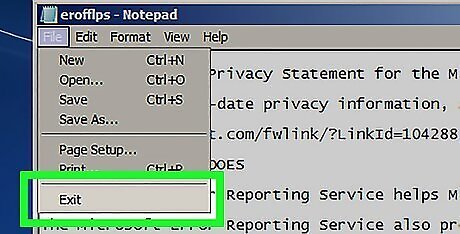
Close the "Open" window and Notepad. Click Cancel in the lower-right side of the "Open" window, then click the X in the top-right corner of the Notepad window.
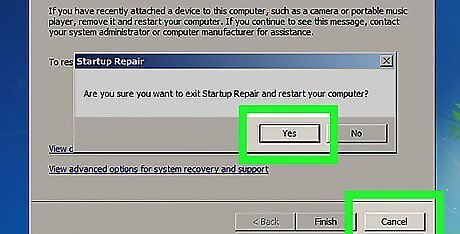
Exit the remaining windows. Click the X in the top-right corner of the error report window, then click Cancel in the lower-right corner of the Startup Repair window and click Yes when prompted. At this point, you can proceed with creating a new Administrator account.
Getting Administrator Privileges on MacOS through recovery mode
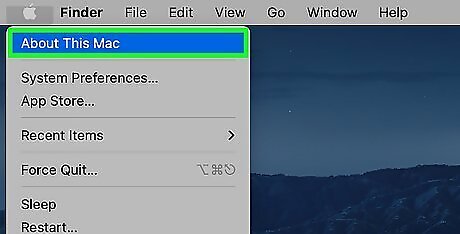
Before going ahead with this, check your macOS version (older versions will be OS X and even older ones Mac OS X). To do this method, you need Mac OS X 10.7 Lion or later. To check if you have this, press the Apple Button then About this Mac
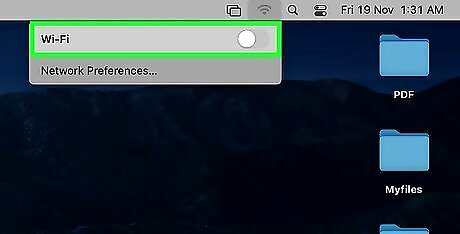
Disconnect from the internet. This is required as it will stop most software that will in one way or another record your attempts. As most of this kind of software notifies another device, disconnecting from the Internet will prevent most of this software (BEWARE: Some software may tell the school that it has lost the connection, although this can also apply to Shutting Down. If anyone questions you, say that the computer stopped responding and that you had to reboot it)
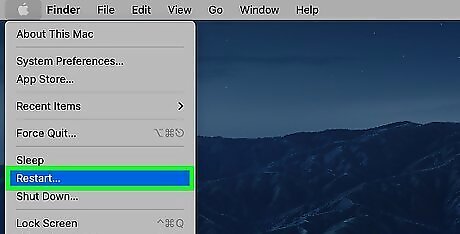
Restart your Mac. To do this, click the Apple logo, then press restart You may need a Confirmation to do this, depending on the settings
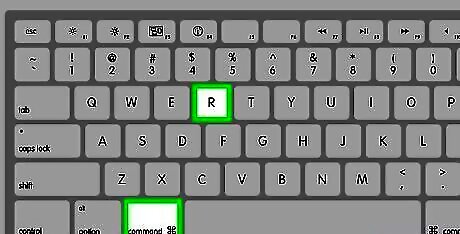
Boot Your Mac into recovery mode. To-Do This, Hold Command+R during startup This boots the Mac into recovery mode, where you can Format the Disk, reinstall MacOS, and change a Password. This may take longer than usual to load. If you boot to an Options screen with the Time Machine, Reinstall, Safari, and Disk Utility Screen, proceed to the next step. If you see the normal screen, repeat the process
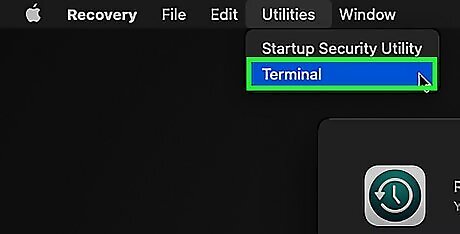
Open Terminal. To-Do This, Select 'Utilities'. After this, click 'Terminal'
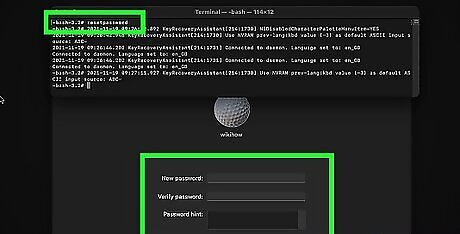
Change the Password. In order to do this, there will need to be an Admin Account already on it. Type 'resetpassword'. Then, select the Admin Account and change the Password.

Reboot your Mac as normal

Log in to the Administrator Account. To do this, select the account you changed the Password and enter the password
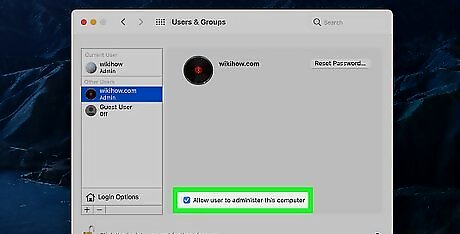
Open Passwords. To do this, click the Apple logo, select System Preferences, select Accounts (or users). Select your account, click the lock (this will require the admin password) and use it to change the privileges to give your account Admin.
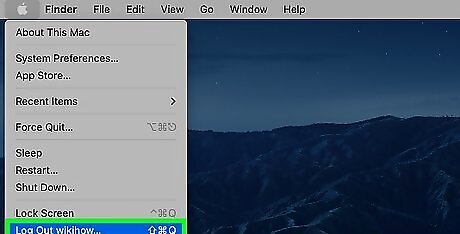
Log out of this Admin Account. To do this, sign out by clicked Apple Menu, then log out (Like before, you may need to confirm this action)

Sign into your Account as normal and you should have Administrator Privileges. This means you can use it as any other Mac.


Comments
0 comment