
Hollowing out a Carrot
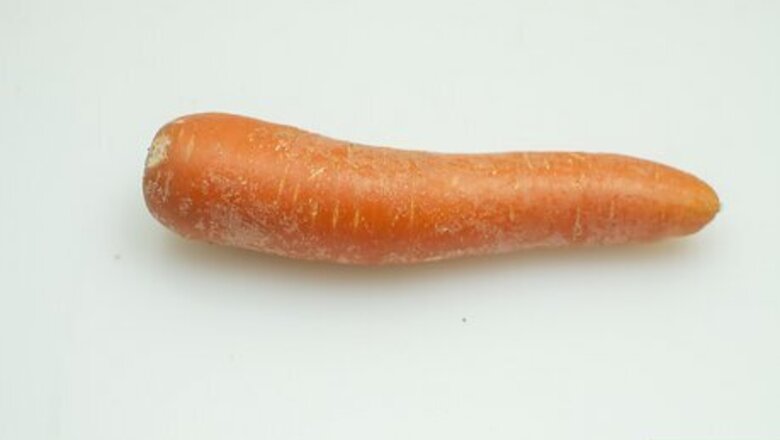
Find the longest, straightest carrot you can for the recorder. Stop by a local grocery store or open the vegetable drawer and look for the longest carrot you can find. For a decent recorder, try to grab a carrot that’s at least 8 inches (20 cm) in length. The thicker, the better. Inspect the carrot carefully to make sure it’s straight enough to drill directly through it in a straight line. So long as the carrot is at least 2 inches (5.1 cm) thick, it’ll work. Don’t worry if the end of the carrot is too skinny. You can always trim the end off if you need to. It’s okay if the carrot isn’t perfectly straight, but if it’s too oddly shaped you won’t be able to drill through it.

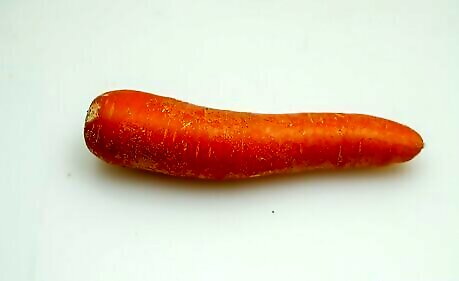
Get a second, smaller carrot to create the recorder's mouthpiece. You actually need 2 carrots to complete this process, but the second one can be any size you’d like. If you’re heading out to the grocery store to get the long, straight carrot, pick a second smaller carrot up while you’re there. You will cut a portion out to make the block that slides into the mouthpiece. You can even use a baby carrot for this if you have any of those sitting around.
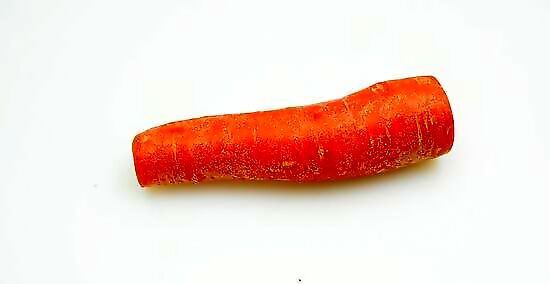
Wash the carrot and trim the ends of the carrot off with a chef’s knife. Wash the carrot under water and dry it by hand. For best results, let it sit out for 3-6 hours to completely dry. Then, set your carrot down on a cutting board. Cut ⁄2–1 in (1.3–2.5 cm) off of each end to clean them up. You should be able to stand the carrot up on its thickest end. You can wash the second carrot now, or wash and dry it when you're ready to make the mouthpiece. You don't need to trim the second carrot.
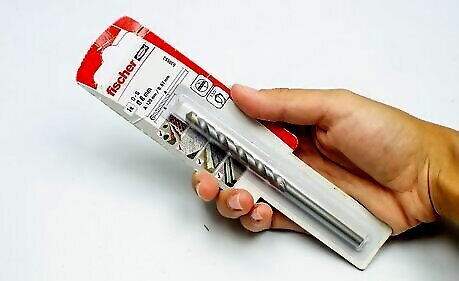
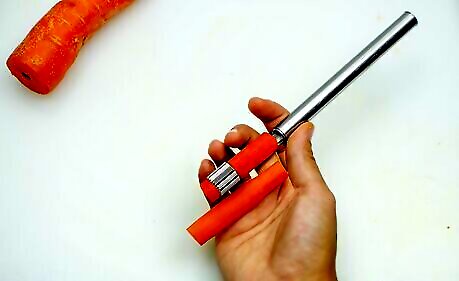
Put a long, ⁄8 in (0.95 cm) pilot drill bit on your drill. Grab a drill and unlock the drill bit on the end. Then, grab the longest ⁄8 in (0.95 cm) drill bit you have and slide it into the opening on the drill. Lock it in place by tightening the end of your drill or flipping the lock switch. The drill bit must be at least half as a long as the carrot. If it isn’t, trim the thinner end of the carrot down until the drill bit can reach the halfway point from each side. You can’t realistically do this without a drill and the proper drill bit. The carrot won’t make sound if you try to carve the middle out with a knife.
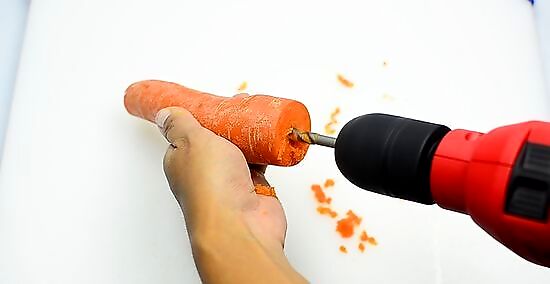
Bore a hole through the middle of the carrot. Set the carrot down on a cutting board so the thicker end hangs over the side of the table. Line the drill bit up with the middle of the carrot so that it’s parallel to the table. Then, set the drill to the slowest speed possible and slowly pull the trigger. Drive a hole all the way through the carrot to hollow it out. If the drill bit doesn’t reach all the way through to the other side, drill through as far as you can from one side and flip the carrot around to repeat the process from the other side so that the two holes meet in the middle of the carrot. This is kind of tricky. You must be careful about drilling at an angle and breaking the side of the carrot.
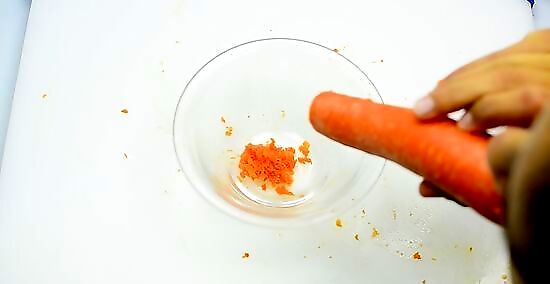
Blow on the end of the carrot to empty it out into a bowl. Set a bowl down and hold the wider end of the carrot up to your lips. Blow through the carrot to push out all of the juice, scraps, and junk sitting in the middle of the carrot. Do this 2-3 times to clear the middle of the carrot out. If you don’t do this, your recorder may get blocked up when you try to use it. The insides of the carrot should come out fairly easily. You can also use a long pipe cleaner to clean the inside of the carrot out if you prefer. Just try to avoid cutting the membrane.
Constructing the Block and Window

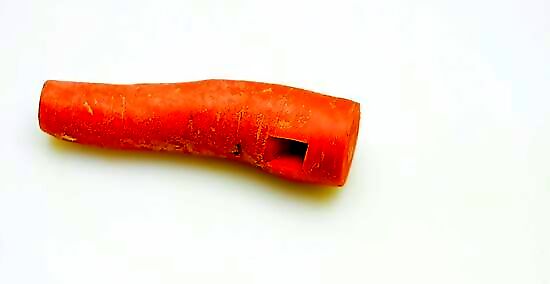
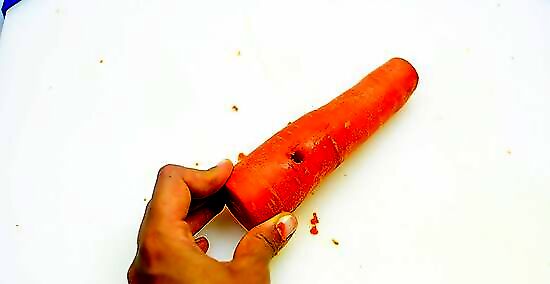
Cut a small rectangular opening out 1.5 in (3.8 cm) away from the mouthpiece. Grab a thumbtack and punch two holes, ⁄4 in (1.9 cm) away from one another and parallel to the mouthpiece. Then, use a scalpel or utility knife to dig a ⁄4 inch (0.64 cm) trench in between the holes. Cut all the way through the top of the carrot. You should be able to see the hole you made with the drill bit when you’re done cutting the window out. This part of the recorder is known as the window. The window lets air come out of the top of the recorder and produces the notes. Just to clarify, this rectangular opening should be roughly ⁄4 inch (1.9 cm) long and ⁄4 inch (0.64 cm) wide.
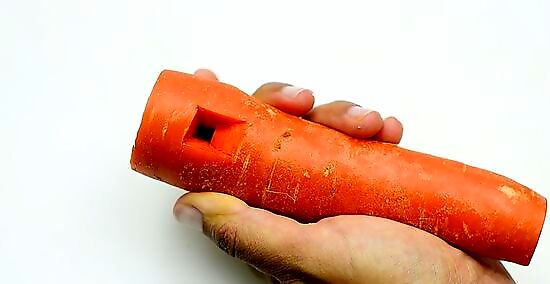
Carve an angular rectangle out in front of the window to make the ramp. Use your scalpel or utility knife to trace a ⁄4 by 1 in (1.9 by 2.5 cm) box that shares one side with the window. Then, slowly and carefully carve out layers from the inside of the box with a utility knife or scalpel to make an angular ramp leading down into the window. Carve downwards as you remove layers of the carrot so it leads down into the window like a ramp. This part of the recorder is literally known as the ramp. It requires a bit of patience and a steady hand to do get this right. The ramp should lead down into the window at roughly a 20-degree angle. This tapered opening into the window helps give the recorder’s notes its distinctive sound.
Punch a hole out of the second carrot with an apple corer to make the block. Grab a second carrot and wash it. Dry it with paper towels and grab an apple corer. Drive the apple corer through a portion of the carrot that’s roughly 1.5 inches (3.8 cm) thick. Remove the piece you cored out and set it down on a cutting board. On a normal recorder, the block is the removable piece of wood that you blow into. For the carrot recorder, you are going to make a block out of this smaller piece of carrot and slide it into the opening of the mouthpiece.
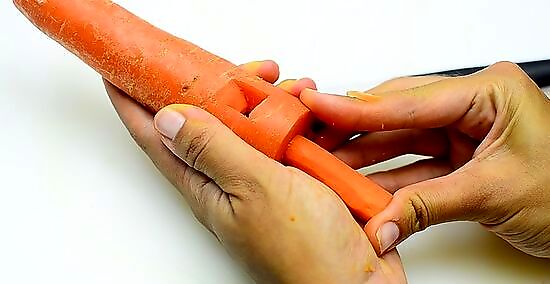
Trim small portions of the block off so that it fits in the mouthpiece. Hold the block up to the opening on the mouthpiece. The cored-out block will be a little bigger than this opening, so make minor adjustments to it with your scalpel or utility knife to remove layers around the block. Keep trying to fit the block and cutting small pieces off until it slides cleanly into the mouthpiece. The block should fit firmly, but not so tight that it gets stuck. If you cut too much off of the block and it doesn’t fit tight, you’ll need to retry with a new block.
Shave the top ⁄6 in (0.42 cm) off of the block with a utility knife. Once you’ve trimmed the block to fit the mouthpiece, set the block down so that the side that goes into the mouthpiece is resting against the cutting board. Grab your scalpel or utility knife and trim a vertical ⁄6 inch (0.42 cm) layer off of any side of the block. Cut in a single line so that there’s a straight cut in the side of the block. This will let a little bit of air enter into the recorder. You can either set the block inside of the recorder now, or set it aside to complete the rest of the steps and put it in when you’re done.
Drilling the Finger Holes
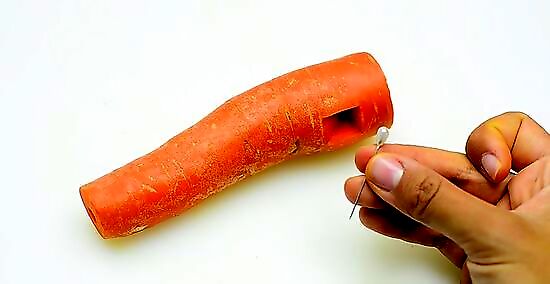
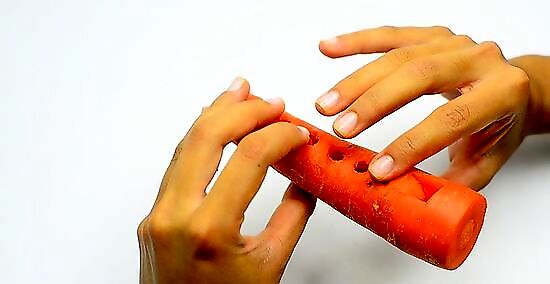
Mark the locations for your 5-7 finger holes with a small pin. It’s actually the size of the hole, not the location, that gives each finger hole its sound on a recorder. Hold the carrot up by the mouthpiece and pretend it’s a real recorder. Choose comfortable locations for your 5-7 finger holes depending on how big the carrot is. Mark each finger hole with a small dot from a marker or a tiny cut from a pin. You could theoretically put finger holes on the top, bottom, and side of the recorder. If they were all the same size, they’d make roughly the same sound! If you want them to be perfectly even, leave 1 inch (2.5 cm) between each hole. Most recorders have 7 holes. You may not have a long enough carrot for this, though. Feel free to stick with 5 holes. This will give you the base notes for the recorder that you need.
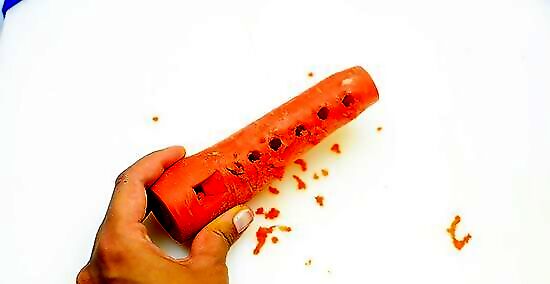
Drive finger holes into the carrot with a sequence of different drill bits. The pattern of the hole sizes is really important, so make sure you do this correctly. Use 5 differently-sized drill bits to bore your finger holes into the top of the carrot where you made your marks. There aren’t any standardized sizes for the finger holes, but the holes on top should follow roughly this pattern: First hole (closest to the mouth) – ⁄64 in (0.48 cm) (medium hole) Second hole – ⁄64 in (0.56 cm) (bigger hole) Third hole – ⁄64 in (0.56 cm) (bigger hole) Fourth hole – ⁄64 in (0.48 cm) (medium hole) Fifth hole – ⁄64 in (0.60 cm) (biggest hole) Sixth hole (optional) – ⁄64 in (0.40 cm) (smaller hole) Seventh hole (optional) – ⁄64 in (0.24 cm) (smallest hole)
Punch a ⁄4 in (0.64 cm) thumb hole into the bottom of the carrot. Put a ⁄4 in (0.64 cm) pilot bit on your drill and flip the carrot over. Drive a ⁄4 in (0.64 cm) thumb hole into the carrot, roughly ⁄2 inch (1.3 cm) away from the first finger hole so that it’s closer to the mouthpiece. The thumb hole changes the octave of the notes. You don’t have to drill one if you don’t want to, but you’ll effectively double the number of notes you have if you add a thumb hole.
Blow into the mouthpiece and hold the finger holes down to play. To use your recorder, lift the mouthpiece up to your mouth. Put 3 fingers from your right hand and 3 fingers from your left hand on top of the finger holes. Cover the thumb hole with the thumb closest to your mouth. To play notes, blow into the recorder. Changing which holes are covered and uncovered changes the note and taking your thumb off of the thumb hole changes the octave! Store the carrot in a plastic bag inside your refrigerator. It will last for roughly 7 days. You can try freezing it to preserve it for the future, but the inside of the carrot is probably going to rot when you thaw it.


Comments
0 comment