
Making a Basic Origami Bookmark

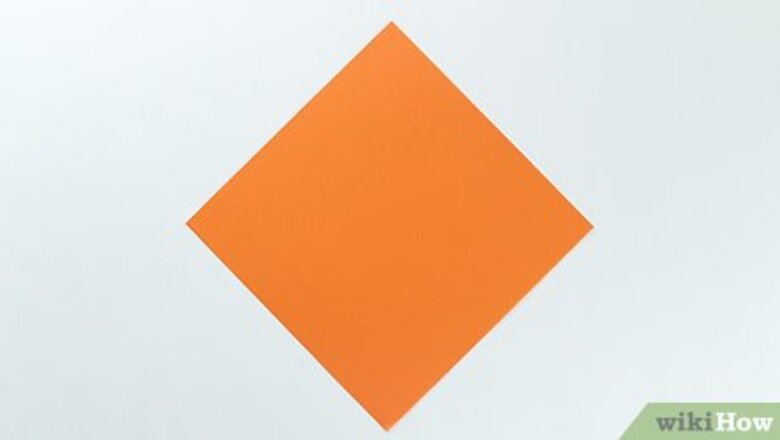
Place a square piece of paper in front of you so it looks like a diamond. Set the paper on a flat surface with the color side facing down. Then, rotate the paper so that instead of having a flat edge at the top, you have 1 corner at the top, like a diamond. You can use any size paper. A good size for a standard bookmark is 15 by 15 inches (38 by 38 cm).Tip: Use origami paper if you’re a beginner since it’s thinner and easier to fold. You can find it on Amazon.

Fold the bottom corner up to meet the top corner. Bring the bottom corner that’s closest to you up onto the top corner, folding the paper in half. Crease the fold firmly. Make sure the corners are perfectly lined up before you crease the paper.

Fold the sides up to the top to make a small diamond, then unfold them. Fold the left corner up so that the tip aligns with the top of the triangle. Repeat on the right side so that the edges line up in the center of the triangle. Crease the folds, then unfold both so the triangle lies flat. Try to align the edges to lie flush against each other. Avoid overlapping the edges or leaving a gap between them in the middle.
Fold the top layer of the top corner down to meet the bottom edge. Take the top layer of the top corner and bring it down so that the tip lines up with the bottom edge of the triangle. Run your finger firmly along the fold to crease it in place. If you’re having trouble making a straight fold, place a ruler under the paper as you crease it to guide you and prevent any crooked folds.
Tuck the left and right corners under the folded-down flap. Pull the left and right corners up along the creases you made before as if you’re going to fold them onto the top corner. Then, fold the top of each corner into the pocket formed by the folded flap to create the final diamond shape. If the corners aren’t folding up easily, go back and refold them to make the creases more flexible. To use your bookmark, slide the pocket onto the corner of a book page.

Decorate your bookmark if you’d like to make it more unique. To embellish your bookmark, add things like glitter, painted designs, stickers, or gems, for example. You can also turn your bookmark into a cute animal or funny monster by gluing on googly eyes and paper ears or teeth. If you use things that could peel off, like glitter or glued-on paper, brush a thin layer of decoupage medium over it and let it dry completely before using. This will prevent the decorations from coming off. Avoid adding anything that’s too bulky to the middle of the bookmark since it will affect how the bookmark sits in your book. If you want to use something like pom poms or chunky rhinestones, for instance, attach them to the outside edges instead.
Folding an Origami Heart Bookmark

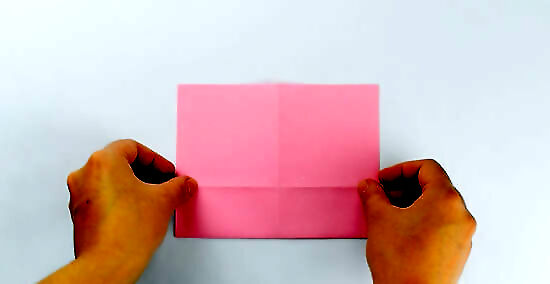
Fold the paper in half horizontally, unfold it, then fold it vertically. Use a square piece of paper in any size. Align the bottom edge with the top edge and make a crease. Then unfold the paper and align the left edge with the right edge. Crease the fold before opening the paper back up. Check that your 2 folds intersect each other at the middle of the paper.Tip: If you’re using paper that has a color or pattern on only 1 side, start with the color side facing down.
Fold the bottom edge up to the middle crease, then flip the paper over. Pull the bottom edge of the paper up so that it aligns with the center crease. Run your finger along the fold to crease it before flipping the paper over onto the other side. Take your time and line up the edge with the middle crease as perfectly as possible. Sloppy folds can ruin the project.

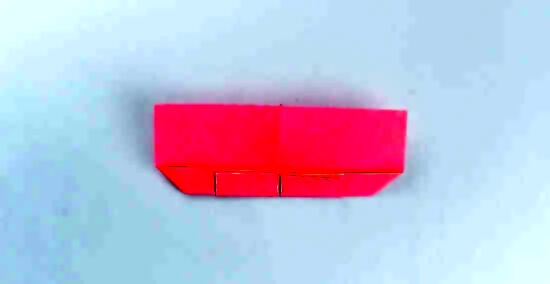
Bring the bottom corners in to the middle vertical crease. Fold up the left and right corners so that the bottom edges line up with the crease in the center of the paper. Crease them securely to hold them in place. Avoid overlapping the edges in the middle or leaving a space between them. Try to get them to rest against each other.
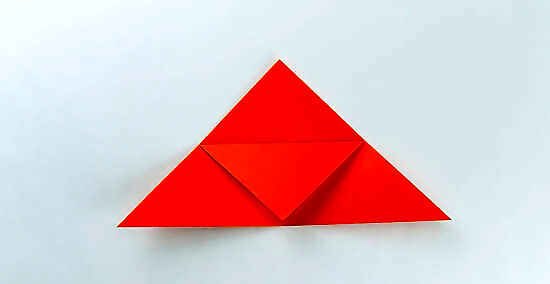
Flip the paper over, fold the bottom corner up to the top edge, then turn it back over. Turn the paper over onto the other side. Then, take the corner at the bottom and bring it up so that it meets the flat edge at the top. Crease the fold and then flip the paper back over. Don’t let the tip go past the top edge of the paper or your finished heart won’t look right.
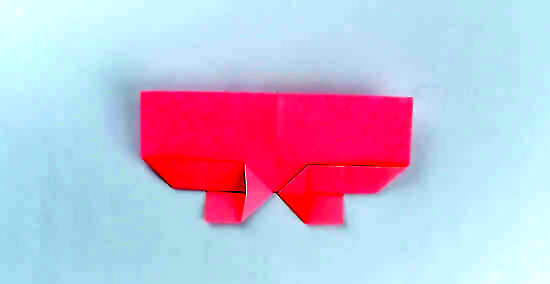
Open the left and right flaps at the bottom edge and flatten them down. Find the 2 flaps in the center of the paper along the bottom. Place your index finger inside 1 flap to open it, then press down to flatten it into a triangle shape. Repeat with the other flap. Make sure the crease in the center of the flattened triangle lines up with the bottom edge of the paper and that the 2 tips of the flattened triangles point towards each other.

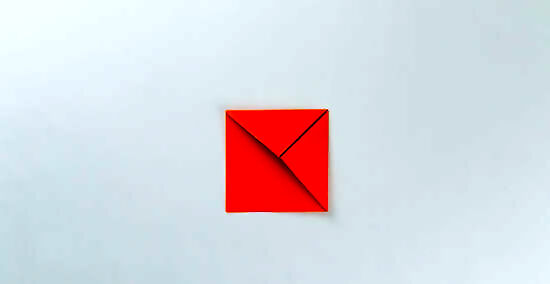
Fold the 2 square corners of the opened flaps up to meet the bottom edge. Find the small squares at the bottom edge of the paper that were created when you flattened the flaps. Take these corners and fold them up to the bottom edge of the paper to create small triangles with the tips pointing down. For example, on the right flattened flap, fold the outer right corner up and in. On the left, fold the outermost left corner up and in.
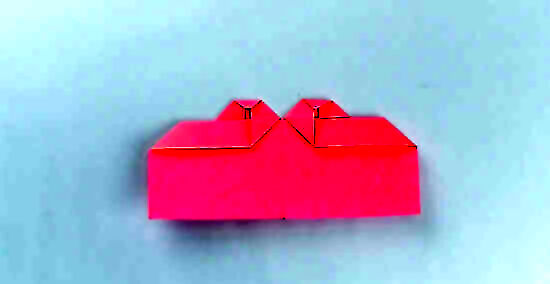
Fold the bottom tips of the 2 triangles up about ⁄4 inch (0.64 cm). To round out what will be the top curves of the heart, take the 2 tips of the small triangles that are pointing down away from the paper. Fold them up slightly and crease them to stay in place. You can fold the tips up more or less than ⁄4 inch (0.64 cm), depending on how you want to shape your heart. For instance, folding them up less will make the arches pointier, while folding them up more will make the arches flatter.
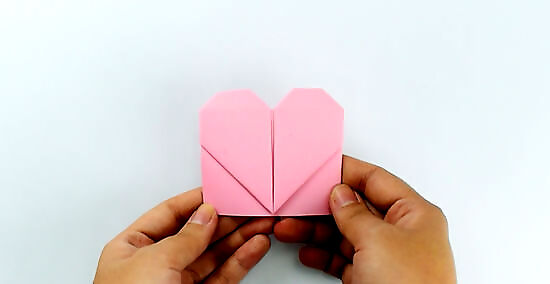
Bring the left and right edges in to line up with the middle crease. Fold the 2 outer edges of the paper in so that they align perfectly with the crease in the center. Then, press down firmly to crease the 2 folds. Avoid folding in the heart shape, created by flattening the flaps and folding them into triangles, during this step. Flip the paper over to see your finished bookmark! To use it, simply slip the page you want to mark underneath the bottom point of the heart.


Comments
0 comment