
Windows 10
Press ⊞ Win+R. This opens the Run dialog window. Back up any data that's currently on your USB flash drive that you don't want to lose. You may need to delete that data during the partitioning process.
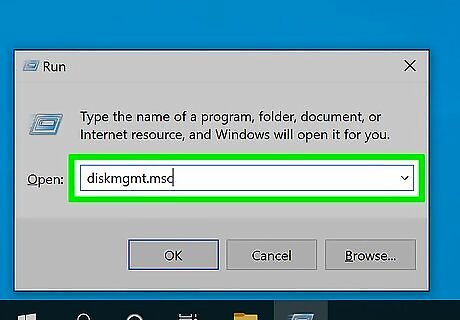
Type diskmgmt.msc and click OK. This opens the Windows Disk Management tool.
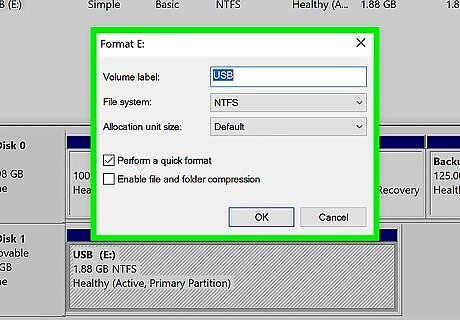
Convert your USB flash drive to NTFS if necessary. Find your USB flash drive in the list of drives at the top of the window (you can identify it by its drive letter and size). Then, look at what it says in the "File System" column. If you see NTFS here, you are good to go! If you see FAT32, you will need to convert the flash drive to NTFS so you can partition it. This will delete everything on the flash drive. Here's how to convert it from FAT32 to NTFS: Right-click your USB flash drive and select Format. Select NTFS from the "File system" menu. Click OK. Click OK to confirm that you want to erase and format the flash drive.
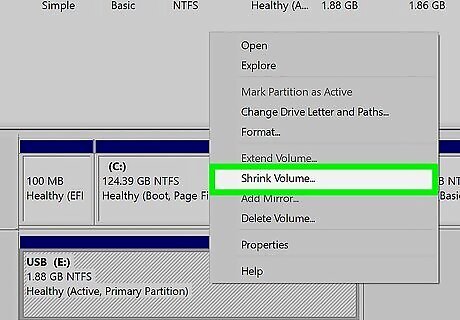
Right-click your USB flash drive in the bottom panel and select Shrink Volume. Each USB flash drive connected to your PC appears at the bottom with a label like Disk 0, Disk 1, Disk 2, etc. When you right-click the USB flash drive, a menu will expand, which is where you will find the Shrink Volume option.
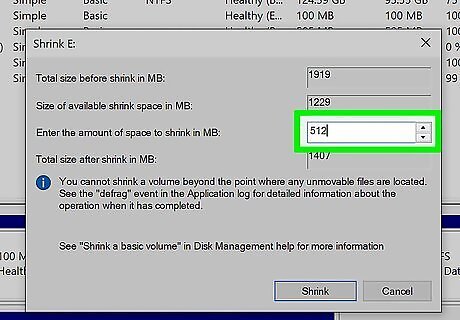
Enter the desired size of your new partition. This goes into the "Enter the amount of space to shrink in MB" area. Use the value of "Size of available shrink space in MB" as a guide to figure out how much to shrink. This is the total amount of space you can divide between your partitions. For example, if you want to partition a 20 GB drive into two roughly 10 GB partitions, and you see 20,480 as the "size of available shrink space" in MB, you can enter half of that (10,240) into the box. This will create a new 10 GB partition.

Click the Shrink button. This creates a new unallocated partition, which you'll now see next to your USB flash drive in the bottom panel.
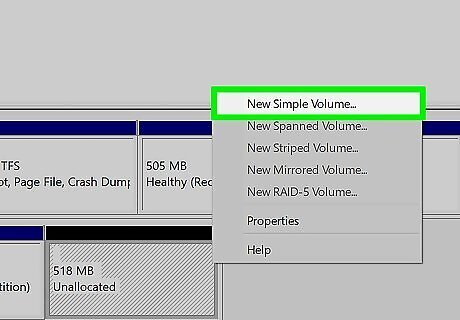
Right-click the unallocated partition and select New Simple Volume. This opens the New Simple Volume wizard.
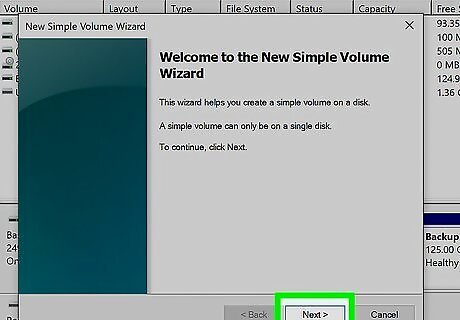
Click Next to start the wizard.
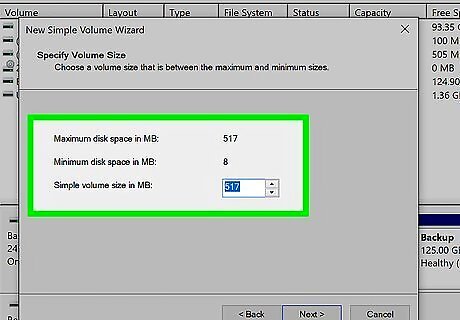
Adjust the partition size and click Next. By default, the full amount of unallocated space will appear in the "Simple volume size in MB" field. Clicking Next accepts that size so you can use all of the unallocated space for your new partition. If you want to create multiple partitions from your unallocated space, adjust the size to reflect the size of the first new partition. Then, after creating this partition, you can right-click the remaining unallocated space and restart the wizard to create the next partition.
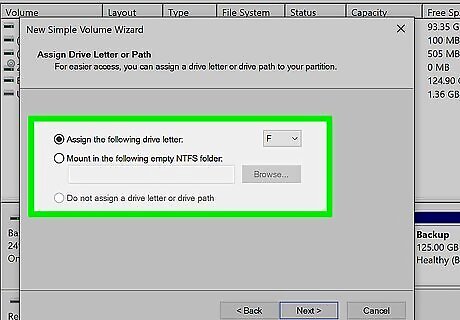
Assign the partition a new drive letter and click Next. This drive letter is how the new partition will appear in Windows.
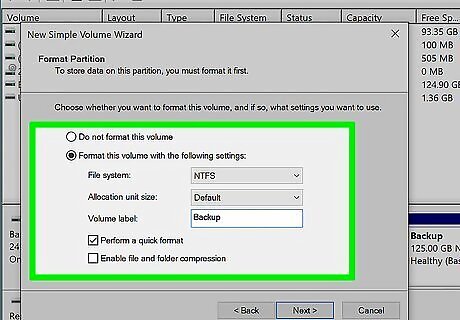
Select your formatting settings and click Next. By default, the radio button next to "Format this volume with the following settings" is selected, and some default options are filled in. Unless you know for sure that you need to change these options, leave the defaults intact. Once you click Next, the new partition will appear. If you still have unallocated space you'd like to partition further, right-click that space and select New Simple Volume to restart the wizard now.
macOS
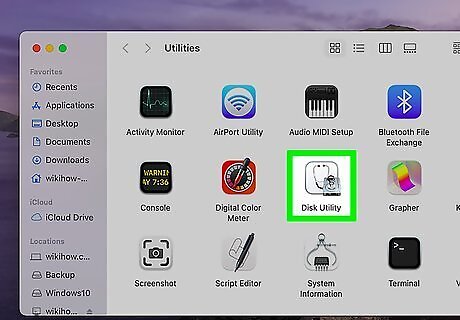
Open Disk Utility. You can find this in the Utilities folder, located in your Applications folder. Before you partition your USB flash drive, it's a good idea to back up everything that's on it that you don't want to lose.
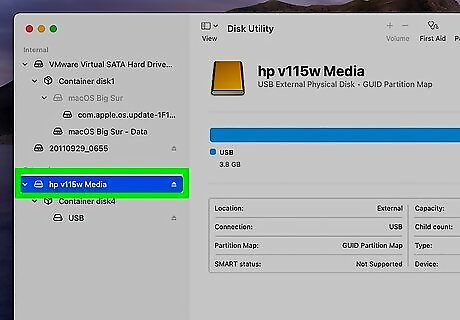
Select your USB flash drive. It's in the left panel.
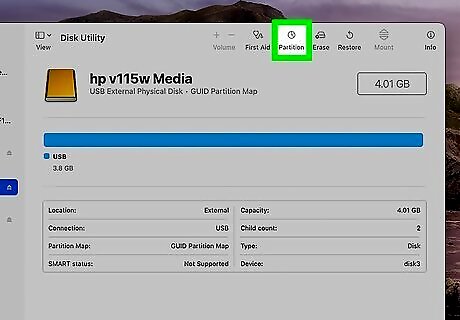
Click the Partition icon on the toolbar. It's the icon that looks like a pie chart at the top of the window.
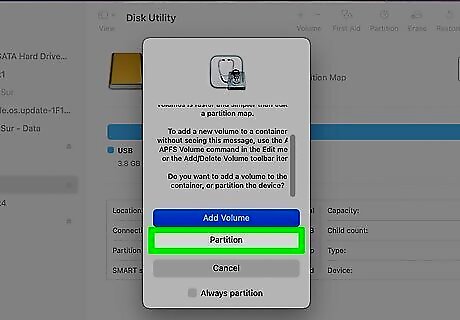
Click Partition on the pop-up window.
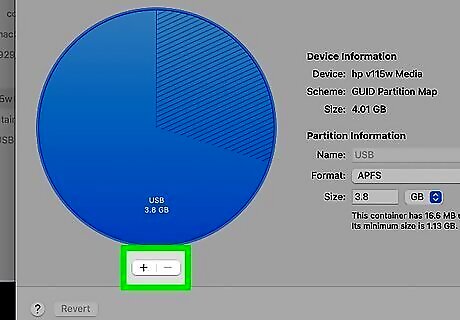
Click + to add a new partition. It's below the pie graph.
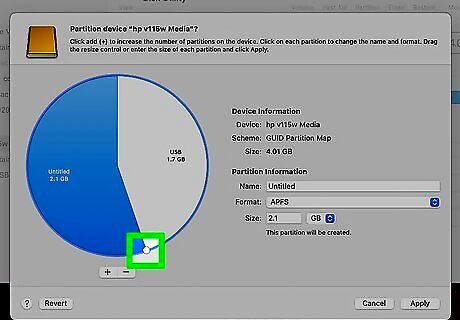
Drag the edges of the pie chart to adjust the partition size. If you already have data on the drive, the shaded area displays the amount of space on the drive it's consuming. The unshaded area represents free space on the drive—this is what you'll be turning into a new partition. If you want to have two partitions that are the same size, just move the slider so that the shaded and unshaded sides are equal. If you want to erase the data that's on the drive, click Cancel. Then, click Erase at the top of the window to erase your USB flash drive. If there is no shaded area on the drive, just skip to the next step.
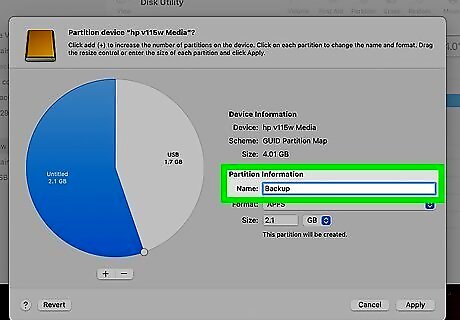
Enter a name for your new partition. Your new partition will show up on your Mac as its own drive. The name you enter here will be the name that represents the new "drive" on your Mac.
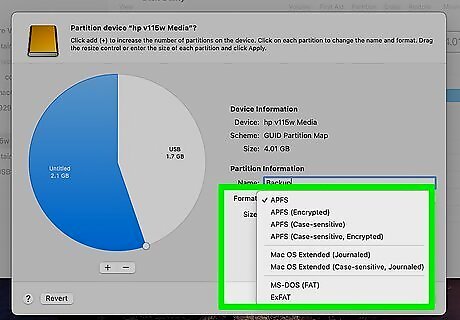
Select a file system format from the "Format" menu. This is up to you—if you want to use the drive on multiple operating systems, including Windows PCs, use ExFAT or FAT. Otherwise, choose APFS, which is the default Apple file system. If you want to change the size of the new partition, you can enter a size into the "Size" field, or drag the slider between the partitions as needed.
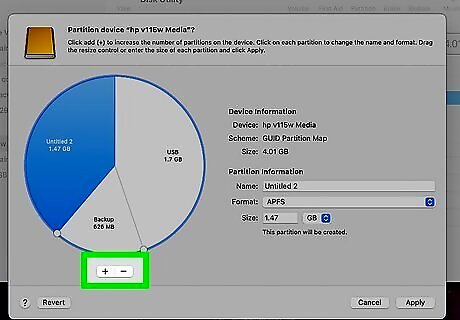
Click the + to add additional partitions. Continue adding partitions and adjusting their sizes until the drive contains all of the partitions you need.
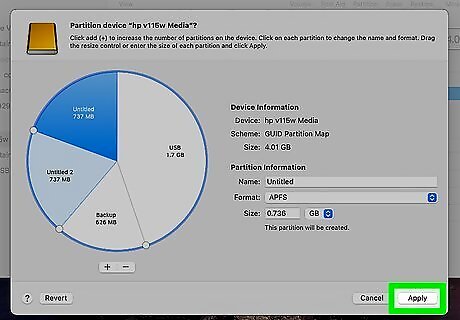
Click Apply to create your new partitions. A confirmation message will appear.
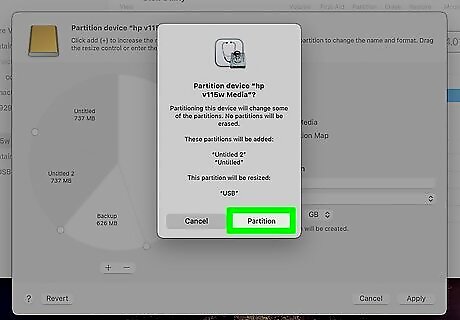
Click Partition to confirm. This partitions your USB flash drive. When the process is complete, you can click Done to exit.
Ubuntu Linux
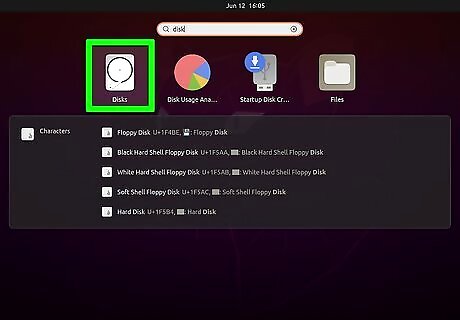
Open GNOME Disks Utility. An easy way to do this is to open the Application menu, type disk, and then click Disks in the search results. If you don't have this tool, open a terminal window and run the command sudo apt-get install gnome-disk-utility to get it now. If your USB flash drive is not already connected to your computer, plug it in now. If there is any data on your flash drive, you'll want to back it up before you continue.
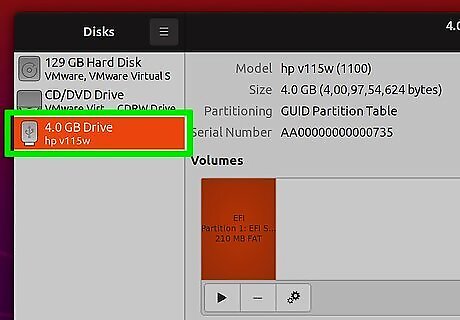
Select your USB flash drive in the left panel. You can identify your USB flash drive by the size. Make sure you don't select your hard drive instead, or else you will lose all of your data.
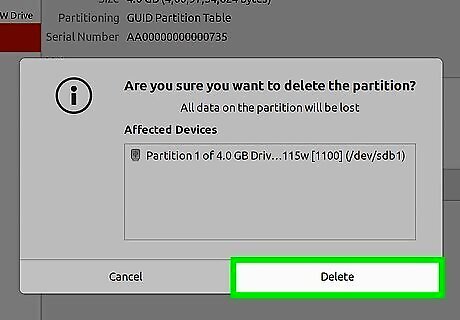
Delete any existing partitions you don't want to keep. To delete a partition, select it in the right panel and click the minus sign button. A confirmation message will appear—click Delete to confirm. Once you've deleted all partitions, the remaining space will be marked as "Free Space."
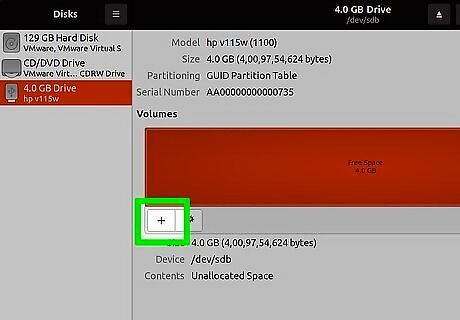
Click + to create a new partition. This opens the Create Partition window.
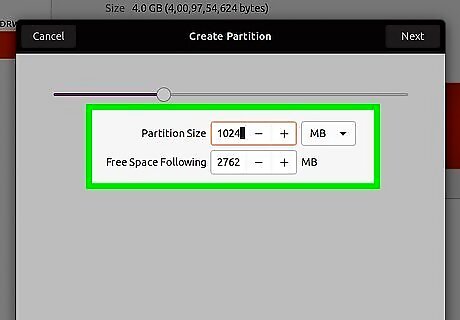
Enter the desired size of your new partition. If you only want to make one partition from the free space, just leave the default size selected, as it's the total of all free space. If you want to create multiple smaller partitions, enter the size of the first partition you want to create here.
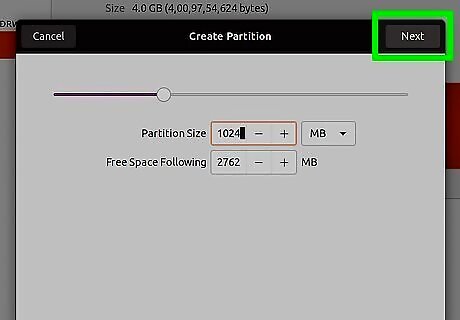
Click Next. It's at the top-right corner of the window.
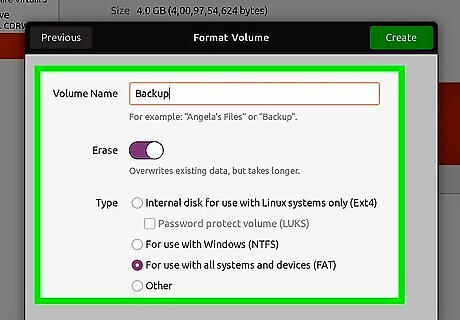
Enter the details for your new partition. Here you'll need to enter a Volume Name, which is how the drive will be identified when inserted into a computer, and select a file system type. The file system type options vary depending on your computer—the Disks utility describes the function of each in the window.
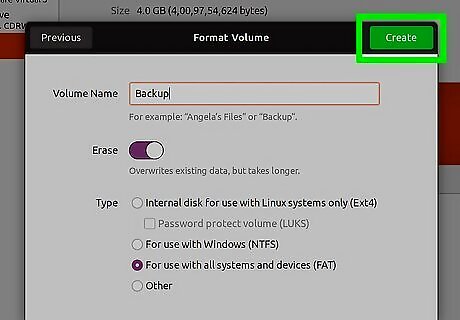
Click Create. You will need to confirm your password at this point, but once confirmed, your new partition will be ready to use. If you'd like to create another partition from the remaining free space (if any), click + again to create a new partition.


Comments
0 comment