
- Start your acorn squash in peat pots indoors before the last frost of the year, or plant them directly in mounds of soil once freezing temperatures pass in the spring.
- Give your acorn squash 6 hours of sunlight a day, 1 inch (2.5 cm) of water every week, and balanced fertilizer when blooms and buds first appear.
- Harvest your squash 45–55 days after flowering when the rind hardens and begins to turn orange. Cut the squash stem with shears and use it within 2 months.
Starting & Transplanting Seedlings
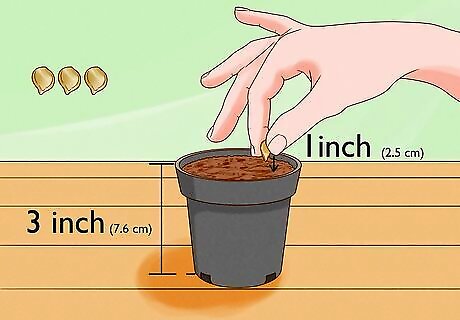
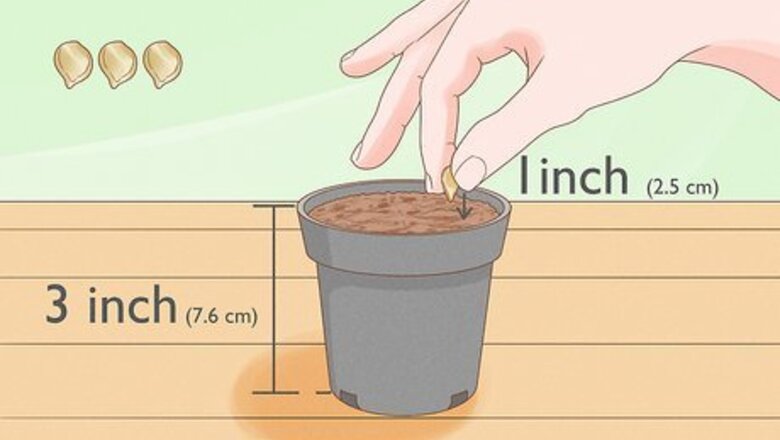
Plant 2-3 acorn squash seeds in a peat pot during mid-to-late spring. Check the last frost date for your area in the spring, and start your acorn squash seeds about 3 weeks before. Fill a 3 in (7.6 cm) peat pot with organic potting soil. Then, plant each seed about 1 inch (2.5 cm) deep into the soil and sprinkle it with water to help keep it moist. If there’s no danger of frost and the soil temperatures are consistently above 60–70 °F (16–21 °C), then it’s okay to sow your seeds directly into the ground.

Sprout the seeds in a warm, sunny window for 1–2 weeks. Acorn squash seeds thrive in warm temperatures, so maintain a soil temperature that’s about 70 °F (21 °C) or higher. Leave the squash seeds alone for about 1–2 weeks so the seeds can properly germinate and form small sprouts. Cover the pot with landscape fabric or black plastic to help warm up the soil and make the seeds germinate faster.
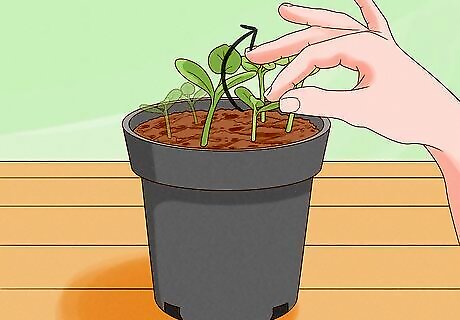
Thin out weak or dying seedlings when they’re 2 in (5.1 cm). After a few weeks of your seeds germinating, inspect the pot and look for the seedling that’s tallest and strongest. Pinch off any of the other weaker, smaller seedlings with your fingers, or trim them out of the pot with a pair of gardening scissors. Avoid forcefully pulling or yanking out the weaker seedlings, because you may hurt the root systems.
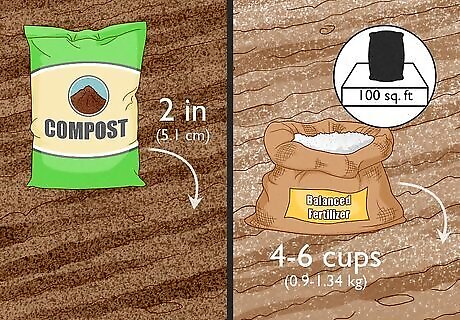
Mix a layer of compost or balanced fertilizer into your planting site. Choose a spot in your garden that gets 6 hours of sunlight during the day and start planting when the soil is above 70 °F (21 °C). Spread a 2 in (5.1 cm) layer of compost over the space and work it into the layer of topsoil so it’s thoroughly mixed. If you don’t have any compost on hand, spread 4-6 cups (0.9-1.34 kg) of balanced fertilizer over every 100 square feet (9.3 m) of soil. Balanced fertilizer has equal parts nitrogen, phosphorus, and potassium to help your squash develop strong growths. If you don’t have much garden space to spare, build a trellis or use a fence next to your squash to train it vertically. Run a soil test to determine the pH to see if it’s between 6.0–6.5. If you need to, raise the pH of acidic soil by applying a layer of lime. If your soil is too basic, lower the pH with aluminum sulfate.
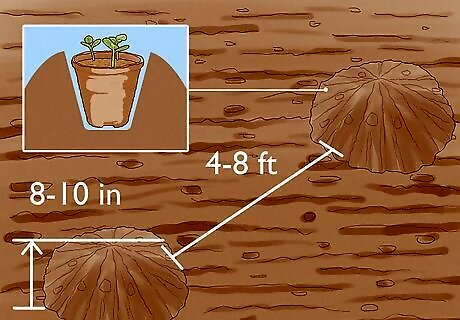
Transplant seedlings into their permanent planting spot after 2–3 weeks. Form mounds of soil that are about 8–10 in (20–25 cm) tall and around 4–8 ft (1.2–2.4 m) apart. Dig a hole on top of the mound that’s slightly larger than the diameter of your peat pot and set the pot directly inside. Fill in soil around the base of the squash seedlings. Avoid taking your acorn squash out of the pots because the roots are delicate and you could cause the plant to die when you try transplanting it. If you plant your squash seeds directly into the ground, plant 6 seeds per mound. Then, thin each mound down to 2-3 plants after they each develop 2–3 leaves. Acorn squash that is planted near a fence or trellis will not need to be mounded.
Caring for Acorn Squash

Water your squash once a week to keep the soil moist. Give your squash at least 1 inch (2.5 cm) of water every week, whether that’s from rainfall or irrigation. Try to water in the morning or early afternoon so the foliage and soil have time to dry before evening. Soak the soil to a depth of 6–8 inches (15–20 cm) so water gets absorbed by the entire root system. Avoid getting water on the plants or squash because it could cause powdery mildew to form on the surface.
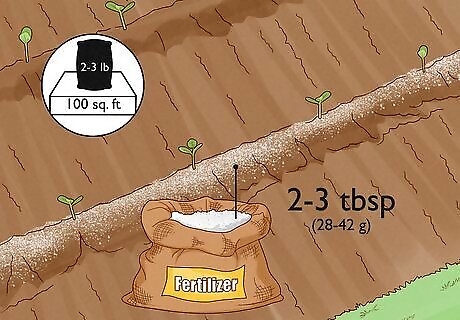
Spread balanced fertilizer onto each mound when blooms or buds appear. When you first see blooms starting to form on your squash, take balanced fertilizer over the soil and spread about 2-3 tbsp (28-42 g) around the base of each mound. Gently scratch the fertilizer into the soil with a hoe or rake, ensuring that it doesn’t touch any of the foliage. Water the soil to help the fertilizer soak in and get absorbed by the roots. Apply another round of fertilizer later in the growing season when you see vegetables starting to form.
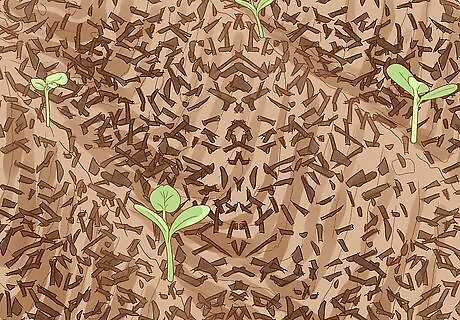
Mulch around your squash to prevent weeds from growing in. At the start of the growing season before soil temperatures are 75 °F (24 °C), roll black plastic mulch to help warm up the soil and stop weeds from coming in. If the soil is already at or above temperature, then it’s okay to use an organic mulch, like straw, compost, or grass clippings. If any undesirable plants grow near your squash, pull the weeds by hand or carefully dig out their root system with a hoe.
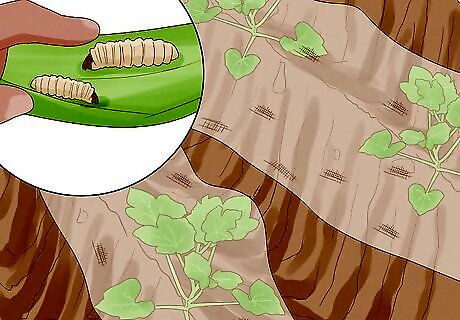
Remove or spray any pests you find on your squash. Acorn squash is susceptible to pests like squash bugs and vine borers that chew holes in the plant leaves or cause them to wilt. Look on the undersides of leaves for brown beetles with small red masses of eggs, and remove them by hand or step on them to get rid of them. If you find any grubs or larva crawling on the leaves, then spray them with carbaryl or permethrin pesticides starting in the midsummer. Alternatively, drape your squash plants with a floating row cover to keep insects from accessing them. Dig up and remove any plant debris at the end of the growing season to prevent squash bugs and vine borers from returning the following year.

Pollinate your squash by hand to ensure vegetables form. Squash have male and female flowers that need to pollinate before they form new fruit buds. Find a male flower without a spherical growth at the base, and stick a cotton swab inside to gather the pollen. Then, stick the swab into a female flower (that has a bulbous base) to transfer the pollen. While bees and other insects will naturally pollinate your acorn squash, doing it yourself helps promote more growth.
Harvesting Acorn Squash
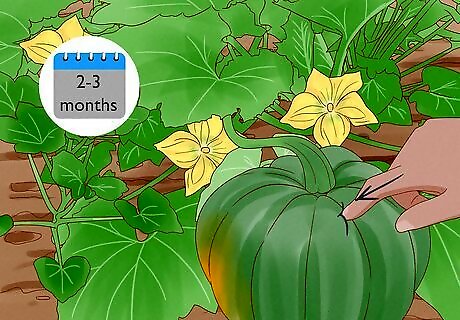
Wait until the squash’s rind hardens and changes color to harvest it. It usually takes around 45–55 days after flowering for your squash to fully mature. Check the spot of the squash that sits closest to the ground, and start harvesting if it changed from yellow to orange. If you’re still not sure if your squash is ready, try scratching it with your fingernail. If the rind feels tough and resists damage, then it’s ready to pick. Acorn squash also will have a dull surface instead of looking shiny. Be sure to harvest your squash before a heavy or hard frost occurs in your area, or else the plant may die.
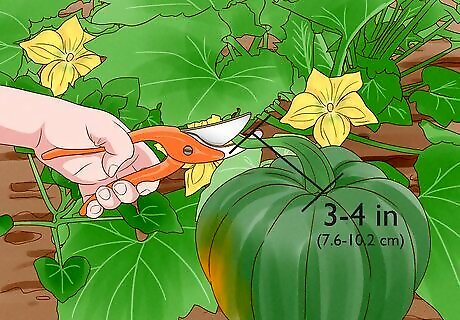
Cut the squash’s stem with a pair of garden shears. Support the squash with one hand so it doesn’t drop down when you cut it. Measure about 2 in (5.1 cm) up the stem and make your cut.
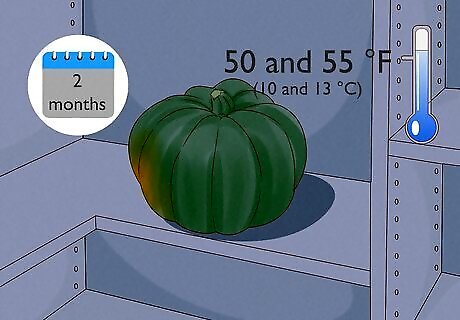
Store your squash for 1–2 months in a cool, dry, and dark place. Try to find a space that’s between 50 and 55 °F (10 and 13 °C) to keep your acorn squash. Set the squash you harvested side by side rather than stacking them so they’re less likely to develop rot. Use your squash within 2 months of harvesting it to keep it from going bad. If you cut acorn squash into pieces, store it in plastic wrap or in a plastic bag inside your fridge for up to 1 week.


Comments
0 comment