
Wrapping a Box
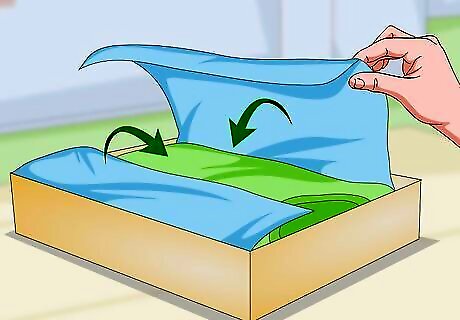
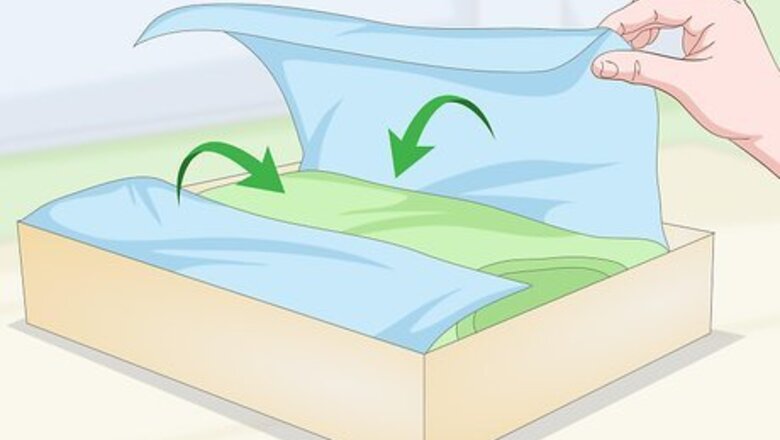
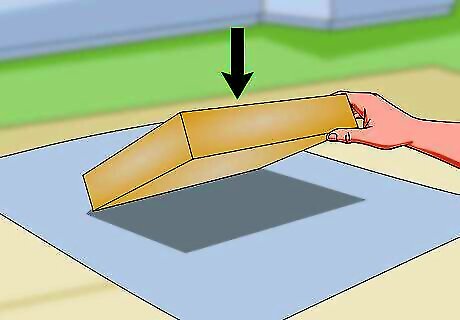
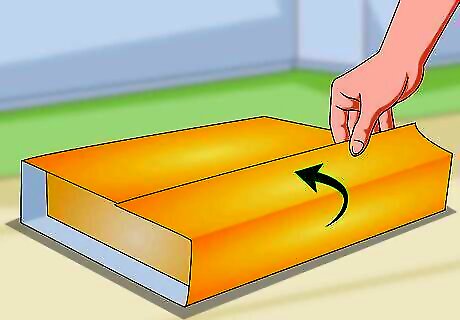
Place tissue paper and the folded shirt into a garment box and tape it closed. One of the easiest ways to wrap a shirt is to place it into a garment box, also called a shirt box. Lay 2 pieces of tissue paper in the bottom of the box, then neatly fold the shirt and lay it on top of the tissue. If you’d like, you can add another sheet of tissue paper, then place the top onto the box and tape it closed with 2 small pieces of tape. Sometimes, you can get these boxes for free when you buy clothing, especially at department stores or shops that offer gift-wrapping. You can also buy garment boxes at big-box stores, party supply stores, or wherever gift-wrapping supplies are sold. The tape will help keep the box from coming open while you’re wrapping it.
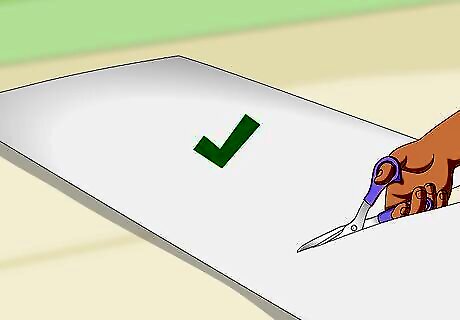
Lay the box face-down on a large piece of gift wrap. Unroll the gift wrap until you have a piece that’s big enough to wrap all the way around the box. Place the box face-down onto the non-printed side of the gift wrap with the widest sides of the box facing you. Then, use a sharp pair of scissors to cut the piece of gift wrap away from the roll. Remember, it’s always better to cut the paper bigger than you need it. You can always trim off the excess later, but you can’t add more if you cut it too short.

Pull the far end of the paper up and over the box and tape it down. Reach over the box and grab the edge of the paper furthest away from you. Pull the edge of the paper all the way over the top side of the box, so you have a 1 inch (2.5 cm) flap of paper hanging over the top edge that's closest to you. Tape this flap down securely, preferably with double-sided tape. To create neat, sharp-looking edges, use your thumb and first finger to crease the flap over the box's edge before taping.
Pull the front of the paper up to the edge you just taped. Once you’ve taped down the first side of the paper, use your thumbs to push the box back so the bottom of the wrapping paper is pulled taut. Then, pull the front side of the paper, or the part that’s closest to you, up to cover the front face of the box. Crease the paper where it folds over the edges of the box. Don’t push too hard, since you don’t want the box to tear through the paper.

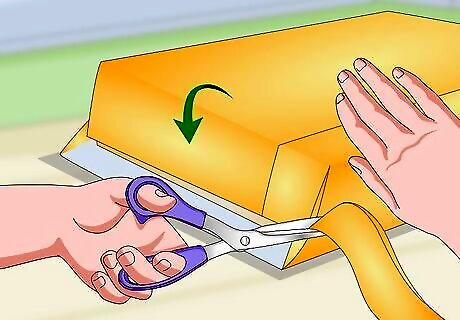
Cut any excess off the paper, but leave a 1 in (2.5 cm) overhang. Any extra paper should now reach up over the top of the box. Use your scissors to trim this paper away, but don’t cut it so it’s flush—leave about 1 cm (0.39 in) more paper than you need to reach all the way around the box. You won’t see this extra paper when you’re finished, so don’t worry if your cut isn’t perfectly straight.
Fold over the extra 1 in (2.5 cm) and tape it down. Using the edge of the box as a guide, fold the excess wrapping paper in half lengthwise, then use your fingers to crease the paper all the way across the fold. Pull the paper so it's taut against the box, then place 2-3 small strips of tape along the edge of the fold to hold the paper in place. Folding the paper creates a neat edge that looks better than if you were to just cut it to size.
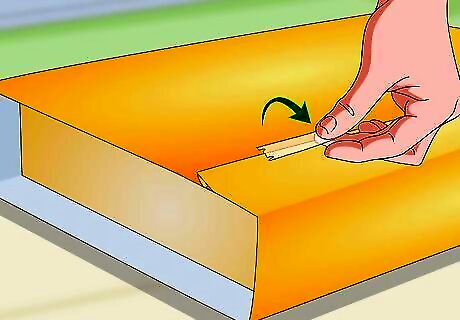
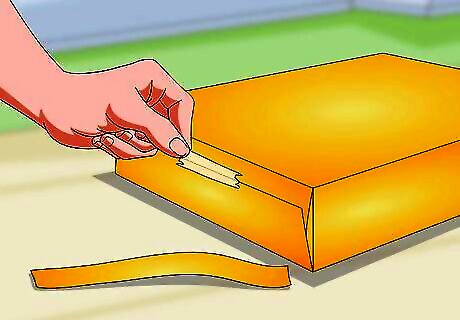
Fold down the top flap on one of the sides and cut off the excess. Turn the box so that one of the open sides is facing you. Then, fold the top piece of wrapping paper down over that side. Crease the paper where it folds over the box at the top and the bottom. Then, cut the paper along the bottom crease. If you’d like, you can fold the sides in to create triangular shapes at the corner of the box. However, folding the flaps straight down is simpler.
Tape down the top flap, then fold, cut, and tape down the bottom flap. Pull the bottom flap up so it meets the top edge of the paper. Crease it where it folds over the bottom of the box, then again at the top. Finally, cut off the excess paper and tape down the flap. Just like when you wrapped the sides of the box, it may look nicer if you leave about 1 in (2.5 cm) of overhang and fold it under before you cut and tape the flap into place.

Repeat on the other side. All that should be left now is one open side on the box. Turn the box around so the open side is facing you, then repeat the process of folding down, creasing, cutting, and taping the top and bottom flaps. That’s it, your package is wrapped! You can now add a name tag, ribbons, bows, or any other decorations that you’d like.
Using Wrapping Paper without a Box

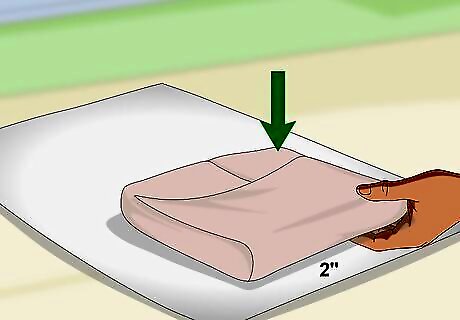
Place the shirt on top of 2 sheets of tissue paper. If you don’t have a box to wrap your shirt in, you can still wrap it. However, using only wrapping paper by itself might not make the most sturdy package, and any buttons, snaps, or pockets might cause the paper to wrinkle. To create a smooth surface, add a couple of pieces of tissue paper to your present, then fold the shirt neatly and place it on the tissue paper. You can use any type of tissue paper you like, but it will look best if it coordinates with the color of the wrapping paper. For instance, if you’re using wrapping paper that’s red, gold, and white, you could use any of those colors. The shirt can be face-up or face-down at this point.
Wrap the sides of the tissue paper neatly around the shirt. Fold one side of the tissue paper neatly over the left side of the shirt, followed by the right side. Then, fold the bottom of the tissue paper up, and fold the top of the paper down. This will create a neat square or rectangle that will be easier to wrap. Don’t pull the tissue paper too tightly, or it might tear.
Cut a sheet of wrapping paper long enough to wrap around the gift. The paper should be a little more than twice as wide as your package, but it only needs to be about 4 in (10 cm) longer than the height of the folded shirt. That will leave enough so you can fold down the top and bottom flaps when you’re finished. A heavier wrapping paper is best for this type of present, since it’s less likely to tear.Tip: Cut the paper a little bigger than you think it needs to be, then trim it later.
Place the shirt about 2 in (5.1 cm) from the bottom of the paper. Lay the wrapping paper that you just cut face-down on your work surface. Then, place the tissue-wrapped shirt on top of the sheet, leaving just enough of an overhang that you can close the bottom of the package later. If you cut your paper to size, the shirt will probably be in the center. However, if you left excess, it’s best to have all the extra paper on one side—in this case, the top—so you only have to make one cut later.
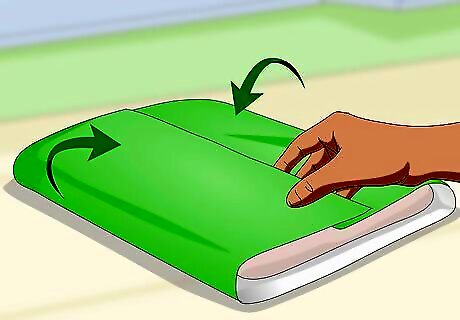
Wrap the paper around the gift side-to-side and tape it down. Fold one side of the wrapping paper all the way around the shirt to the opposite side. This should leave you with a small amount of overhang. Fold and crease the excess paper lengthwise, then tape down the flap you just made. If you wanted to overlap the paper all the way across the back side, wrap it over the package one more time, then crease, cut, and tape any overhang.

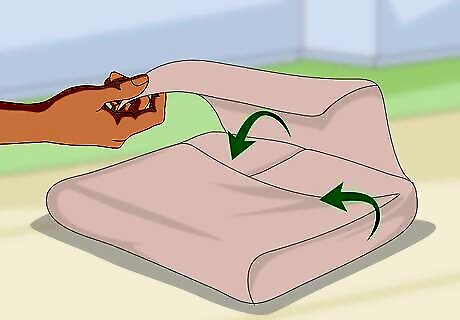
Fold the paper on the top and bottom of the package and tape it down. Once you’ve finished closing the sides, you should see that the top and bottom of the present are still open. To close them, simply fold them toward the back of the gift, then tape them down. If you’d like, you can fold in the corners of the paper, but this isn’t necessary.
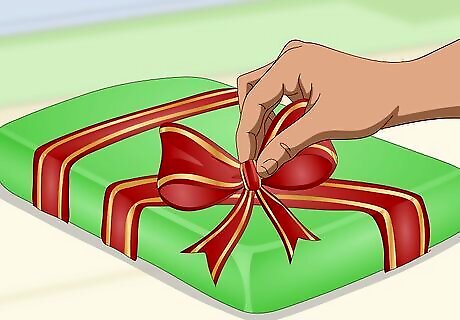
Add any embellishments you’d like. Now that your shirt is wrapped, you can add ribbons, bows, flowers, a name tag, or anything else you’d like. Feel free to get creative! However, since there’s nothing sturdy beneath the surface of the paper, avoid trying to write on the gift with an ink pen, since you might punch through the gift wrap and leave a hole in your present.
Making a Christmas Cracker
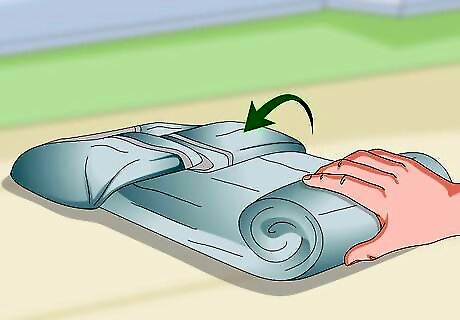
Fold in the sleeves of the shirt, then roll it tightly from the bottom. Lay the shirt flat in front of you, either face-up or face-down. Fold the sleeves and sides of the shirt in toward the middle to create a rectangle shape. Then, starting from the bottom of the shirt, roll it up tightly, like a burrito. This will create the shape for your Christmas cracker, which resembles a wrapped piece of candy. Tip: Wrap rubber bands around the shirt if it won't stay rolled!

Lay the rolled shirt on 3 sheets of tissue paper. Spread 3 sheets of tissue paper, all stacked together, on your work surface. Then, place the rolled shirt near the bottom of the top sheet of paper, an equal distance from either side. Although this gift style is called a Christmas cracker, you can use it for any occasion! If you’re wrapping a shirt for a birthday present, for instance, you might use tissue paper in the recipient’s favorite color.

Roll the shirt in the tissue paper. Pull the bottom of the tissue paper up over the shirt, then roll the tissue paper around the shirt, using the same technique you did when you rolled the shirt. However, don’t pull the tissue paper too tightly, since it could tear. Stop when you get about 1–2 in (2.5–5.1 cm) from the edge of the paper.
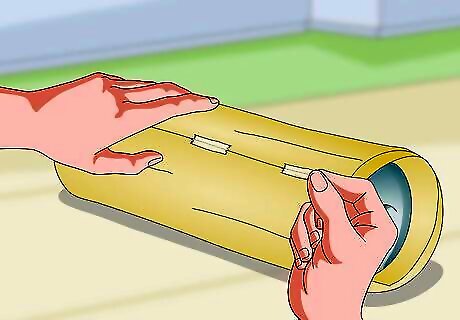
Fold the last piece of tissue paper over, then tape it down. By creating a small, folded edge from the last 1–2 in (2.5–5.1 cm) of tissue paper, you’ll give the tape something to adhere to. Once you’ve folded the paper down, use double-sided tape to attach the flap to the tissue paper beneath it. In addition to providing security, a folded edge tends to look nicer than the raw edge of a sheet of paper.
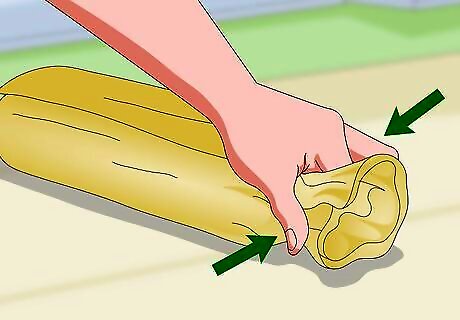
Squeeze the tissue paper just below the shirt. Feel along the tissue paper until you can tell where the shirt stops. Then, move your hand about 1 in (2.5 cm) from the end of the shirt and grip the tissue paper. It should collapse in easily, creating a shape that looks like a hard candy wrapper.

Wrap the crease with a piece of ribbon, then repeat on the other side. Take a 1 ft (0.30 m) piece of wire-edged ribbon and wrap it around the place where you just squeezed the tissue paper. Tie the ribbon securely, then find the edge of the shirt on the other side of the package and tie a ribbon there as well. You can use any ribbon you like, but wire-edged ribbon will give the gift more stability, because it’s less likely to become untied. If there’s any excess ribbon, cut it off. That’s all there is to it! You can add a name tag, wrap the gift in more ribbons, add stickers, or anything else you’d like! However, keep in mind that tissue paper is fragile and shows wrinkles easily. For the package to look its neatest, avoid handling it too much once it’s wrapped.


Comments
0 comment