

Calculating Runoff
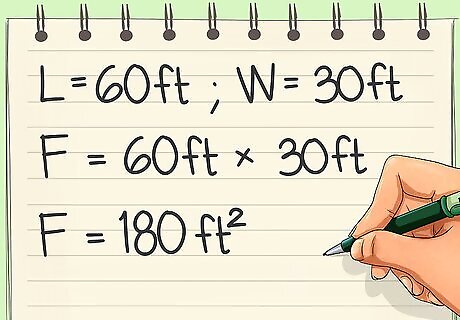
Determine the footprint of your structure (F) in square feet: Measure along the length of the house or building and along the width of the house or building (in feet). Multiply the two figures together to obtain the square footage of your roof.
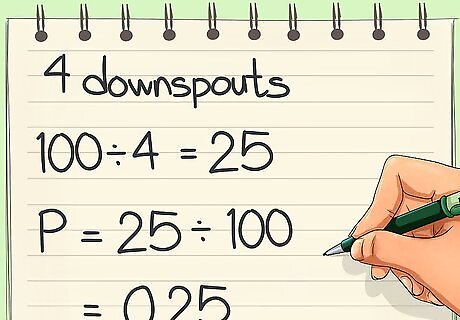
Determine the percentage of water collected from each downspout (P). Count the number of downspouts coming from your roof. Divide 100 by the number of downspouts in order to obtain the percentage of water collected from each downspout. Convert the percentage to a decimal by dividing the percentage by 100.

Calculate the area of square footage that each downspout will be collecting from in a rainfall (A). Multiply the area of your roof by the total obtained in step 2, as outlined in the following equation: F x P = A
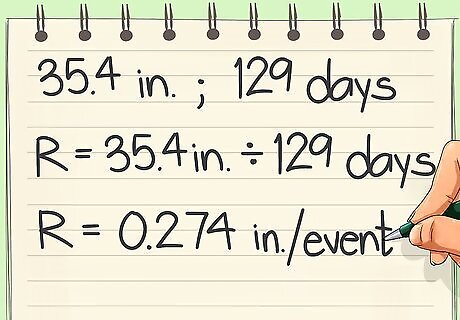
Estimate the rainfall per event in your area (R) by dividing the annual precipitation rate by the number of rain days per year. For example, if it rained 35.4 inches in 2010, with 129 calculated days of rainfall, you would divide 35.4 by 129 to get the average of .274 inches per event.
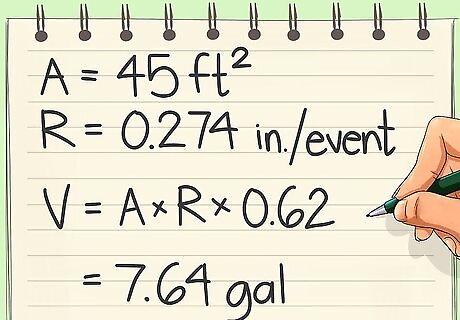
Calculate the volume of water each downspout will collect in a rainfall by using the following equation: A x R x 0.62 = V (Volume in gallons)

Calculate the average annual runoff coming out of each downspout (R1) by using the following equation: A x R1 x .062 = V
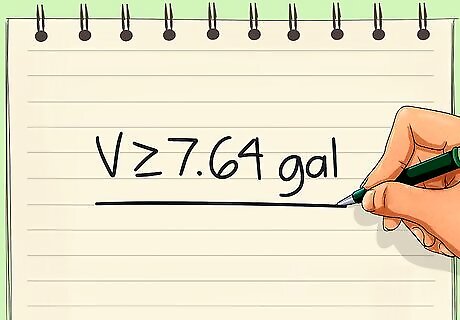
Determine the gallon size of your rain barrel based on the calculations obtained from steps 6 and 7. Depending on the amount of rainfall which will be collected annually from your rooftop, you may opt to build and attach multiple rain barrels.
Building a Rain Barrel

Clean the rain barrel by mixing the castile soap and lemon juice together. Rinse thoroughly afterwards.
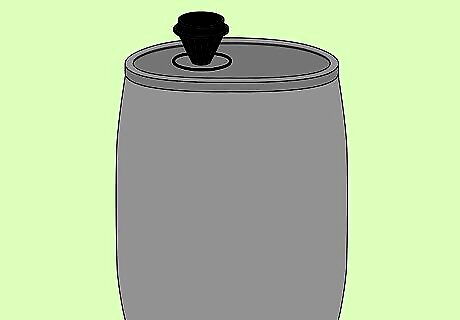
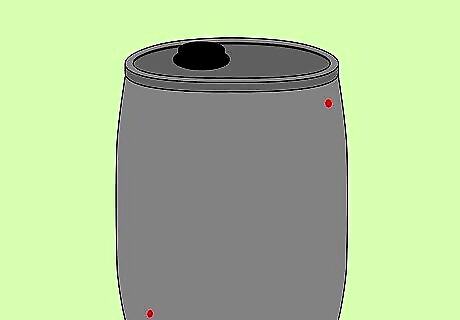
Using the felt tip pen, trace the circular outline of the atrium grate on top of the barrel. Use the top part of the grate to trace; make sure no part of the circle is closer than 4 inches to the edge of the barrel.
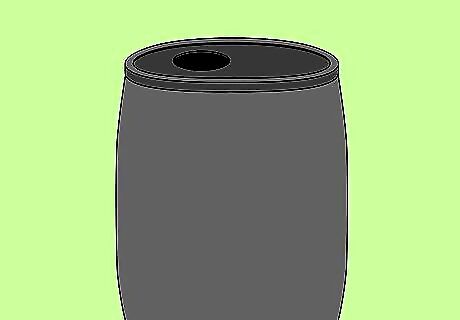
Use the utility knife to cut along the traced line, creating a hole in the lid. Be sure to cut as close to the trace as possible, allowing for a snug fit of the atrium gate to the hole.
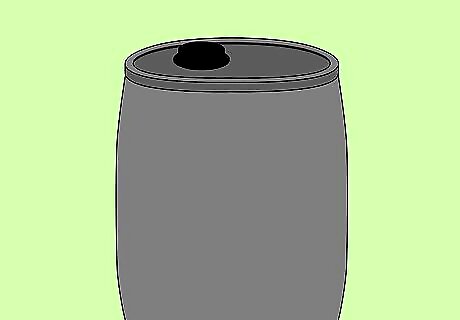
Place the atrium grate in the hole, filter side into the barrel, and twist lightly to secure in place.
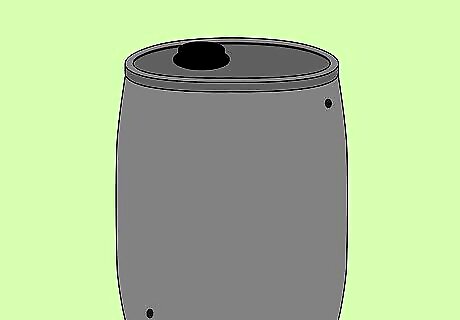
Determine where you want to place your spigot hole, and mark it with your felt tip. This should be approximately 2 inches up from the bottom of the rain barrel. Mark a spot for your overflow, approximately 2 inches from the top of your barrel and 90 degrees to the right or left of the spigot hole.
Use the 29/32 inch drill bit to drill the overflow and spigot holes.
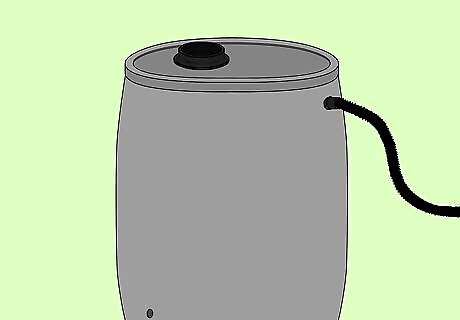
Attach a sump pump drain kit to more accurately direct your overflow. Using your file, work along the edges to expand the hold to approximately 29/32 of an inch. (Use your drill bit to gauge the size. It should fit snugly in the hole.) Attach a ¾ inch male PVC adapter from the outside of the overflow hole to a ¾ inch female adapter on the inside of the hole. To do this, attach the female to male adapter, and twist the male adapter through the hole. Caulk the inside and outside of the holes with silicone caulk, and allow 20-30 minutes to set. Place the sump pump hose onto the male adapter on the overflow hole to redirect the water.
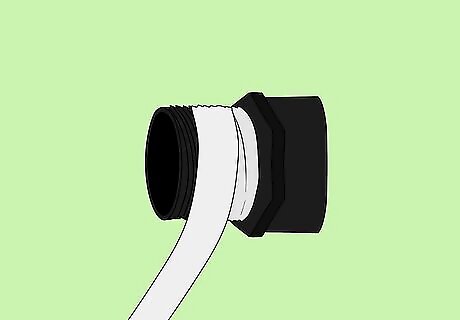
Use plumbing tape to wrap a ¾ inch PVC male adapter threads so there are no threads exposed. Three times around the threads should be sufficient.

Secure the spigot to the adapters. Place the adapter inside the barrel by setting the threaded end of the adapter through the hole and screwing the two parts together. The spigot should be tight to the barrel.
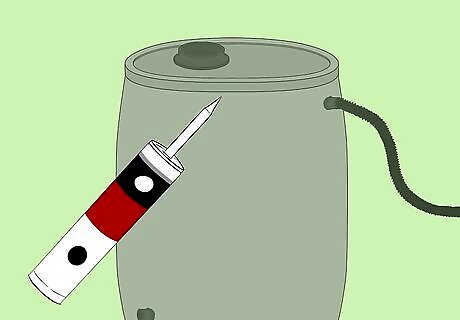
Use the silicone caulk to seal around the inside and the outside of the spigot hole by tracing a ¼ inch thick line of caulk along the edge of the spigot and around the interior adapter. Allow 20-30 minutes for the caulk to set.
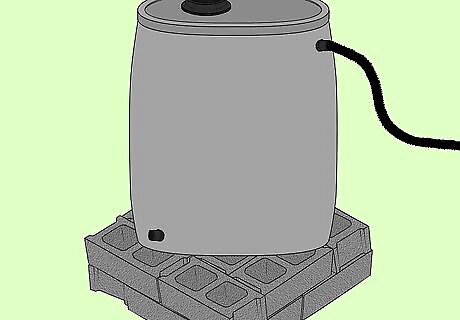
Locate a level spot underneath a downspout, and place the concrete blocks lengthwise next to each other under the downspout. Position the rain barrel centered on top of the blocks. This will allow you room to access the spigot. You may create a more stable “pad” by stacking 16 blocks, alternating directions.
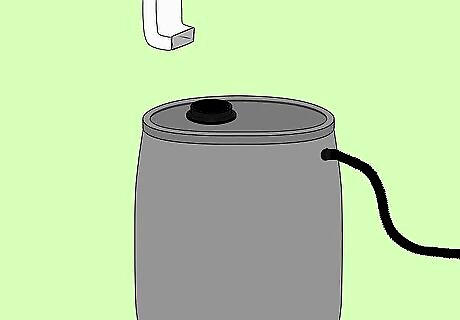
Measure and mark the downspout 4” above the top of the rain barrel, and use the hacksaw to cut the downspout fitting.

Crimp the end of the elbow using the pliers. To do so, grasp the edge of the elbow with the pliers and bend the edges of the elbow opening inward.
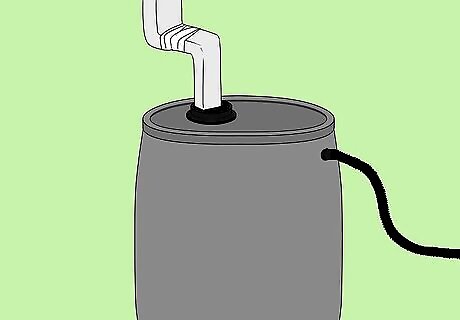
Insert the 90 degree elbow into the existing downspout, and secure in place by wrapping the overlapping edges with plumbing tape. Be sure to position the elbow over the atrium grate.

Attach the elbow by using the ¼” screw bit to screw the zip screws into the overlapped fittings. Attach one screw to the front and to each side. Remove the plumbing tape once the elbow has been secured in place.


Comments
0 comment