
Removing Old Strings

Change your strings when they are rusty, gummy, or falling out of tune quickly. If you're a serious guitar player you'll be changing your strings frequently, and some musicians change weekly. If your strings feel slow and sticky, or you have to re-tune frequently, you're due for new strings. If you haven't restrung in 3-4 months, get new strings. If you're about to play a big gig, change the strings that morning to prevent unexpected breaking.

Note the path of each string before removing it. If you're new to tuning, you want to have a good sense of how the guitar should look. Take a picture of the strings, or simply look up a picture of your guitar online. While it isn't complicated, you want a good sense of how the guitar is strung before beginning. Though it is rare, some guitars have special holes or winding patterns near the strings. Don't cut the strings off without taking a quick look at everything.

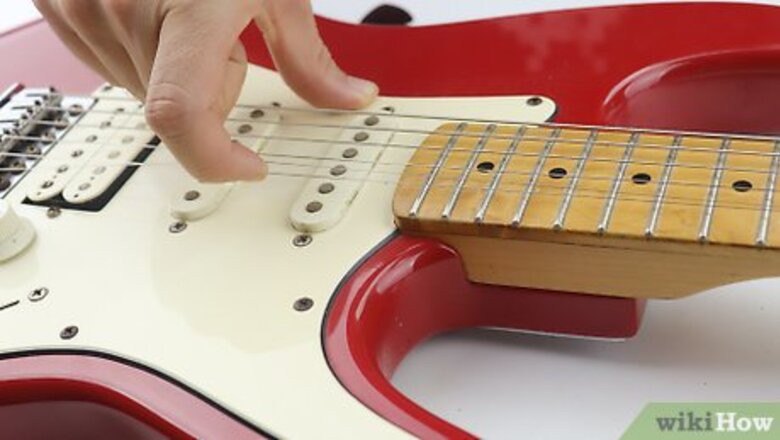
Loosen the old strings by down-tuning. Turn the tuning machine or peg to loosen each string enough that you can unwind the string and pull it out but hand. You'll know you're loosening if, when plucked, the string sounds deeper. While you can also cut your strings off, this method eases tension gradually and, in the worst case scenario, you can reuse an old string if one breaks while restringing. If you're a beginner, just loosen one string at a time. Then replace it and repeat with the next string. Once loose, you can unwind the string off the tuning peg and free it from the neck of the guitar.
Remove the strings from the bridge. On a regular bridge, like a Fender Strat or any other string-through guitar, just pull the strings out of the back of the guitar's body. To make it easier, carefully push the strings through, providing some slack and making them easier to grip. Grab the string by the small, donut-shaped metal end and slowly pull it through the guitar. Most guitars are strung in a simple, straightforward manner, so just follow the string through the guitar to remove it. Do not yank the strings out. Protect your guitar by taking your time. If you have a wrap-around bridge, you will be able to pull them out of the underside of the bridge. Wrap-arounds started out as Toms when players like ZZ Top wrapped the strings around the tailpiece to give the string height a low profile without any buzz.
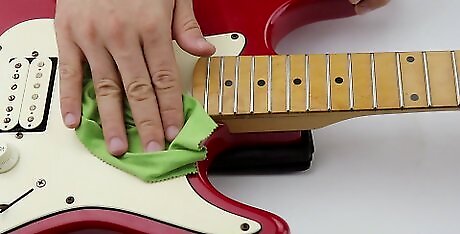
Clean your unstrung guitar with a lint-free cloth. Use this time to remove all of the dust, grime, and dirt from the neck of your guitar. This will make the guitar look good, protect the new strings, and actually make your guitar feel a little faster. For deeper cleaning, purchase a bottle of fret-cleaner from your local music shop.
Restringing the Guitar

Purchase the correct strings for your guitar. 95% of the time you should get the "regular weight," or "lite" strings. While some guitarists use heavier gauges or odd string configurations, you can't simply grab a set of strings if your guitar is not made for it. Strings that are too heavy for your guitar can warp or bend the neck without the proper adjustments, so stick to regulars until you know more about your guitar. In general, you want your high E to be a ".008-.0011" thickness. This is for medium, lite, and extra lite strings. If you use drop tunings, like a drop D, you might want heavier strings. Ask your music store staff for a specific recommendation.

Lay the guitar on a flat, soft surface at a comfortable height. Give yourself plenty of room to work, laying the guitar down on a table so that you can adjust it comfortably. Make sure to place a towel or blanket underneath to prevent scuffing or scratching. Some people like resting the head off the edge to make tuning easier.

Turn the hole of the tuning post so that the hole faces you. This hole should point away from the string so that it is parallel to one of the frets. If you were holding the guitar and playing it, the hole would be pointing up.
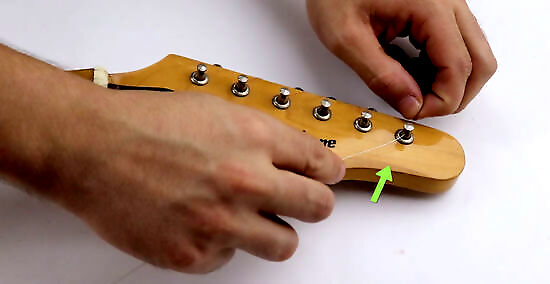
Thread your first string through the bridge and into the tuning peg. Thread it from the inside of the guitar out. In general, most guitarists will begin with their heaviest string, the top E. It will often be marked as "6th string," or by the highest gauge number (usually around .050). Slide it in the opposite way you took the other strings out, then run it through the hole in the tuning peg, pulling the string away from the guitar. Make sure you leave 2-3 inches of slack, as well -- you don't want the string to be taut before you even start tightening. The tuning pegs aren't marked, but you should just replace the strings in the same order you took them out. On most electric guitars, the first peg is for the top string, then each one further towards the tip of the head is for a string further down.
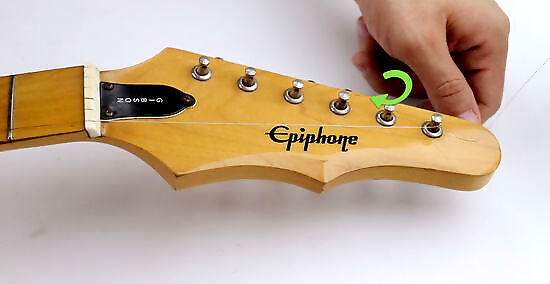
Grab the string on both sides of the peg and crimp it in an "s" shape. Try not to overthink this. Simply grab both sides tightly, then turn your hands clockwise to crimp both sides of the string along the tuning post. If you pulled the string out, it would look like the "S" in the Van Halen logo. Your right hand will be coming towards your body, away from the guitar. Your left hand will be pushing up, in towards the other tuning pegs.
Wrap the end of the string around the other half to lock the string in place. Take the end of the string and pull it under the other side of the string (the side being fed into the tuning post). After you go underneath the string, bring the end back over the top and pull it taut, pulling towards the very tip of the guitar. You're basically creating a loop with the end of the string around the rest of the string. You'll have a small coiled bit of string right where the string meets the tuning peg.

Lightly hold down the string as you slowly tighten it. Place your index finger on the string 1-2" before it meets the tuning peg. You don't want to pin it, just hold it down. Then you can turn your tuner slowly counter-clockwise. Make sure that your string is winding around the peg in a uniform manner. Use a tuner to slowly get yourself up to the proper tension. When in doubt, try not to over-tighten -- this causes strings to break.

Repeat the process on the rest of the strings. Once you've got the first one done, repeat the process on the rest of the strings, working through the packet. Remember to clean the fretboard after removing a string, to leave some slack in the string before tightening, and to crimp the string in place before starting to turn. If your head has a 3x3 set-up, remember that the lower set of tuning pegs must be turned in reverse. Simply repeat the proceeding instructions, replacing left with right and up with down.
Cut the ends of the string off. Use wire cutters to remove the excess string at the end, though you may want to leave 1/2" or so to allow deeper tunings, if you desire. Unlock your visual learning style. "As someone who learns best by seeing stuff, the videos here were a huge help for me. Just reading how to restring a guitar didn't make sense. Being able to watch the steps made everything click. Now, I can remove the old strings and put on new ones, thanks to the pictures and videos provided." - Joel J. Discover a new passion later in life. "At 70 years old, I've just started learning guitar. As a real beginner, the step-by-step instructions help me understand what to do. Even though I'm starting decades late, I love that I can pick up this new skill! This article teaches me how to string my guitar properly from square one." - Lisa H. Gain independence with DIY skills. "I never knew how to restring my guitar before, so I always had to ask for help. But the tips here taught me how to do it on my own. I can take off the old strings and put on new ones without any issues now. I like that I can take care of my own instrument instead of relying on others." - Rick S. Master maintenance without fancy tools. "I thought you needed special equipment to restring a guitar. But these instructions show me how to do it with just basic stuff. The tips for wrapping the strings prevent them from slipping out. Now I can keep my guitar sounding great without expensive gadgets or taking it to the music shop." - Nate T. Did you know that wikiHow has collected over 365,000 reader stories since it started in 2005? We’d love to hear from you! Share your story here.
Tune your guitar frequently once the new strings are on. As the strings get used to the tension, they slowly stretch. This only occurs for the first 1-2 days, and can be avoided by regular, constant tuning as you put the strings on.


Comments
0 comment