views
Syncing Notes on Mac
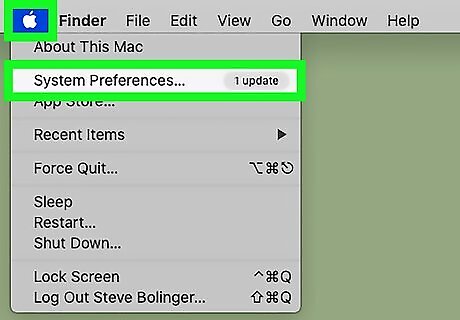
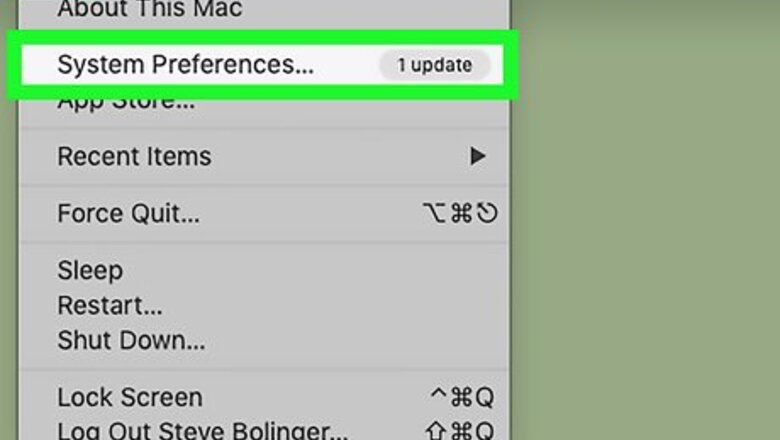
Open System Preferences on your Mac. Find and click the iPhone Settings App Icon icon in your Applications folder to open your preferences menu. To open System Preferences you can also do the following: Click on Mac Apple Click on System Preferences...
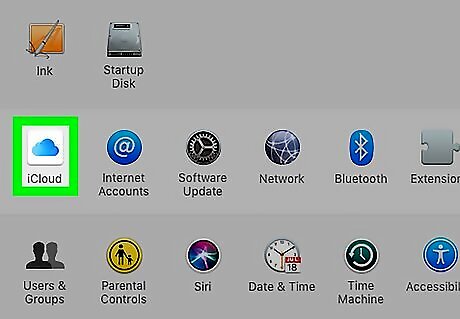
Click iCloud in System Preferences. This option looks like a iPhone iCloud icon on the third row. It will open your iCloud settings.
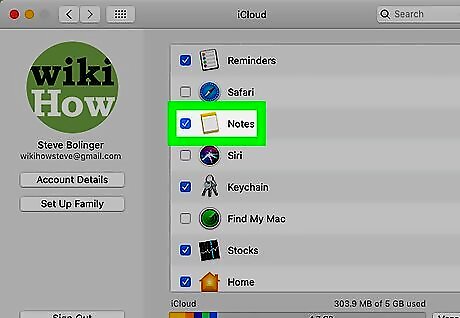
Click and check the box next to Notes. The Notes icon looks like iPhone Notes App on the menu here. This will enable syncing your notes via iCloud between all your devices. All your iCloud notes from other devices will be automatically downloaded to your Mac. If you're not sure how to enable syncing via iCloud on iPhone or iPad, you can check out this article for some help.
Exporting Notes on Mac
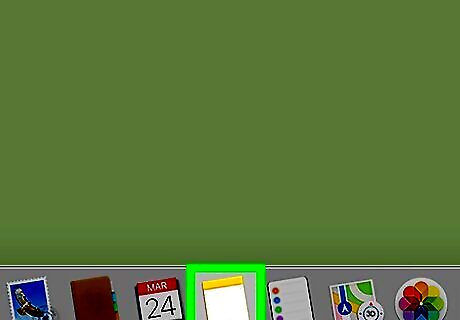
Open the Notes app on your Mac. Find and click the notepad icon iPhone Notes App in your Applications folder or your Dock to open Notes.
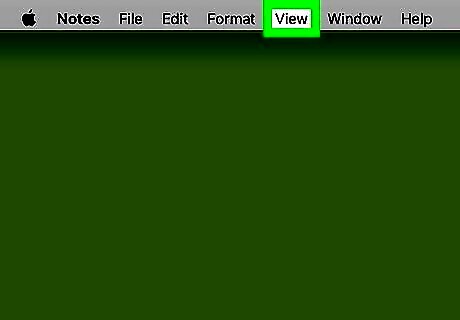
Click the View tab on the menu bar. You can find it between Format and Window in the upper-left corner of your screen. It will open a drop-down menu.
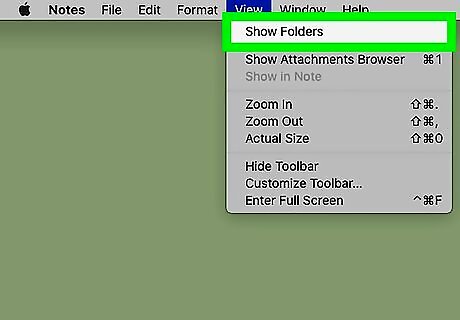
Click Show Folders on the menu. This is the first option at the top of the View menu. It will expand the folder menu on the left-hand side of the Notes app. Alternatively, you can click the Show Folders icon on the top-left of the Notes app. It looks like a square with a menu panel in the upper-left corner. If you already have the folder menu expanded, you'll see Hide Folders instead of Show Folders here. In this case, you can skip this step.
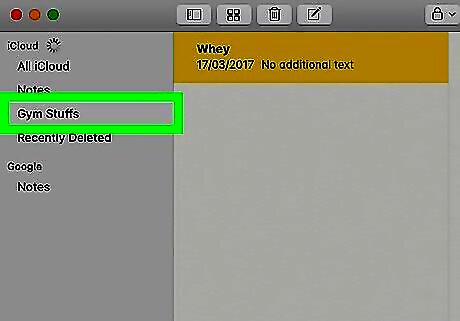
Click a folder on the left panel. You can see all the iCloud folders under "iCloud" here. You can select All iCloud to view all your iCloud notes. If you don't see the folder list on the left, click the View tab on the menu bar at the top, and select Show Folders.
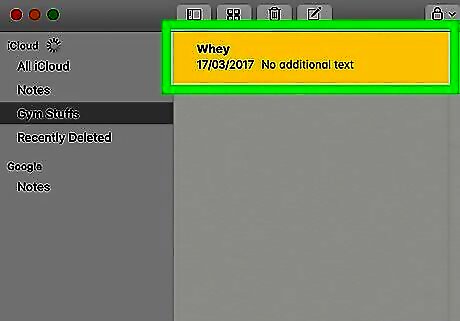
Select the note you want to save. Click on the note on the list to select it.
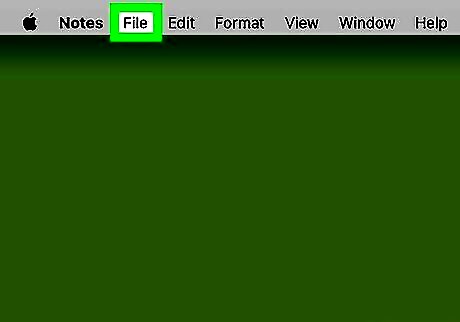
Click the File tab on the menu bar. It's located near the Apple icon in the upper-left corner of your screen. It will open a drop-down menu.
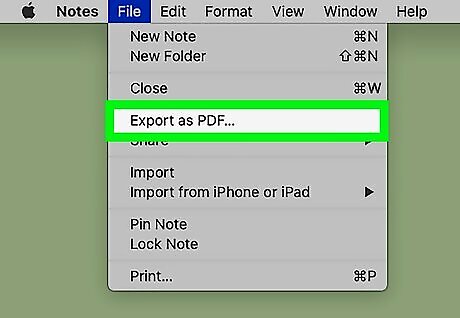
Select Export as PDF on the File menu. This will open a new pop-up window to select an export location.
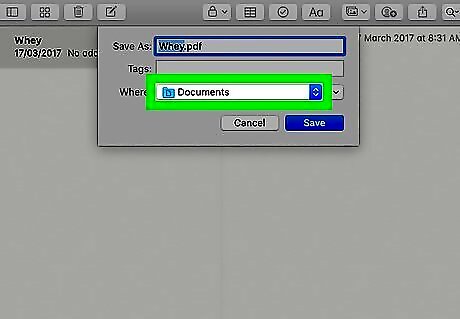
Select where you want to save your note. Find and click the folder where you want to save your PDF download in the export window. You can also edit the PDF file's name here.
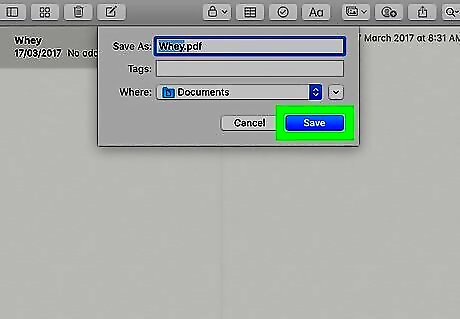
Click the Save button. This will export your note as a PDF document, and save it to the selected location on your computer's local storage.
Syncing Notes on Windows
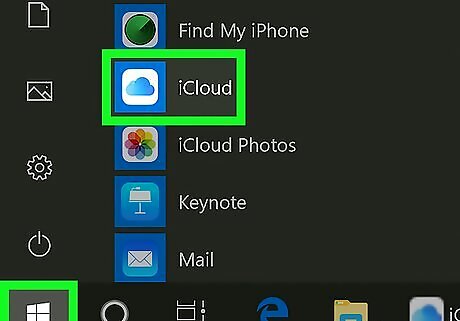
Open the iCloud desktop app on your computer. The iCloud icon looks like iPhone iCloud on the Start menu.
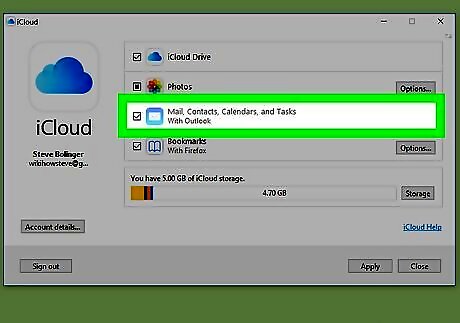
Click and check the box next to Mail, Contacts, Calendars, and Tasks. This option enables syncing your all your iCloud data to Microsoft Outlook on your computer. This will also sync and download all your iCloud notes to Outlook. This option says "With Outlook" since iCloud uses Microsoft Outlook to sync to a PC.
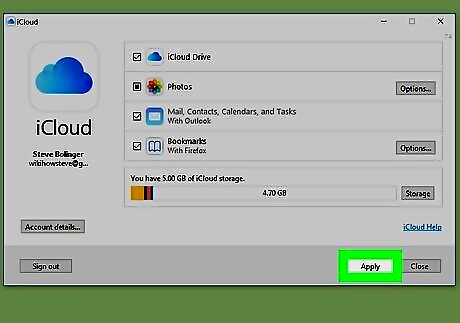
Click the Apply button. This will apply your new settings, and sync all your iCloud data to Outlook on this PC, including all your notes. Make sure to also sync your iCloud notes on your iPhone or iPad if you're using one. You can check out this article for some help.
Exporting with Outlook on Windows
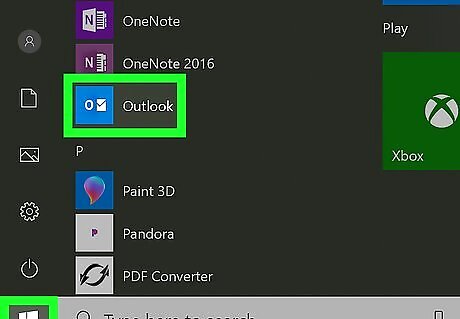
Open Microsoft Outlook on your computer. The Outlook icon looks like a blue-and-white envelope and an "O." You can find it on your Start menu. Make sure iCloud is set up and synced on your computer. Check out this article if you need help setting it up.
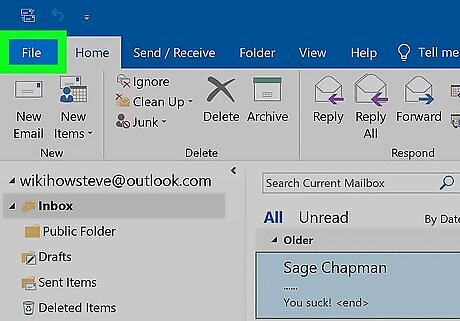
Click the File menu on the top-left. This button is in the upper-left corner of the Outlook window. It will open a full-window menu.
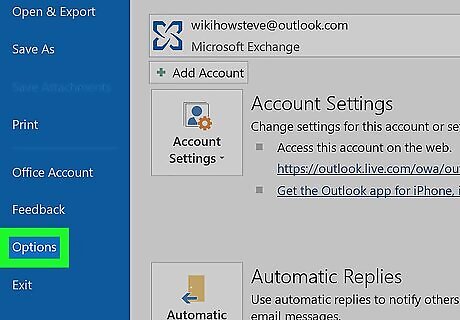
Click Options at the bottom of the File menu. You can find it above Exit near the bottom of the menu options on the left. This will open your Outlook Options window in a new pop-up.
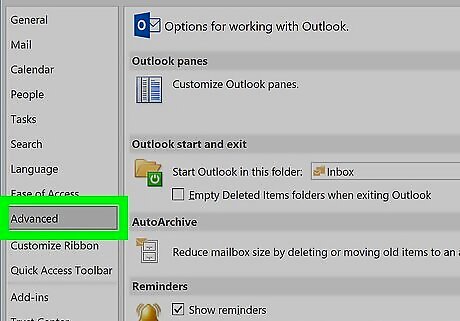
Click Advanced on the left menu. It's located below Language on the left-hand side of the Options window. Your Advanced options will show up on the right-hand side.
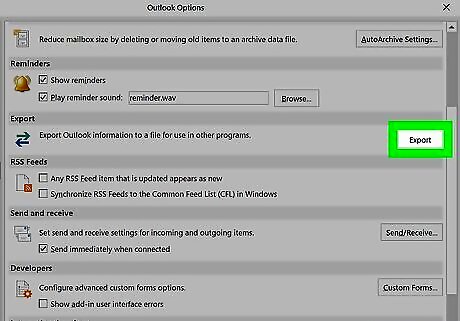
Click the Export button. You'll find this button on the right-hand side under the "Export" section. It will open the Export Wizard.
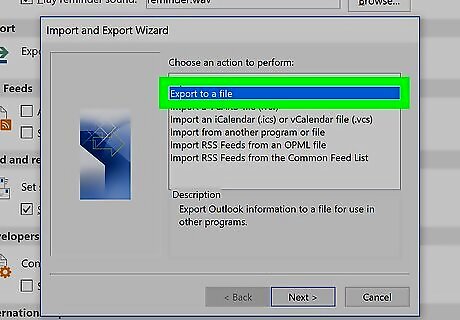
Select Export to a file. This will allow you to download and save a your notes as a separate file. Click Next.
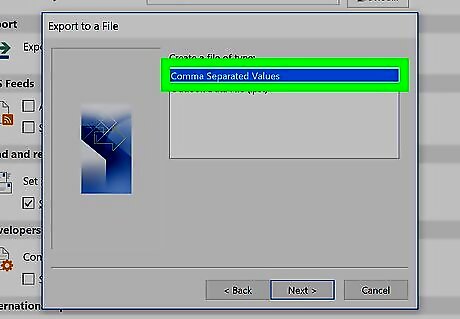
Select the file type you want to export your notes. You can select Comma Separated Values or Microsoft Excel 97-2003 to easily open and view your exports in Excel. Click Next.
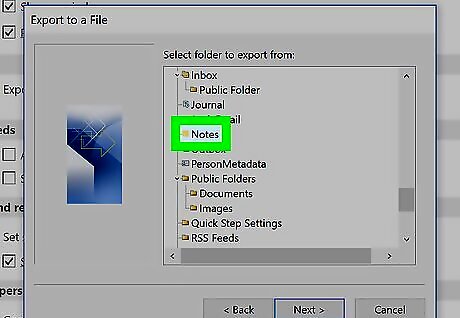
Select the "Notes" folder under your iCloud account. When you're prompted to "select folder to export from," find and click Notes under your iCloud email. Click Next.
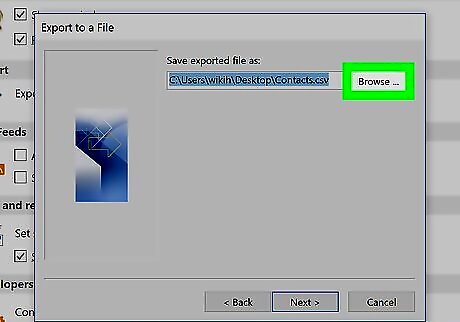
Click Browse under "Save exported file as." This will allow you to select a location to save your export. Click Next after selecting a location.
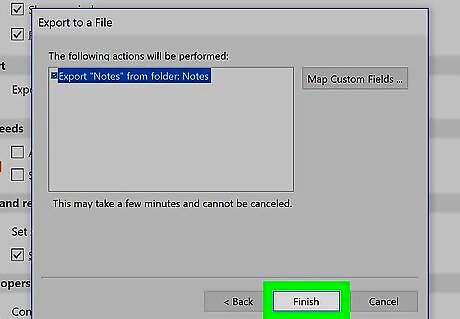
Click Finish. This will export all your notes from iCloud, and save the export file to the selected location. You can open and view the export file in Excel or another program, depending on the file type you select.


Comments
0 comment