

Planting Delphiniums from Seed
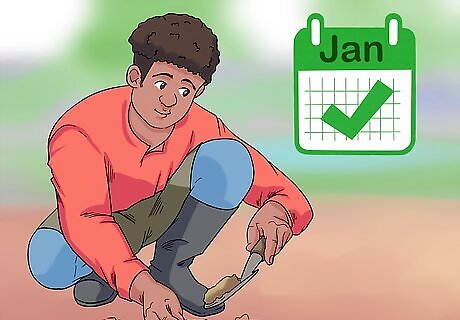
Plant in late January for the best results. This should give the seeds several months to start growing before it starts to get super warm, and it will be after the coldest months so that the seeds don’t go through a difficult frost. Starting in January is for the Northern Hemisphere. While you can try planting the seeds directly into the ground outside, you'll have much better luck if you start growing your seedling indoors.

Purchase the seeds from a nursery or website. Check with your local nursery or garden store to see if they sell delphinium seeds. If they don't, you can find and purchase them online. Do a quick online search to find reputable seed sellers. Read the instructions on the seed packet after you get it before starting the planting process—there are usually climate-specific suggestions about when you should start planting, as well as other variable conditions.
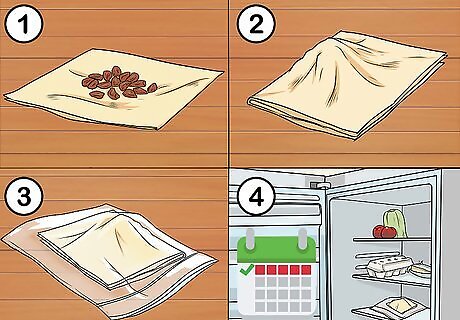
Presoak your seeds to allow them to germinate before planting. Dampen a paper towel and place the seeds you’d like to plant on half of the paper towel. Fold the other half of the paper towel over the seeds so that they’re in the middle, and place the soaking seeds in the fridge to germinate. Once they've germinated, you'll see a white tail growing out of the seed. Place the paper towel and seeds in a plastic bag before they germinate to prevent them from drying out. The seeds could take anywhere from a few days to over a week to germinate, so be patient and check on them daily.
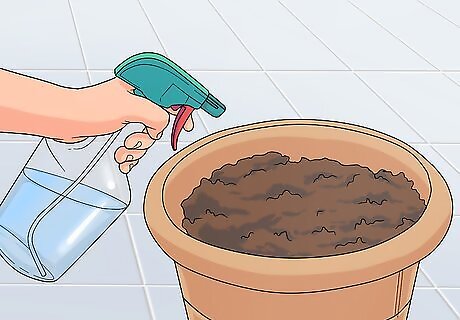
Prepare a container with potting soil and compost in it. Use fresh, nutrient-rich potting soil and/or compost and put it in a container, filling it most of the way up. You can use a small pot, a plastic seed tray, or even a small scrap container. Get the soil moist before planting the seeds by spraying it with a spray bottle filled with water. If you don't have a container, use small scrap containers such as the plastic container that berries come in at the grocery store—they're a great size and even have holes for draining.
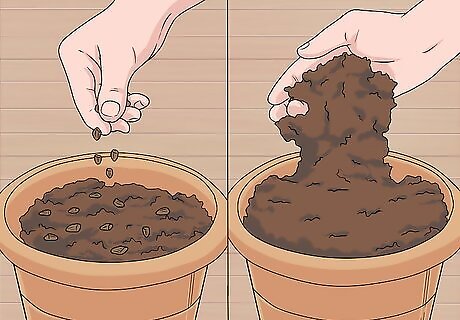
Sprinkle the seeds into the container before covering them with soil. Take the seeds out of the paper towel and gently drop them into the soil, trying to get them as evenly spaced as possible. Spread a fine layer of soil over the seeds to ensure they're covered. If you're using a seed tray, try to put 2-3 seeds in each section. If the pot is a bit larger, you can sprinkle 5-7 seeds. You don’t need to measure out where each seed goes, just try to spread them in each area of the container. The layer of soil shouldn’t be thick, you just want to make sure the seeds aren’t exposed—a thickness of 1 centimetre (0.39 in) should work fine. Use the same nutrient-rich soil that you used in the container.
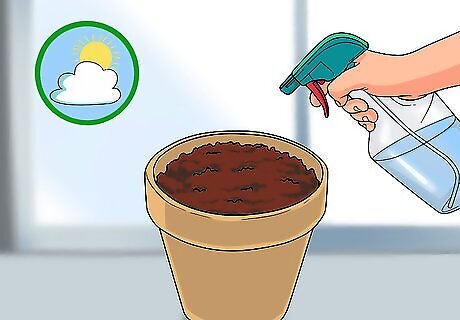
Keep the potting soil moist and in a sunny spot so the seeds will grow. Once your seeds are planted, check the soil daily to ensure it’s nice and moist. Place the seeds in a spot that gets access to lots of sunlight, such as a windowsill. Use a spray bottle to keep the soil nicely wet, if possible. If you don't have a spray bottle, fill a small cup with water and slowly water the seeds.
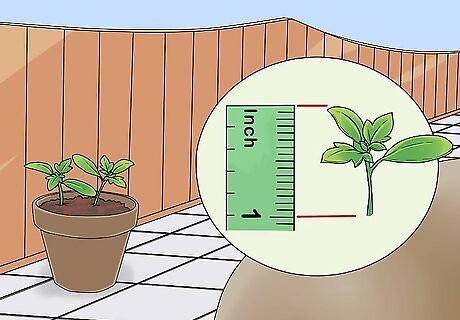
Expose the seedlings to the outdoors once they have at least 2 pairs of leaves. At this point, the seedlings should be at least 1 inch (2.5 cm) tall. Once you see at least 2 pairs of healthy leaves that have grown, you can begin to help the young plants adjust to the outdoors. Avoid placing the pot in direct sunlight when they're first placed outside, and protect them from any wind. Leave the plants outside in their original pot for about a week, monitoring them to make sure they're hydrated and healthy. If the weather is supposed to turn cold overnight, bring the seedlings inside and place them back outside in the morning. You're transferring them when winter is over, so the days should be warm.
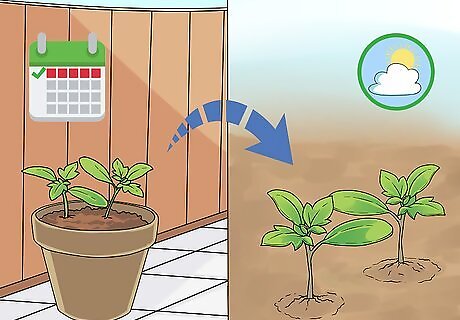
Transfer the plants into the ground after a week of adjustment. Look for a sunny spot in your garden or yard that has well-draining soil. Dig a hole that's twice the size of the small seedling root ball, and place the plant into the hole, covering up the roots with soil. Keep the young seedling well-watered while it's adjusting to its new environment.
Taking Delphinium Cuttings
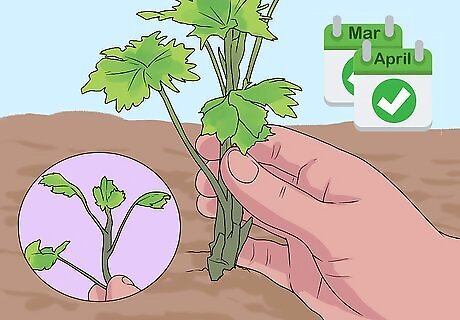
Choose new shoots near the base of the plant in March or April. These shoots will be young and solid, which is important for a healthy cutting. As the plants grow older, they become hollow, which can lead to rotting if cut. Look for shoots that are healthy and green. These months are for the Northern Hemisphere.
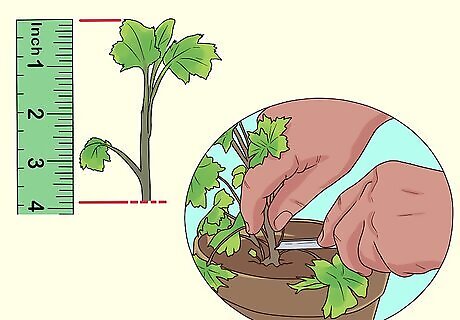
Make the cut near the crown of the plant. The crown of the plant is the spot where the stems join the root. Use a sharp knife to cut the shoot off, making sure the cut is about 10 centimetres (3.9 in) long. If there are leaves near the bottom of the shoot, strip these away so that the bottom of the stem is clear. Make your cut above the actual root of the plant.
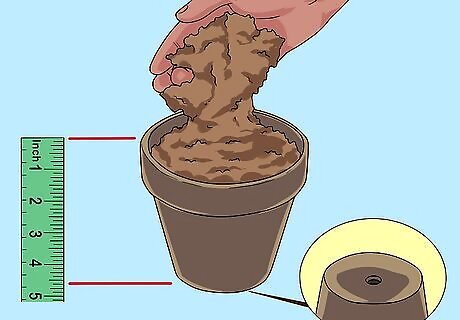
Fill small clay pots with nutrient-rich soil. Clay pots are the best to use because they drain easily and can breathe. Use a rich soil or a loam-based compost, filling it almost to the top. A 12 cm (4.7 in) pot works well. Make sure the pot has drainage holes.
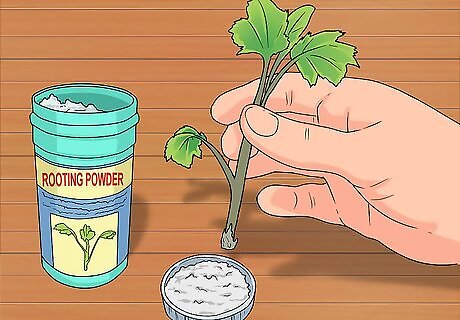
Dip the cutting in a hormone rooting powder. The powder will prevent the roots from rotting and will help them grow to be a healthy, strong plant. You can find hormone rooting powder at a garden store or online. While it's not always necessary, you can wet the end of the stem before dipping it in the hormone rooting powder so that more powder sticks to it.
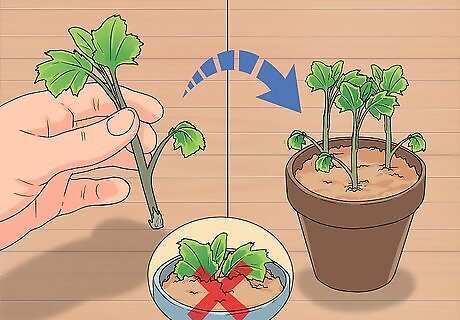
Place the cutting in the pot gently. Set the cutting into the soil so that the bottom of the cutting is covered by soil but the leaves are not. If you're taking several cuttings, space them around the pot so that they all have enough room. If you took several different types of cuttings, remember which one is which by putting a label on a toothpick and sticking it in the soil next to the corresponding cutting. For a smaller sized pot, aim for about 3 cuttings to get them started.
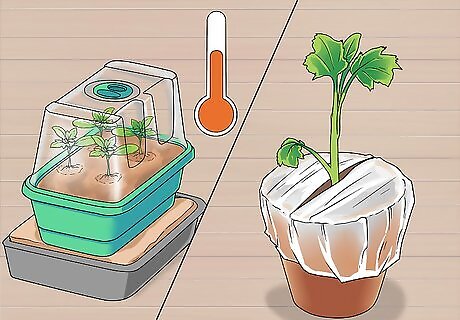
Keep the cuttings in a warm, moist environment to allow them to grow. You can do this by placing them in a windowsill propagator or tying a plastic bag around the top of the pot, trapping air, heat, and moisture inside. Allow the cuttings to sit in plenty of sunlight to help their growing process.
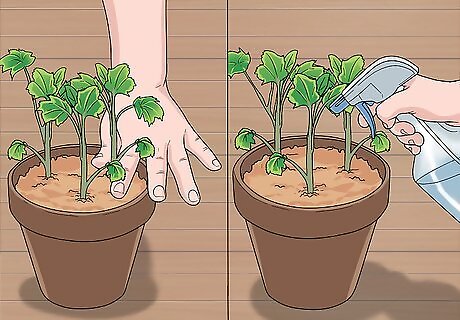
Water the cutting daily to ensure it doesn't dry out. It's best to check the cutting daily at first, touching the soil to feel if it's dry or not. If it is dry, water the soil slowly to allow it to absorb adequately. How much water the cutting needs will depend on how much sunlight it gets, the specific variety, and the temperature.

Transplant the cuttings once the roots grow through the drainage holes. This will probably take several weeks, so be patient and stay attentive to the cuttings. Once you see the roots growing through the pot’s drainage holes, it’s time to transfer the cuttings to their own separate pots. The cuttings can be transplanted outdoors once they’ve filled in their own individual pots. Space the cuttings so that the individual plants are roughly 18–24 inches (46–61 cm) apart in the garden. The separate pots don't need to be large—a small or average-sized pot will do. There should be enough room for the roots to grow comfortably.
Transplanting Delphinium Root Balls
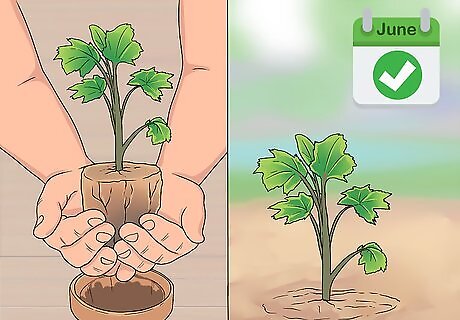
Plant the delphinium root ball outside in the late spring. This is the season you should visit your local nursery to find a healthy delphinium plant. The weather will be warm, and you’ll be planting it just in time for its summer season of beautiful blooms. The soil should also be quite warm at this point and ready to help your flowers grow.
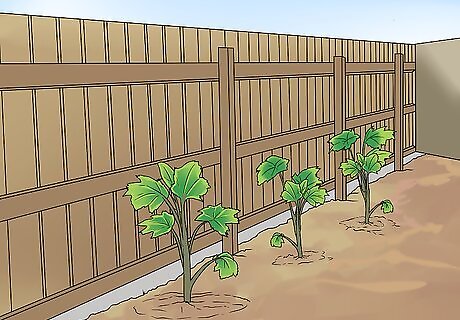
Choose a sunny spot that is shielded from strong winds. A spot next to a fence or wall works well to shield the plants from wind. Pick out a spot that also gets at least 5 hours of sunlight a day to ensure healthy plants. It’s okay if the spot in your yard doesn’t get sun all of the time—dappled shade is fine too.

Prepare well-draining soil in that’s nutrient-rich. Tend to your soil, loosening it up with a rake or shovel if necessary, and providing your plant with nutrient-rich, loamy soil. If you don’t have good soil, you can purchase some at a garden store or online. If your soil is super sandy or clay-filled, you’ll want to get some nutrient-rich soil to help even it out. You can also put organic compost or a dry fertilizer in the soil as well. Mix your soil about 1 foot (30 cm) down into the ground. To see if your soil is well-drained, fill a hole that’s roughly 1 foot (0.30 m) deep and 1 foot (0.30 m) in width with water. If it drains in less than 1 hour, it’s well-draining.
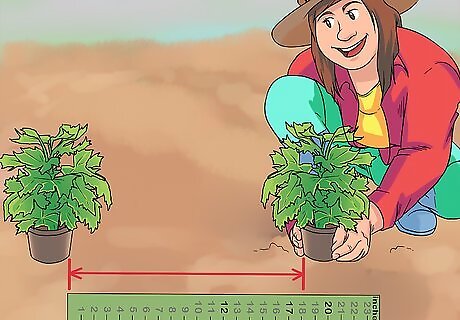
Space delphiniums 18–24 inches (46–61 cm) apart. Spacing them out is important so that the root balls have plenty of room to grow. Each variety will have different guidelines, but placing them far enough apart so that the delphinium can reach maturity comfortably is ideal. Read the instructions that come with the plant to know exactly how far apart to spread your delphiniums. Use a ruler or measuring tape to calculate where to plant the delphiniums.
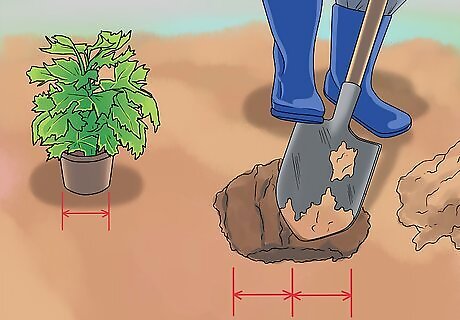
Dig a hole that’s twice the size of the plant’s container. Once you’ve prepared your soil, use a shovel to dig a hole big enough for your plant’s root ball to fit in, while also giving the roots lots of room to expand. While the width should be twice the size of the plant’s container, the depth should be just deep enough so that the plant is at the same level that it was in the container—you don’t want the leaves to be covered in soil.
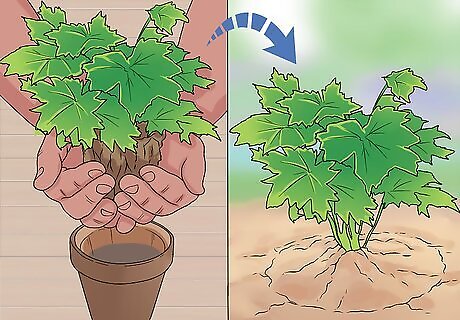
Place the plant in the hole and fill it in with soil. Carefully remove the plant from the container and place it in your freshly-dug hole. Use the soil that you dug up to fill in the spaces around the root ball. Once the soil is back in place covering your plant, it’s ready to be watered. Ensure that the top of the root ball is level with the soil.
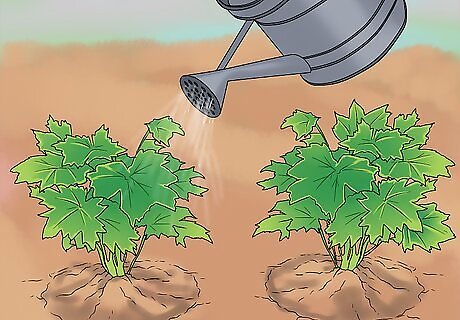
Keep the newly-planted delphiniums watered so they don't dry out. Watering the plants often is especially important when they’re super young or have just been transplanted. Try to avoid overhead watering if possible by using drip irrigation or soaker hoses. If you’re not sure whether the soil is moist or not, touch it with your fingers to see if it feels damp. Don’t let water sit on top of the soil or on the plants. Standing water can develop into disease.
Keeping Delphiniums Healthy
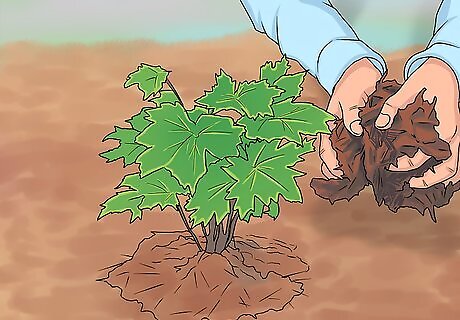
Spread mulch on top of the soil to conserve moisture. Once delphiniums have been planted outside, use mulch to keep the soil nice and moist. Mulching will also help prevent weeds from popping up, and it makes your yard look professional and clean. You can buy mulch from a garden store, as well as online. Try making your own mulch out of natural materials like leaves or tree branches.
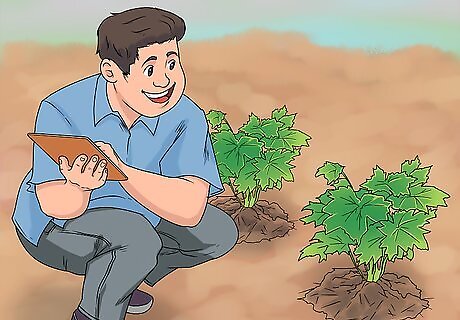
Check the plant every couple of days to make sure it's moist. There's no specific amount of water needed to keep all delphiniums healthy, so you'll need to use your own judgment. If it's been raining and the soil feels moist, your plant is likely well-watered. If the soil looks or feels dry, it's time to water your plants. Water the plants slowly so that the water has time to absorb into the soil, and avoid pouring water all over the flowers and leaves.
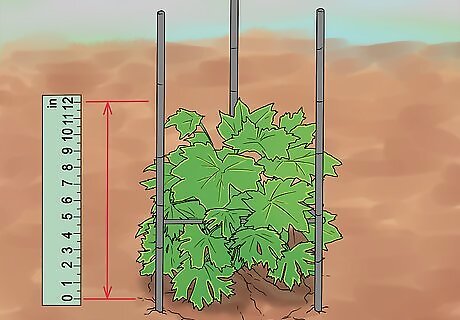
Stake the plant to help it support its own weight, when necessary. Once the plant is 12 inches (30 cm) tall, install stakes to keep it from falling over since it’s top-heavy. You can use metal plant supports or bamboo canes, which can be found online or at a garden store. You don’t need to tie the individual stems in, just let the framework support the plant.
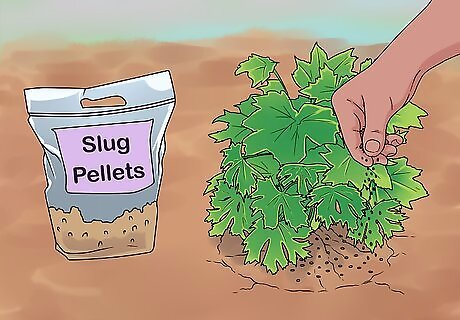
Control pests like slugs and snails. Slugs and snails love delphiniums and are known to eat away at the plants. To help prevent this, use something like slug pellets, nematodes, or another pest cure, depending on whether you’re okay with using a non-organic fix. Sprinkling grit on the shoots of the plant will also help with slugs and snails.
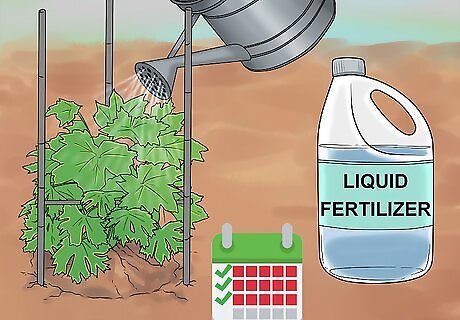
Apply a liquid fertilizer every 2-3 weeks. This will keep your delphiniums happy and healthy while supporting more growth. You can find a liquid fertilizer at your local garden store or online. Read the instructions on the specific fertilizer to know how much to use on your plant.
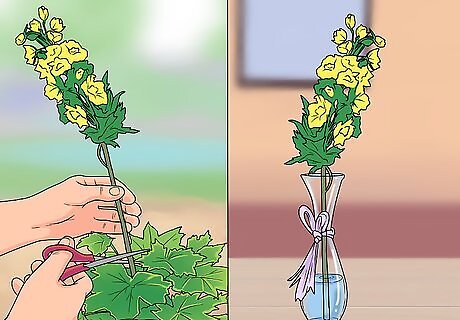
Snip off the flowers by cutting right above a set of leaves. If you're only interested in taking some flowers, you can snip them off anywhere on the stem. However, cutting right above a set of leaves will help promote more growth. Place the flowers in a vase with water once you've cut them.
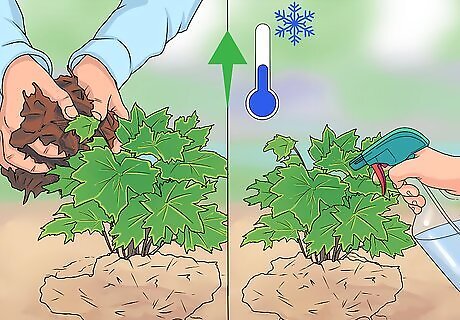
Prepare delphiniums for the winter. You don't need to bring the plants inside during the winter, as the colder temperatures actually help the delphiniums. The best care you can give them is to water them thoroughly the weeks before winter starts and put mulch down to protect the roots and soil. Cut the plant so that it's 6–8 inches (15–20 cm) tall, and it's ready for winter. Put down the mulch in late fall.


Comments
0 comment