views
Getting the Mounts for Your Speakers
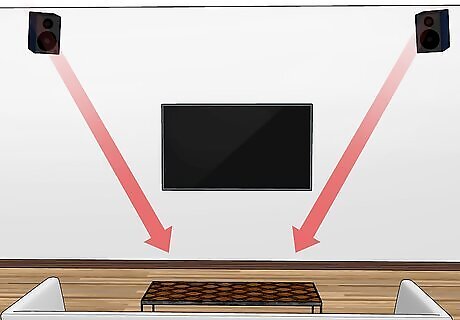
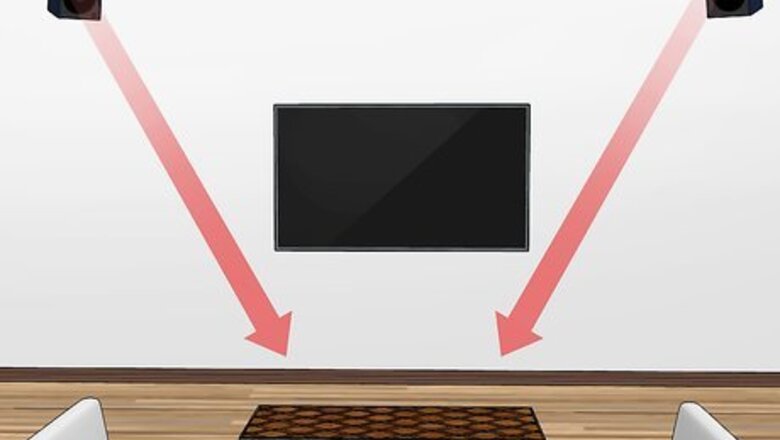
Choose the placement of your speakers for the best sound. Experts recommend a couple of rules to follow when arranging speakers in a room: never put a speaker in a corner; keep all speakers at least 1 ft (30 cm) from the walls; arrange speakers in a symmetrical configuration; and put speakers at the same height as your ears. This means that your left and right speakers should be the same distance from each other as they are from your couch. Left and right stereo speakers should be tilted inwards, facing the middle of your couch. Left and right surround sound speakers should at a 110-120 degree angle from the centre of the TV and tilted towards your couch.
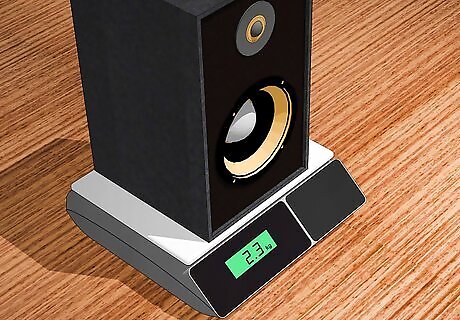
Know the weight of your speakers before buying the mounts. Commercial speaker mounts are rated to hold speakers up to a maximum weight. Therefore, it’s important to know the approximate weight of your speakers before buying the mounts. Most mounts are rated in 5 lb (2.3 kg) increments, so you can estimate the weight if needed. If you’re unsure, use your bathroom scale to help determine the weight. Purchase mounts that are rated to hold the weight of your speakers or heavier speakers. For example, if your speakers weigh 13 pounds (5.9 kg), you can buy mounts rated for 15 pounds (6.8 kg) or 20 pounds (9.1 kg).
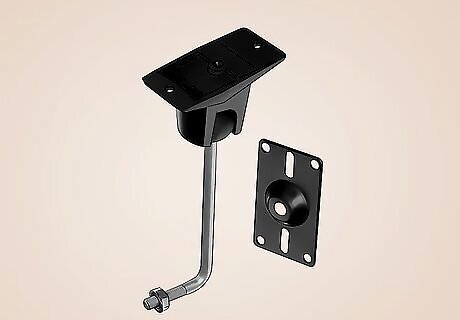
Purchase a mount for each speaker you want to hang on the ceiling. You can buy speaker mounts at electronics stores, audio/video specialty stores, hardware stores, and online. Look for mounts specifically designed to be hung from the ceiling, as not all mounts can be safely hung from the ceiling. Also, look for mounts that will allow the speaker to be tilted downwards so the sound can be directed at your couch. Most mounts are black in colour, which means they most likely match the colour of the speakers. Some mounts do come in white, which may help them blend into the ceiling.
Attaching the Mounts to the Ceiling
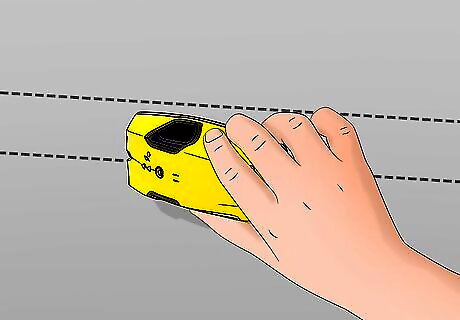
Find the ceiling joists where you want to hang your speakers. Most of your speakers will need to be hung from a ceiling joist as they’ll be too heavy to only hang from the ceiling drywall. While you can decide—in general—where you want to hang each speaker, you’ll need to find the joist before you can determine the exact location. Use an electronic stud finder to locate and mark the joists through the ceiling drywall. Repeat this step in each area where you want to hang a speaker. One exception to this requirement is for small plastic speakers that are very light (less than 1 lb (0.45 kg)). Really lightweight speakers can be hung from the drywall only, with the use of drywall anchors.
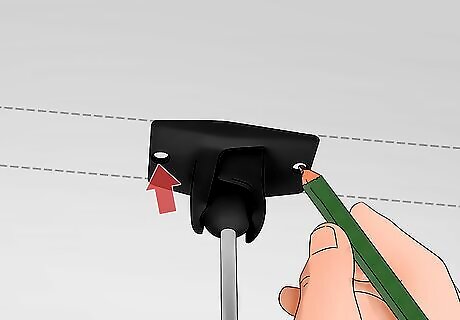
Hold the ceiling plate of the mount to the ceiling and mark pilot holes. Hold the ceiling plates of your speaker mounts to the ceiling in the exact location where you want to hang them. Use a pencil to mark where each screw needs to go into the ceiling. Remove the ceiling plate before drilling the pilot holes. You’ll most likely need to use a ladder or a step-stool to reach the ceiling safely and easily. Avoid standing on your furniture to install your speaker mounts.
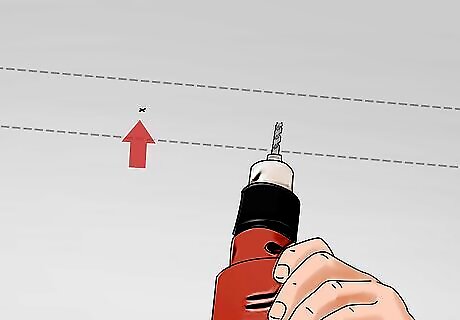
Drill pilot holes in the ceiling for each screw required. Use a power drill to make pilot holes in the locations you marked with a pencil. Use a drill bit that is slightly smaller than the screw being used. For example, if you’re using a #12 wood screw, use a ⁄8 in (0.32 cm) drill bit. Make sure the pilot holes go through the drywall and into the wood of the ceiling joist. This step will make securing the screws into the ceiling so much easier. If you don’t own a power drill, you may be able to rent one from your hardware or home improvement store or borrow one from the library. Always wear safety glasses when drilling into a ceiling to protect your eyes from falling debris.
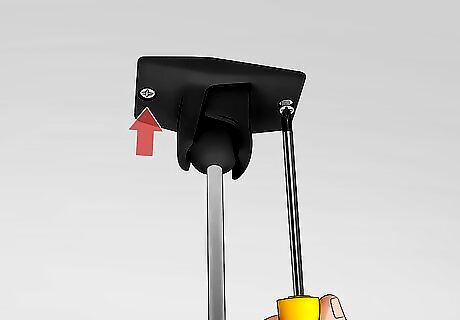
Secure the ceiling plate with the included wood screws. Hold the ceiling plate back up to the ceiling, lining the newly drilled pilot holes up with the screw holes in the ceiling plate. Use a power drill to secure each screw into the ceiling, through both the drywall and ceiling joist. Some speaker mounts have arms that include a ball shaft at one end. That ball shaft attaches to the ceiling mount through a socket joint secured by a tension bolt. You will need to use a screwdriver or socket wrench to loosen the tension bolt and then pull the ball shaft out of the socket before mounting the ceiling plate.
Securing the Mounts to Your Speakers
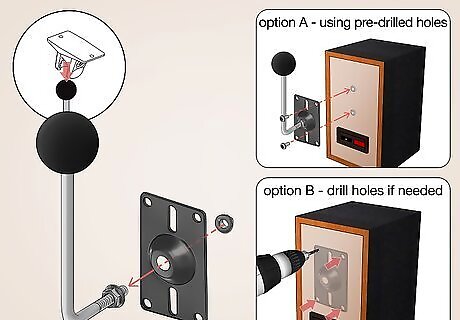
Select the attachment method of the mount to your speakers. Each speaker mount will require a slightly different method to attach it to the speaker. Make sure to follow the manufacturer’s instructions to be sure you’re using the correct method. In some cases, your speaker may come with a pre-drilled hole on the back that’s specifically designed to attach a mount. In other cases, you may need to drill 2 holes in the back of your speaker in order to attach the mount. There may also be some situations where your speaker has 2 pre-drilled holes on the back that can be used to attach the speaker plate without the need to drill new holes.
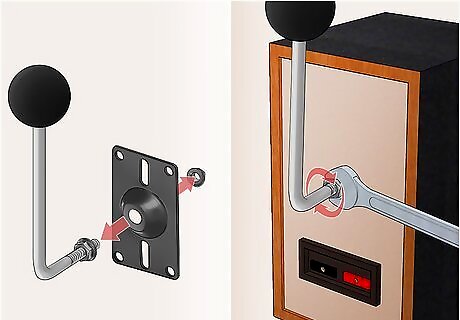
Attach the mount arm to the speaker if using one pre-drilled hole. First, you may need to remove the speaker plate from the mounting arm. Check your manufacturer’s instructions to determine if this step is required. Then, insert the end of the mounting arm into the pre-drilled hole on the back of your speaker. Use a wrench to tighten the nut that will secure the arm to the speaker. Removing the mount arm from the speaker plate requires a wrench to loosen the nut so the arm can be pulled out of the plate.
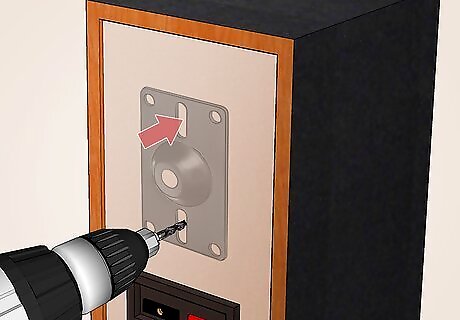
Drill 2 holes in the back of your speaker if required. Hold the speaker plate up to the back of the speaker and use a pencil to mark the 2 hole locations. Remove the plate, then use a power drill and bit to drill holes in the back of the speaker. The material on the back of the speaker shouldn’t be very thick, so you won’t need to drill too deep. Use a drill bit that’s slightly smaller than the screws being used to secure the speaker plate. For example, if you’re using a #14 wood screw on the back of the speakers, you’ll need to use a ⁄32 in (0.24 cm) drill bit for the hole.
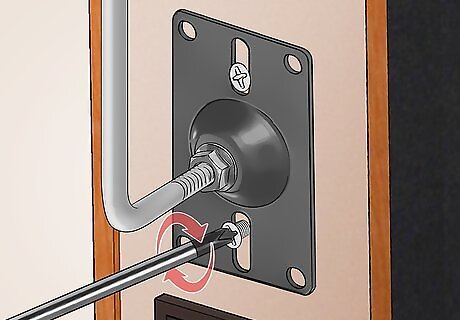
Secure the speaker plate to the back of the speaker if needed. Hold the speaker plate to the back of the speaker, lining up the newly drilled holes with the holes in the plate. Insert the required screws and use a screwdriver or a power drill to secure the screws into the speaker. In some cases, the screw may be able to be secured using an allen key that comes with the mount.
Hanging Your Speakers with the Mounts
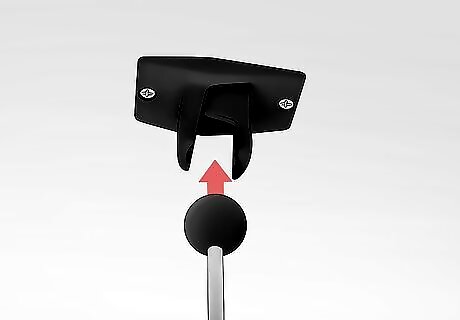
Reattach the mount arm to the ceiling plate if required. The exact method required here depends upon your speaker mount. In some cases, the end of the mount arm will have a ball shaft attached that needs to be pushed back into the socket joint on the ceiling plate. Then, the ball shaft is secured to the socket joint using a socket wrench or allen key to tighten the tension bolt. You will need to hold the full weight of the speaker while securing the arm in place. You may want to enlist the help of a friend if your speaker is heavy.
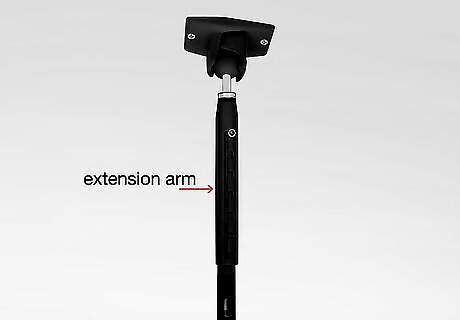
Attach an extension arm to the ceiling plate if needed. Some ceiling mounts will include an extension arm so the speaker will hang further down from the ceiling. In general, these extension arms are only to be used when mounting the speaker to the ceiling, not the wall. If your mount has an extension arm, slide that arm into or onto the ceiling plate, then use an allen key to tighten the screw on the arm into the ceiling plate. Mounts that come with extension arms may also come with ‘low profile’ arms. Low profile arms are shorter and will hold the speaker closer to the ceiling than the extension arm. Low profile arms are attached to the ceiling plate using the same method as the extension arm.
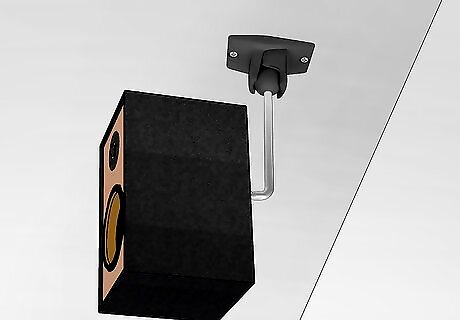
Install the speaker to the ceiling mount if not already done. If the mounting arm was attached to the ceiling plate first, you now need to attach the speaker to that arm. Hold the speaker up to the ceiling plate and mounting arm and slide the mount assembly from the back of the speaker into or onto the arm. Use an allen key to secure the arm to the speaker. You may need to stand further up on your ladder, or get a higher ladder, for this step as you’ll need to be quite close to the ceiling to access the mount arm and back of the speaker.

String the wires from your speakers to an amplifier or receiver. Now that your speaker is hanging from the ceiling, it’s time to attach the speaker wire to your amplifier or receiver. You have a couple of options for doing this. One option is to simply run the wire on the outside of the ceiling and wall. Another option is to run the wire behind the ceiling and wall. While a final option is to connect your speakers using wifi or Bluetooth so there are no wires involved. Unfortunately, not all speakers have wifi or Bluetooth capabilities and such capabilities cannot be added to a speaker after the fact.





Comments
0 comment