views
Screenshots are from a Windows computer and Blender 2.68
Steps

Be sure that you have the Cycles Render engine. If you have the current version of Blender, you have it. While checking that you have it, go ahead and select it.

Blender reload start up file.pngIf you don't have the default cube on your screen, go to File >> New >> Reload Start-Up File (CTRL N).
Be sure the cube is selected (Right Click on it), and delete it.
Making the Bowl of the Cup
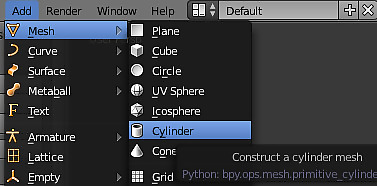
Blender Add Cylinder.pngClick on Add >> Mesh >> Cylinder for your starting shape.
In the lower left, go to the Add Cylinder options. It may appear differently depending on your version of Blender.
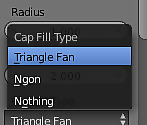
Blender Triangle Fan.pngClick where it says NGON (Cap Fill Type) and select Triangle Fan. If it is an older version of Blender, skip this step.
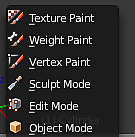
Blender Edit Mode 2.pngZoom in closer to the cylinder (using the scroll wheel if you have one), then select the Object Mode in the lower left and change it to Edit Mode.
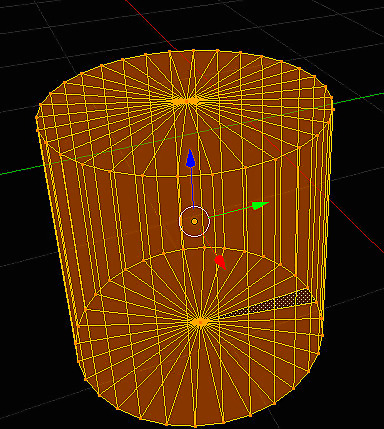
Blender Wireframe.pngGo to the Display Method (right next to Edit Mode) and select Wireframe. Here is what it should look like now.
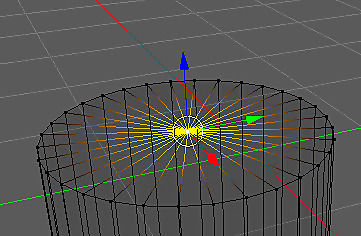
Deleting Vertices.pngRight click on the center of the vertices at the top of the cylinder to select that face.

Blender delete cylinder vertices.pngPress Delete and then select Vertices.
Press 1 to change your view of the cylinder.
Press 5 to change the perspective. Even thought it is still a cylinder, it will look like a square because of your perspective.
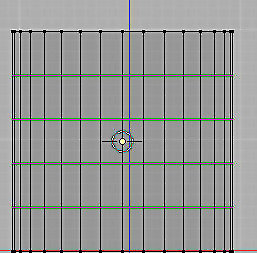
Zoom in closer, be sure your mouse is over your object and then press CTRL R. Keeping your cursor over the object, use your scroll wheel and roll it up until there are 4 lines.
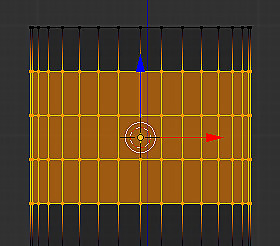
Selected area in Blender.pngStill 'inside' those 4 lines, left click and then right click. This will select (and create) those 4 lines.
Press A to deselect everything.

Blender select top vertices.pngWith your cursor at the top left of the cube, press B on your keyboard. Press and hold the left mouse button to make the selection that you need; the top vertices.
Shorten the top section. Click on the blue arrow and move the selected vertices until they are shorter.
With the selection still made, press S (Scale) and then type in .9 and then Enter.
Deselect everything (the A key).
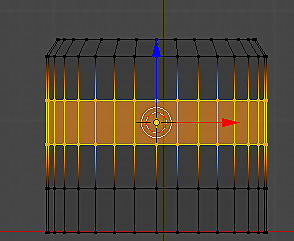
Blender Select two vertices.pngSelect B again and then select the center two vertices as shown in the screenshot.
Type S (Scale) and the 1.45 and Enter. This will slightly enlarge the center of the cup.
Deselect everything.
Press B and select the bottom vertex.
Type S, then .8 and then Enter.
Deselect everything.
Go to Edit Mode, switch back to Object Mode and change Wireframe to Solid
Making the Coffee Cup Handle
Move your coffee cup to the side so that you have room to work. To do this, hold down the Shift key and the middle mouse button and move your cup to the side; left in the video.
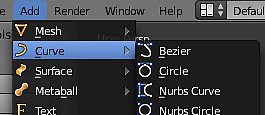
Blender construct a path.pngClick your mouse to the right of your coffee cup to give Blender a basic 'point of origin' and then go to Add >> Curve >> Path.
With your most recent selection (the Path) still selected, change the Object Mode to Edit Mode. This will leave you with five nodes to edit.
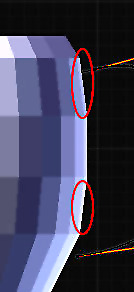
Blender basic coffee cup handle 1.pngRight click the left most node to select it. You will be using the arrows to move it where it needs to be.
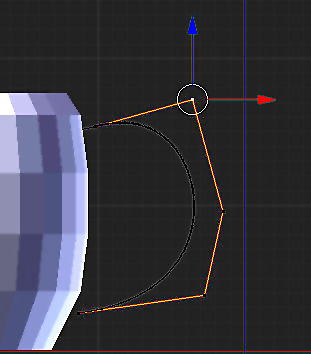
Start moving the nodes to put the handle in the basic shape it will need to be in, to be a handle. This will vary from person to person. Just move it into the correct position. Handle appearance.pngHere is what the handle should look like, approximately, at this time.
Start fine-tuning the handle. You want it to connect about midpoint between the sections shown above. Get a good shape, but have it not quite touching the body of the cup.
Switch from Edit Mode back to Object Mode.
Deselect everything.
Go to Add >> Curve >> Circle.
Press S and then .2 and Enter. This will make it quite a bit smaller. You will be using it to give your handle its shape.
Look at your upper right hand corner where the description of the scene should be. If you see Bezier Circle, then you are where you need to be. If not, backtrack your steps and determine what went wrong.
To apply the shape to your handle, right click on the handle to select it.

Blender object path button.pngGo to the Object Data button and select it.
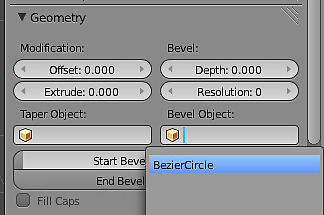
Blender Bevel Object Geometry.pngIn the Geometry section that you will see below the toolbar is a section called Bevel Object:. Click on that and select BezierCircle. This will apply the shape to your handle.
Start making changes to the circle. Any changes that you make to the circle will change the handle. Don't be alarmed at the shape that the circle (and handle) becomes.

Convert to Mesh object.pngConvert the handle into a Mesh object. Right click the handle, select ALT C >> Mesh from Curve/Meta/Surf/Text.
Delete the circle/square. You no longer need it.
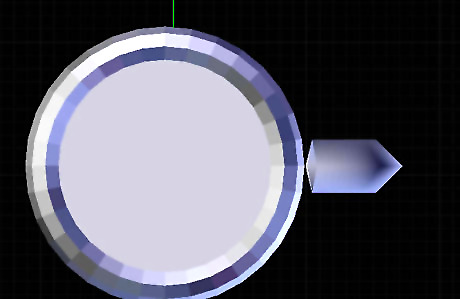
Check to make sure that your handle placement is good. Move the cup over so that it is centered on your screen and press 7 (on the right hand keyboard). This will give you a viewpoint of looking straight down on the cup.
If your cup and handle are too far apart, select the cup and move it so that it is closer to the handle. Use the arrow to move it laterally.
Join the cup and the handle together so that they are one object. If your cup is selected, leave it selected. Hold down the shift key and right click on the handle. Press CTRL J. This will make them one object.
Select Edit Mode. You are going to be connecting them together now.

Face Select icon.pngSelect the Face Select icon. It is the one with the face selected.
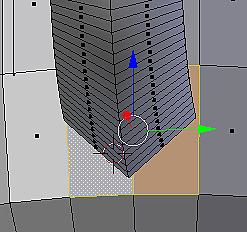
Move your cup so that you are 'behind' the handle. You are doing to be deleting some faces before connecting the handle. Underneath the handle (from this angle), select one of the faces, as shown in the screen shot. Press the SHIFT key and right click on the other one.
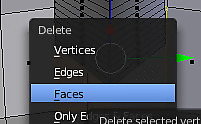
Delete Faces.pngPress Delete and then select Faces. Here is what your cup should look like, approximately. Notice the empty spaces under the cup handle. That is what you just did. Coffee cup progress.png
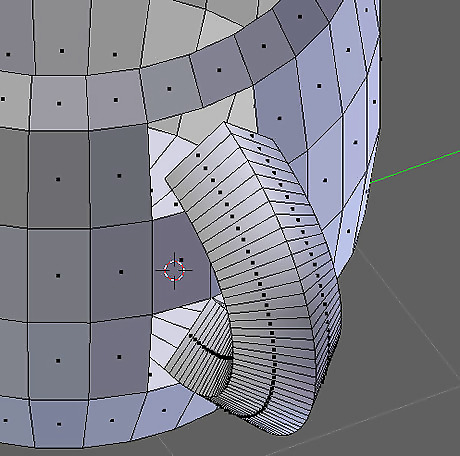
Change your angle of view again and be looking 'down' into the handle, as seen in the screenshot.
Connecting the Cup and the Handle

Edge select tool.pngGo to where you selected Face Selection and change it to Edge Selection. It is the one right next to it.
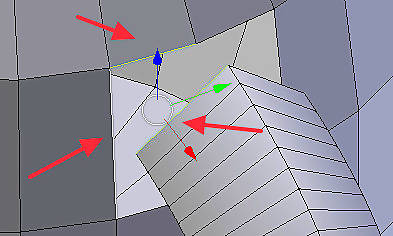
Once you have done that, press the edge (left edge of the handle in the screenshot). Three edges selected.png
Hold down the SHIFT key, then press the other two edges that you see selected.
Press F. This connects the edges into one face. Repeat for the other side.
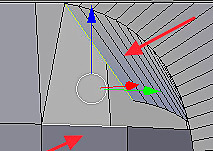
Inside connection of cup handle.pngOn the bottom side of the top connection of the cup handle, do the same, but you will only be connecting two edges.
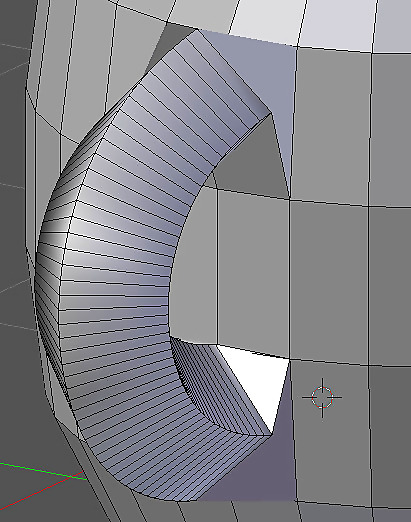
Do the same for the bottom part of the cup handle. Three on the outside connections, two on the inside.
Save your work.
Building the Inside of the Coffee Cup
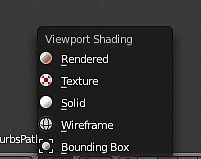
Blender Wireframe 2.pngChange the Display Method to Wireframe.
Press 1 to get a front view of your cup.

Vertex Select.pngGo to where you chose Edge Select and select the third icon there. It is the Vertex Select.
Press B and then select the top vertices.
Press E (Extrude) and then press Enter.
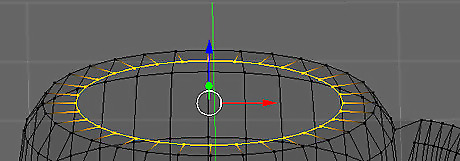
Scale the top of the cup. To do this: Press S Extrude and scale.pngType in (on the right side number pad) .8 and hit Enter.
Press the number 1 to get a front view.
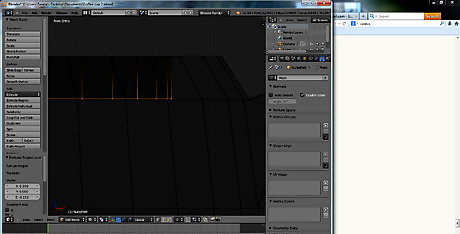
With the top vertices still selected, press E. After you press E, press Z. This will keep it going straight up and down. Take it down to the next set of vertices and press Enter.
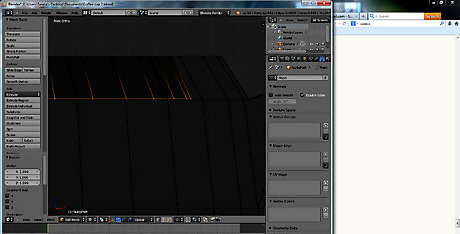
Press S and scale the inside until it is parallel with the outside of the cup. Press Enter.
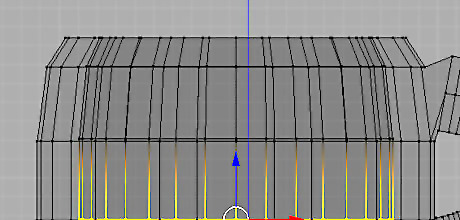
Repeat this process until you get to the third vertices.
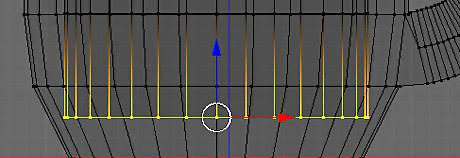
Press E to extrude but this time don't stop at the vertex. Go down about half the distance again, as in the screenshot.

Press S to scale the bottom and bring it in, but not as much as you have been. It will vary from project to project, but approximate what you see in the screenshot.
Press E and then Enter.
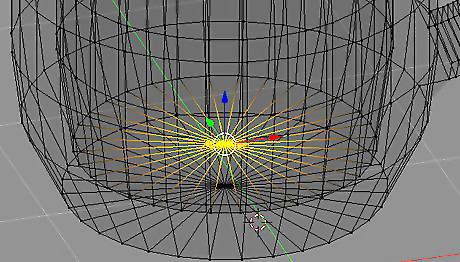
Merge all of the points that you have been manipulating up until now (bottom of the coffee cup). Rotate it just a bit so that you can see the bottom surface when created. Go to your left side tool bar and find the Remove group. Select Merge and then At Center.Merge at center.png
Change the Display method to Solid and Edit Mode to Object Mode.
Touching Up Your Coffee Cup
Smooth the edges of your cup by going to your left tool bar and go to Shading >> Smooth.
Select the wrench on the right side. Add Modifier Subdivision Surface In the Subdivisions section, change both the views and renders to 3.
Click on the World button to edit the material (the look of your cup).
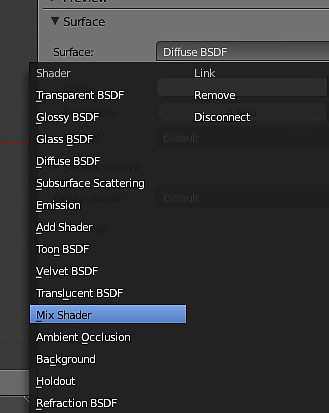
Click on New and select Mix Shader. If your options don't look like this, then check to make sure Cycles Render has been chosen.
Click on the first Shader drop box and select Diffuse BSDF.
Change the color to a light gray.
Click on the second Shader drop box and this time choose Glossy BSDF. is is the one that will determine the color of your cup. If you want to see what your cup will look like, go to the Viewport section and give it a similar color and your cup will become that color.
Change the Roughness to 0 (zero).
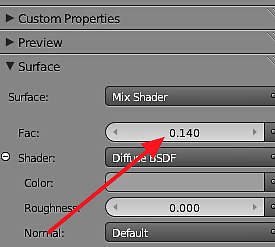
Surface Fac.pngChange the Surface Fac to something around .14. By doing this, it will make the cup appear to be made out of ceramic material.
Save your work.
Making a Tabletop
Click to just below the coffee cup to give the table a good origination.
Go to Add >> Mesh >> Plane and add a plane to just below your cup.
Select S, 3, and then Enter. This will 'grow' the table three times its current size.
Zoom in closer to the bottom of the cup and, by using the BLUE arrow, get the plane as close as possible to the cup.
Go to the right toolbar; the World icon should still be selected.
Click on New and then go with the default Diffuse BSDF option.
Click in the white bar and change the color to whatever you want. Make sure it complements your coffee cup.
Lighting the Scene
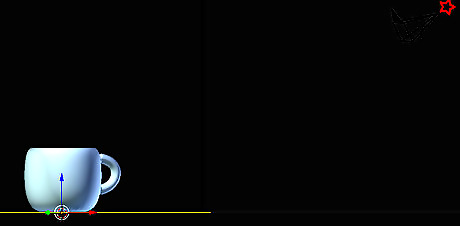
Zoom out from your cup until you see the camera. Click behind it like you see in the screenshot. This will give you a point of origin for your light source.
Go to Add >> Mesh >> Plane. Notice the angle of the plane. It won't provide any light to the cup in that position.
Click on R (Rotate) and then press 45. That will give you the correct angle to light your cup. You could also turn it freehand if you wanted to.
Increase the size by 5 times. Press S for scale, press 5 and then enter.
Set the material for the light. Click on New and for the Surface, choose Emission. This will allow it to light the cup. Change the strength to 10.
Press 0 and then 5. This will allow you to see it as the camera sees it.
Change the scene around through the camera. This will enable you to get the best angle of your work. Otherwise, you are stuck with the one you get. Go to the View menu and then select Properties. Then select Lock Camera to View.
After you lock camera to view, then go back to Properties and click it again.
Move your cup around until it has the look you want.
Rendering Your Coffee Cup

Render icon.pngClick on the Render icon and without making any changes, select Render. This will give you a rough idea of what it will look like. Since this is just a quick render to see how it looks, it shouldn't take long to do this.Quick render.png
Under Sampling, change the Render to a higher number, (500 is used here) and change the Clamp to 0.98.
Press Render again and then wait.
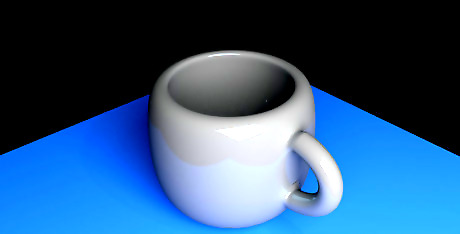
Once it is done and you want to save or share it, hover your mouse over your cup and press F3. Then save your work. Great job!










Comments
0 comment