views
- Cut out a length of card stock that's 36 in (91 cm) long by 36 in (91 cm) wide.
- Fold the paper or fabric into an accordion, making alternating folds every 0.5 in (1.3 cm) inches.
- Wrap the bottom of the accordion with tape. Then, glue popsicle sticks to either side of the accordion to make handles
Gathering and Cutting Your Materials
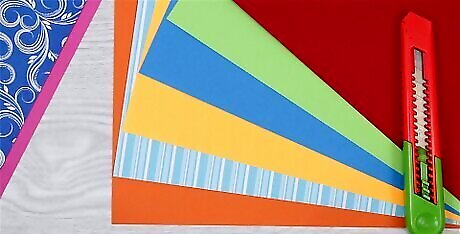
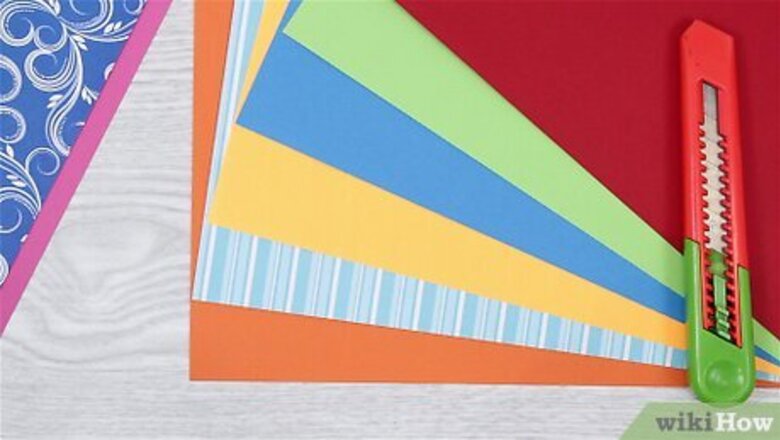
Find some card stock paper in your preferred color. You will want to go to your nearest craft store and buy a piece of card stock, or thick paper, that is at least 3ft. X 9in. You can choose either a basic color (red, black, blue, etc.) or a more intricate design (animals, flowers, architecture, etc.). You can also create your own design on a piece of cardstock. Traditional Asian designs might be harder to find, so you may have to search online. You can use this website as a good reference point: https://silkfans.com/. Thick paper, like card stock, will allow your fan to last a lot longer than traditional paper will. You can also choose plain white card stock, and draw your own design on it. Do not worry if your piece of paper is too big, you can just cut it down to the proper size later on.
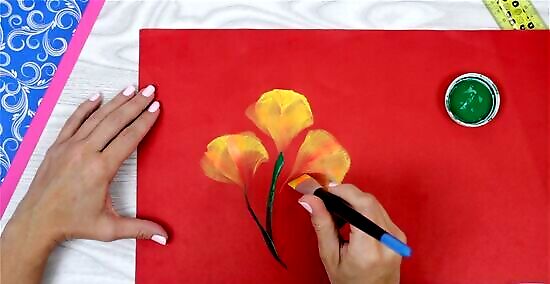
Draw your own design on the paper. This step is strictly optional if you wish to draw your own design. The best things to use for this fan project are crayons, colored pencils, or pen. Magic markers are okay as long as you have bought thick enough paper (the colors might bleed through). You may also consider mixed media coloration, such as drawing an outline in pen, and then filling in the design with watercolors. If you decide to use watercolor paint, make sure to paint the lighter colors first, then dark colors, and finally add your details. Between each layer of paint, give your painting time enough to dry. For more information on watercolor painting, visit this link: How to Paint With Watercolors Make sure before you begin drawing or painting that you measure, with a ruler, the dimensions of your fan. In general, your fan design should be around 3ft. X 9in. If your design goes over these limits slightly, you can adjust for it later on. Do not add "extras" yet, such as glitter, buttons, or beads. These will be added on at the end of your project.

Find some silk if you'd like a more elegant fan. If you decide to make a silk fan, it works the same way a paper fan does. You will need to go to your local arts and crafts store to find a piece of silk you want. If it is not prepackaged, you will have to ask an employee to cut it directly off the bolt for you. You have many options here, whether it be plain colors, or designed silks. For a reference to more traditional Asian designed silks, visit this link: https://silkfans.com/. Remember that you will need a piece of fabric that is at least 3ft. X 9in. If you have a piece of silk at home you want to use, but is not the correct size, you can easily cut it down later on. Buying plain colored silks, like white or light blue, allow you the option of applying your own design. Because silk is delicate, it is best to use pen or marker rather than paint. You also risk damaging your design if you paint it on, as you will be folding the piece of silk. Try to buy a thicker silk, as this will make your fan last longer.
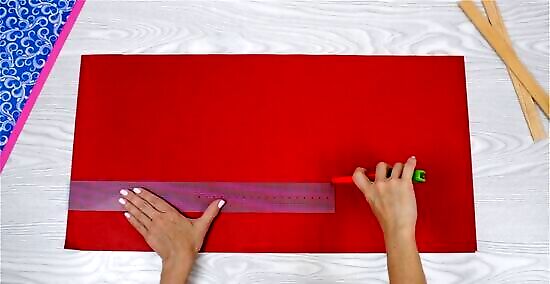
Cut out a rectangle from your paper or fabric. Grab your piece of paper, or fabric, and lay it down face flat on a smooth table. Use a ruler, and measure out a rectangle that is 3ft. X 9in. You can use the corner of the ruler to make right angles. Draw the rectangle with a light pencil mark, so that it does not show through. Take a pair of scissors, or a rotary cutter, and cut out your rectangle. If this is your first time making a Chinese fan, you may want to cut a bit outside of the rectangle to give yourself a little more leeway. Make sure if you use a rotary cutter that you are cutting on a safe surface like a plastic or metal cutting board. Rotary cutters easily slice through surfaces made of wood.
Putting Your Fan Together
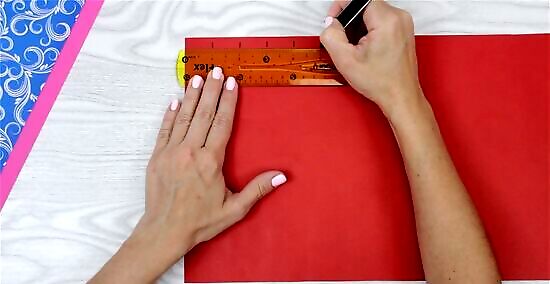
Measure out fold marks for your rectangle. Place your rectangle vertically, face down. Take a ruler, and on one of the long sides, draw a small pencil mark every half-inch. Do this until you get to the bottom of the rectangle. Do the same thing on the other long side, making a pencil mark every half-inch.
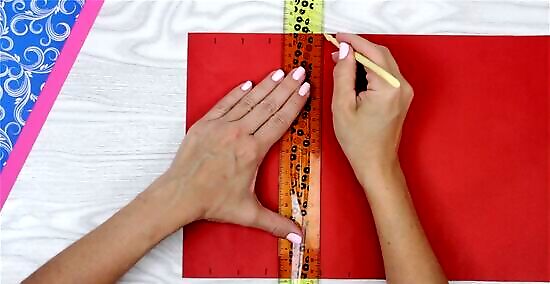
Make indentations in your rectangle. Find a ballpoint pen and take the cap off. Place your ruler on your rectangle, connecting two marks (one on each long side) that are directly apart from one another. Run the pointy end of the cap between the two pencil marks, connecting them. Apply enough pressure so that you can see an indentation in the paper or fabric. Do this between every two pencil marks that are directly across from one another. When you are done, you should have a piece of paper or fabric that has an indentation going across it every half-inch. These indentations are where you will fold your fan.
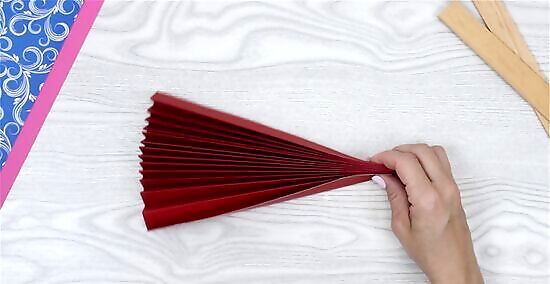
Accordion fold your rectangle. Lay your rectangle vertically, face down. Start at the bottom, by taking the bottom edge in your hands. Fold up along the indentation you made. Flip your rectangle over, so that it is still vertical, but face up. Take the bottom edge (the indentation you just folded) in your hands. Fold it up along the next indentation mark. Continue to repeat this step until you have folded the entire rectangle. Flip, fold up, flip fold up, etc. Always keep your previously folded section near you when you flip your rectangle. If you want to, you can run a ruler down each fold you make so that the creases are sharper. However, if you have painted on a design, it could be damaged by adding pressure to the fold. Keep this in mind, and proceed with caution.
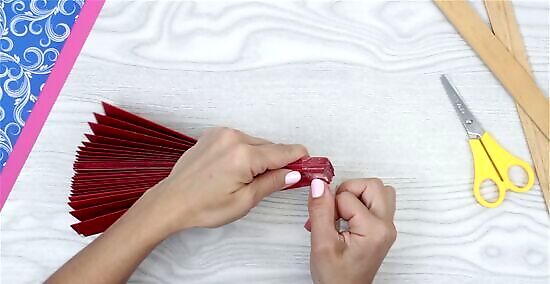
Wrap the bottom of your accordion. First, press your accordion together, and place a semi-heavy object, like a paperweight, on top of it. Next, you will want to get out some masking tape. Use a pair of scissors to cut a strip of masking tape that is 1/2 inch wide, and 7-8 inches long. Take your tightly folded accordion and position it vertically. Wrap this strip of tape around the bottom of your accordion while it is still scrunched together. If you have a design that has to be displayed a certain orientation, make sure that you place the tape on the bottom end of that design. Do not leave any gaps at the bottom. Place the edge of the tape right on the edge of the bottom of the accordion. Keep the accordion pressed tightly together as you wrap the tape. When you finish taping, the wrap should feel secure. If you think it is still loose, wrap another piece of tape (same size) on top of the one you already laid down. By the time you are done, the bottom 1/2 inch of your fan should be completely wrapped.
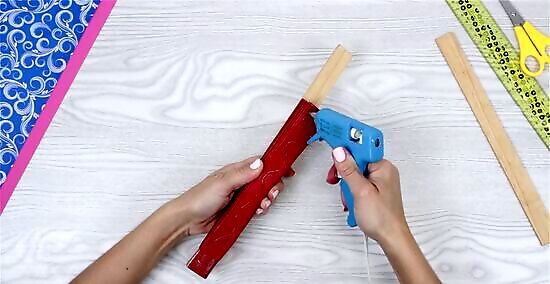
Glue on popsicle sticks. Find two popsicle sticks that are at least 9-10 inches long, and only 1/2 inch wide. Your folded accordion has two flat sides, and two scrunches sides. Use some normal Elmer's glue, or super glue, and glue down one popsicle stick on each of the flat sides. Spread some glue on one flat side at a time, in the space that is not covered by tape. The popsicle stick should be placed right against the tape, not over top it. This should leave you with at least an inch of overhang, depending on the length of your popsicle stick. After you get done gluing the first popsicle stick, place the paperweight back on top of it. Let it sit for twenty minutes before you flip it over and glue the second popsicle stick on. Do the same with the second popsicle stick. Place the paperweight overtop of it for 20 minutes before you move on to further steps.
Finishing Your Fan
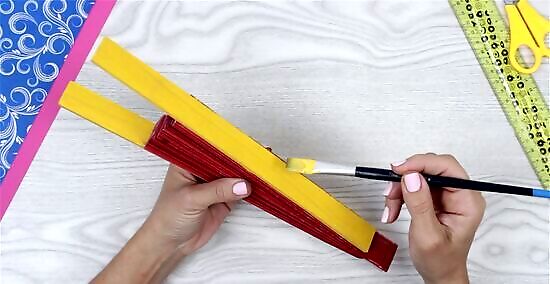
Stain or paint your popsicle sticks. This is a strictly optional step, but which will add another dimension to your fan. Buy some standard wood stain or acrylic paint in any color or shade you like. Chinese fans usually use a reddish stain on the wood handles, but you should choose something which compliments your design. Take a small paintbrush, and apply small brushstrokes to one of the popsicle sticks. Make sure to get both the top, sides, and the back of the exposed end. Let one popsicle stick dry before you turn it over. It is best to wait a day in between each, but you should at least give it an hour or so. If you go the acrylic paint route, you can add painted designs after you apply an initial base coat. You might want to continue the design from your fan onto the popsicle sticks, or add in something complimentary. Make sure to buy a smaller paintbrush for the finer details.
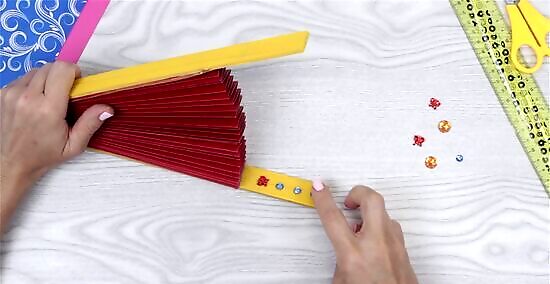
Add extra detail to your fan. This could mean any number of things. You might want to glue on buttons or beads to the popsicle sticks. You can use glitter glue to highlight the edges of your popsicle sticks, or use it to highlight the edges of the actual fan. The important thing is to be creative without adding too much. Remember, this is a fan which will by necessity take on a lot of wear and tear. Too many beads, or add-ons may make the fan too heavy, or make it damage relatively quicker than it normally would.
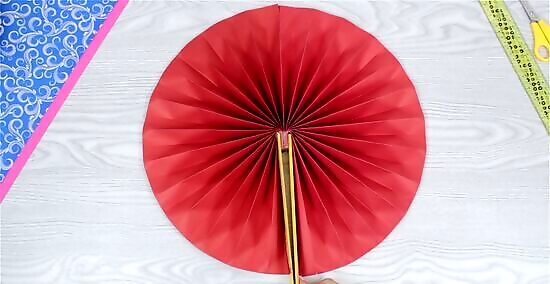
Open and close your fan. Your fan needs "exercise" so that the creases continuously open and close the same way. Every day, try to open and close your fan 3-4 times. Do this for a week straight so you get used to how it opens and closes. The creases of your fan will become more permanent.
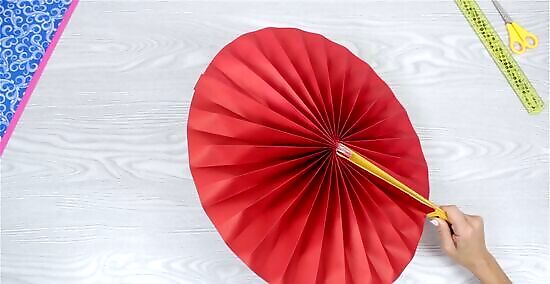
Practice waving your fan. If you are just using your fan at church to keep you cool, you can wave and hold your fan any way you wish. However, if you are going out to the opera, there is a more sophisticated way to hold your fan. Open your fan half-way (half a circle) and place it in front of your face, so that other people would only be able to see your eyes and nose. Your hand will hold the fan at the bottom center of the half circle. Place your thumb on the outside of the fan (decoration side). Your other four fingers will be placed on the inside (non-decoration side). Gently wave the fan towards your face. If the fan comes into contact, move the fan away slightly. The goal is to cool yourself off, show off your fan, and too demonstrate your level of sophistication.

Leave your fan open. Certainly the goal of this project is to create a contractible fan. However, if your fan stays closed for too long, the design you have on it can become worn and damaged. After you are done using it for the night, and you are home, open the fan up. Lay it down on a flat surface, or hang it up on the wall as a home decoration.


Comments
0 comment