views
- To restore the Windows 10 taskbar, Start menu, context menus, and "Never combine," try ExplorerPatcher.
- You can also make parts of the Windows 11 taskbar look like Windows 10 without installing software.
- A quick registry change will bring back the Windows 10 context (right-click) menu so you don't have to click "Show more options."
Start Menu & Search Location
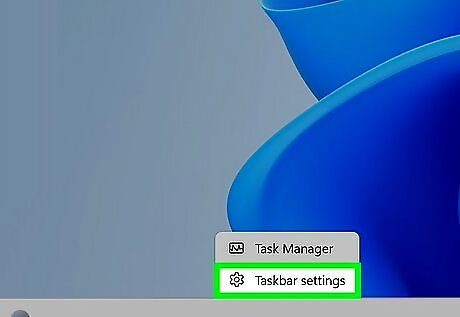
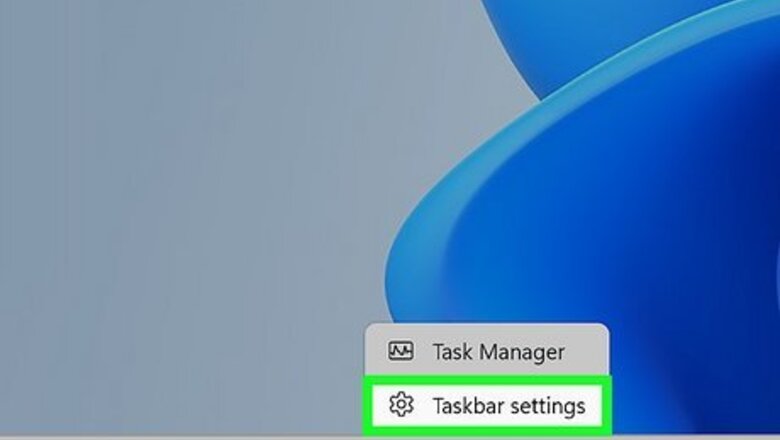
Right-click the taskbar and select Taskbar settings. Windows 11 centers the Start menu, search bar, and taskbar icons at the bottom-center part of the screen. If you prefer having these items on the left side of the taskbar, like in Windows 10, it's easy to go back.
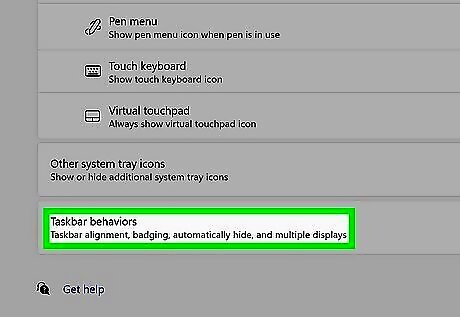
Click Taskbar behaviors. You'll see it at the bottom of the window.
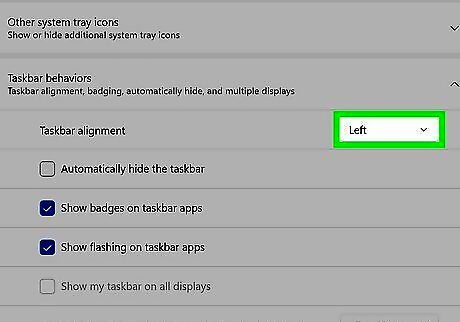
Select Left from the "Taskbar alignment" menu. Your Start menu, search bar, and app icons will now stay aligned on the left side of the screen. If you don't want to see notification badges on taskbar icons, you can uncheck the "Show badges on taskbar apps" box.
Remove New Taskbar Icons
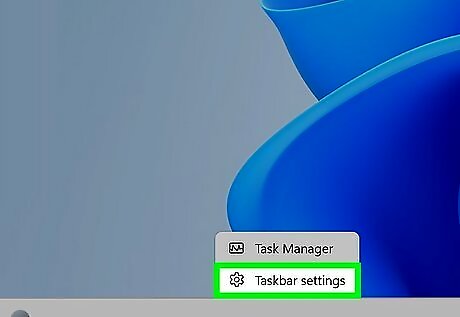
Right-click the taskbar and select Taskbar settings. Windows 11 automatically adds icons for Teams Chat and Widgets to your taskbar, which looks very different than Windows 10. Fortunately, these are easy to disable.
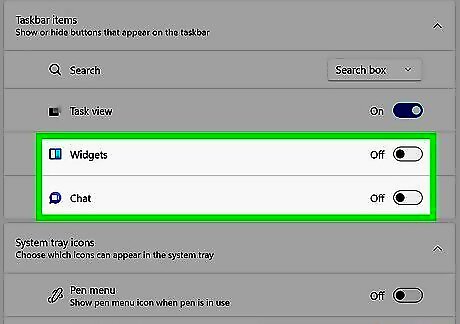
Toggle off the Widgets and Chat icons Windows Switch Off. This removes both icons from your taskbar.
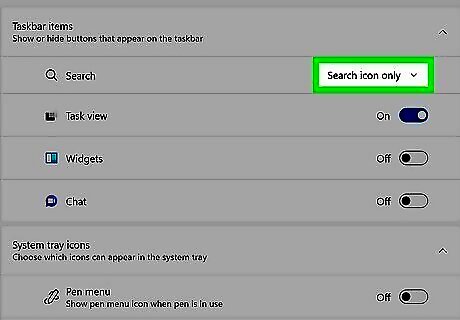
Customize the Search bar (optional). By default, Windows 11 expands the search box and adds a Bing Chat icon. If you'd rather have a standard magnifying glass icon, click the menu next to "Search" and select Search icon only.
Replace Desktop Icons
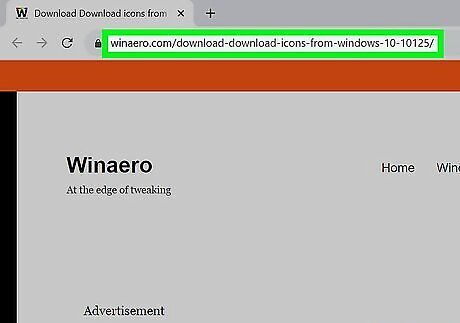
Download a Windows 10 icon pack. You can easily change the system icons on your Windows 11 desktop to their Windows 10 equivalents using an icon pack from Winaero. Go to https://winaero.com/download-download-icons-from-windows-10-10125. Click Click here to download the file to save the file to your computer.
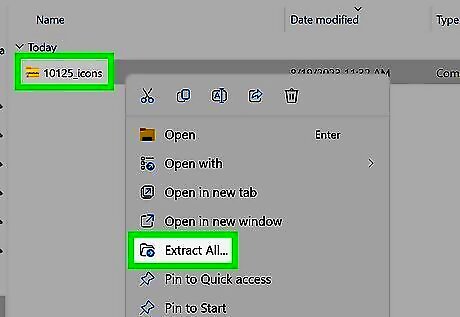
Unzip the icons to a convenient folder. Right-click the downloaded ZIP file and select Extract All… Click Browse and select a folder you'll remember, you can also create a new folder for your icons anywhere by right-clicking a current folder and selecting New. Just call the folder something like "Win10 icons." Click Extract. Once extracted, the folder will open to display the icons in the icon pack.
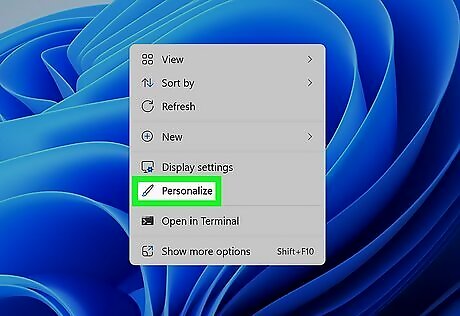
Right-click the desktop and select Personalize. This opens your desktop settings.
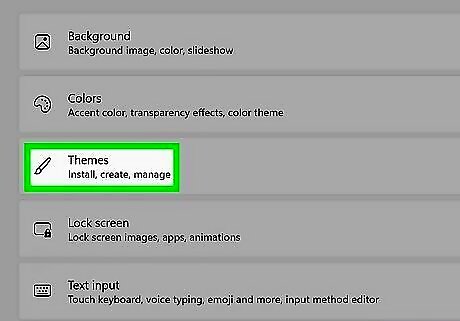
Click Themes. It's on the right panel.
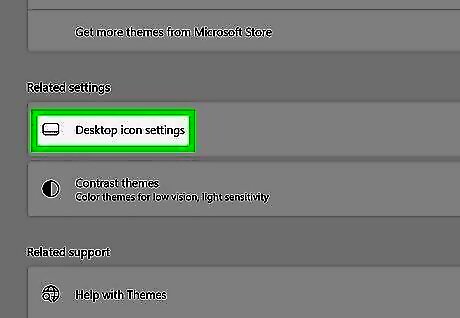
Click Desktop icon settings. It's under "Related settings."
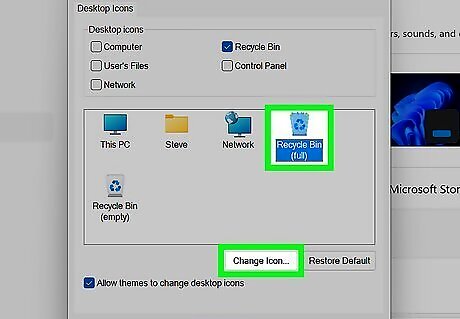
Replace any system icon. You can do this with any of the system icons on your desktop. Here's how: Select an icon, such as Recycle Bin (full), and click Change Icon…. Click Browse… and navigate to the folder where you unzipped your Windows 10 icons. Select the Windows 10 version of the icon you're replacing and click Open. Repeat for all other desktop icons. To change icons for apps that aren't on the desktop, see How to Change the Icon for an EXE File.
Get the Windows 10 Context Menu
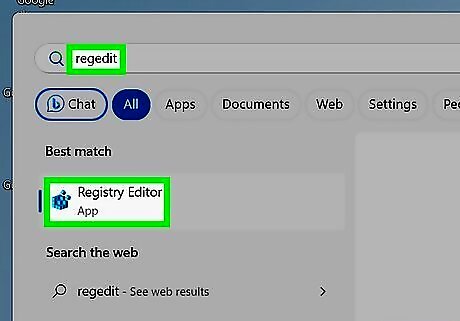
Open the Registry Editor. The context (right-click) menu in Windows 11 takes a lot of getting used to if you're switching from Windows 10. To bring back the familiar context menu, you'll need to make a quick change to your registry. To open Registry Editor, type regedit into the search bar and click Registry Editor. If you don't feel comfortable editing the registry, you can also bring back the Windows 10 context menu using ExplorerPatcher.
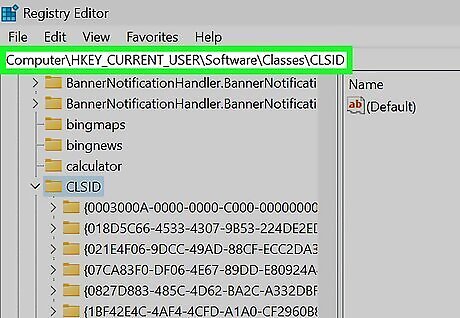
Navigate to Computer\HKEY_CURRENT_USER\Software\Classes\CLSID. You can copy and paste that address into the address bar at the top of Registry Editor to get there quickly, or expand Computer > HKEY_CURRENT_USER > Software > Classes > CLSID.

Create a new key in the CLSID folder. Right-click "CLSID" in the left panel and select New > Key.
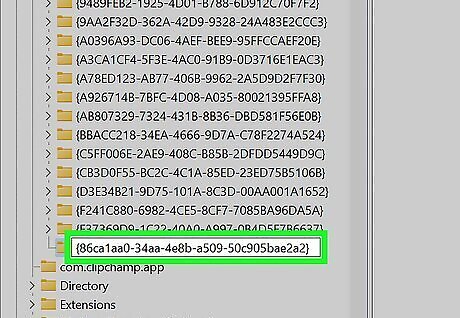
Name the key. Type or paste this key into the "New Key" field and press Enter: {86ca1aa0-34aa-4e8b-a509-50c905bae2a2}
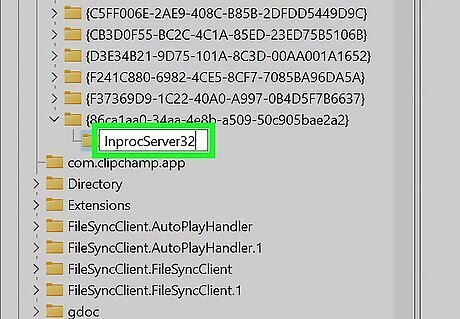
Create a new key in the new key's location. Right-click the key you just created. Select New > Key. Type InprocServer32 and press Enter. Double-click Default in the right column. Make sure the "Value data" field is blank (if it's not, remove any characters here) and click OK.
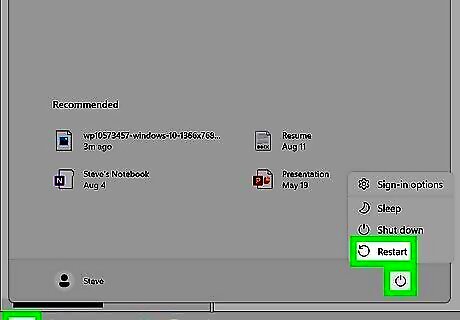
Restart your PC. When your PC boots back up, the right-click menu will return to the familiar Windows 10 look you know and love. If you change your mind, you can reverse the menu change by navigating to Computer\HKEY_CURRENT_USER\Software\Classes\CLSID, right-clicking {86ca1aa0-34aa-4e8b-a509-50c905bae2a2} and selecting Delete > Yes.
Open Start Menu to All Apps
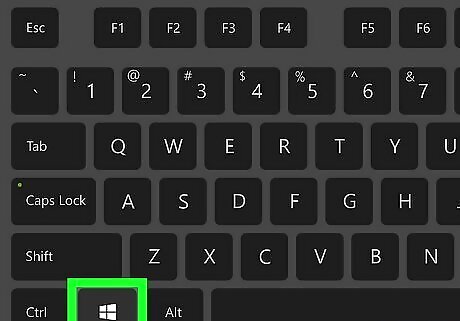
Press the Windows key on your keyboard. While there's no way to make the Windows 11 Start menu open to All Apps by default (a feature that was simple in Windows 10), you can speed up the process by getting used to pressing a combination of keys.
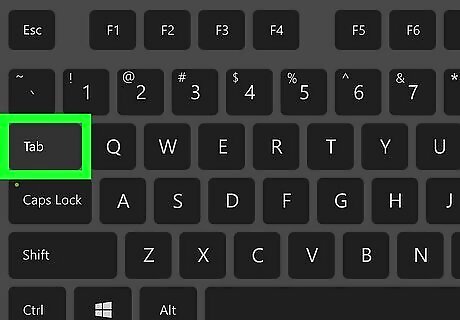
Press Tab ↹ twice, then press ↵ Enter. All you'll need to do to open to the Windows 10-style All Apps quickly is press Windows key, Tab, Tab, and then Enter. The more you practice, the easier it will be to remember!
Get the Windows 10 Taskbar and Start Menu

Download ExplorerPatcher. While you can tweak your Windows 11 settings to make the taskbar and Start menu look a little bit more like Windows 10, the functionality remains different. For example, there's no way to disable taskbar grouping ("Never Combine") or restore the original Start, search, and task view icons in your Windows 11 settings. A free tool called ExplorerPatcher restores the look and feel of the Windows 10 taskbar, Start menu, File Explorer, context menus, and task switcher to Windows 11 in seconds. Go to https://github.com/valinet/ExplorerPatcher. In the rightmost panel, click the latest release number under "Releases." Click ep_setup.exe to save the file to your computer.
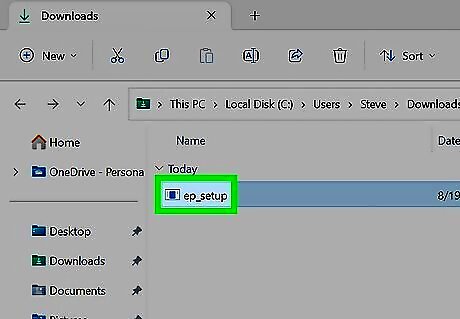
Double-click the downloaded file and click Yes. ExplorerPatcher will immediately install. During the installation, your screen may flash, and the taskbar may look a little funny for a few seconds. No confirmation message or window pops up, so you'll have to be patient. After several moments, the familiar Windows 10 taskbar will come back.
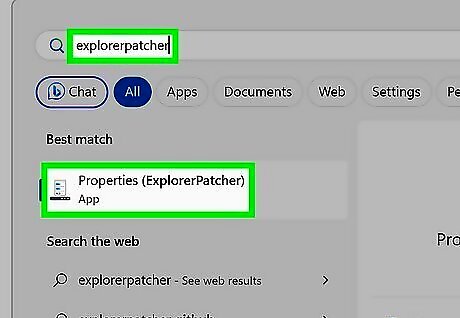
Open ExplorerPatcher properties. Once your taskbar is usable again, open your ExplorerPatcher properties by clicking the magnifying glass icon in the taskbar, typing explorerpatcher, and clicking Properties (ExplorerPatcher).
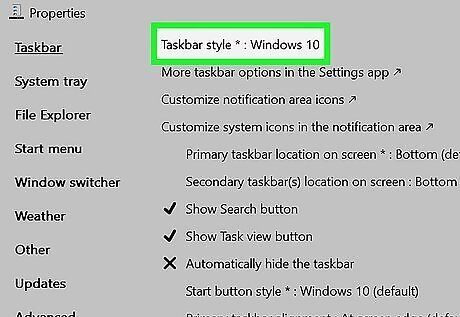
Customize your Windows 10 features in Windows 11. You'll see several tabs on the left side of the screen to control things like the taskbar, system tray, file explorer, start menu, and more. To get a true Windows 10 experience: Taskbar By default, Windows 10 is already selected. You can select Windows 11 if you want to switch back. Use the Combine icon items menu to choose whether to combine or Never combine open apps. Choose your preferred taskbar icon size at the bottom. You can select Small to bring back the Windows 10 "Small icons" feature. System tray: In the last section, you can choose Windows 10 for all the default icon styles, such as Network, Sound, Clock, Battery, and Language switcher. File Explorer: Bring back the old File Explorer and context (right-click) menu on this tab. Before you can enable these features, you'll need to click Register as shell extension at the top and then click Yes. To bring back the Windows 10 context menu, click Disable the Windows 11 context menu. Then, click Restart File Explorer at the bottom-left. Goodbye, awkward Windows 11 context menu! Start menu: Next to "Start menu style," select Windows 10 to restore the look and function of the Windows 10 Start menu. Window switcher: To go back to the Windows 10 Alt + Tab style, select Windows 10 here. Other: On this tab, you can disable rounded corners, prevent Control Panel links from redirecting to Settings, change notification icons, and more.
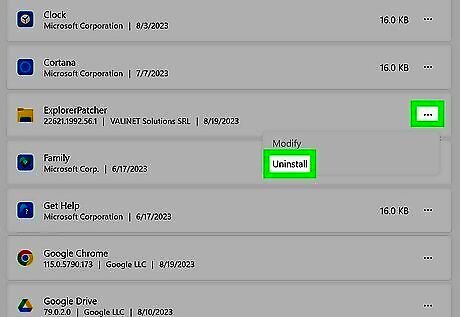
Make Windows 11 look like Windows 11 again at any time. If you change your mind about making your computer look like Windows 10, you can go back through your settings and change things, or just delete ExplorerPatcher. To delete ExplorerPatcher: Open your Settings and select Apps. Click ••• next to ExplorerPatcher and select Uninstall. Click Uninstall, click Yes, and follow the on-screen instructions. Reboot your PC to make Windows 11 look like itself again.
Use Windows 10 Wallpaper

Download a Windows 10-themed wallpaper image. If you miss the default desktop backgrounds from Windows 10, you can easily download them for Windows 11. Head to https://wallpapercave.com/ and search for "Windows 10." Click the Windows 10 Official tile to view the original desktop backgrounds from Windows 10. To download a wallpaper, click the preview, then click Download Wallpaper.
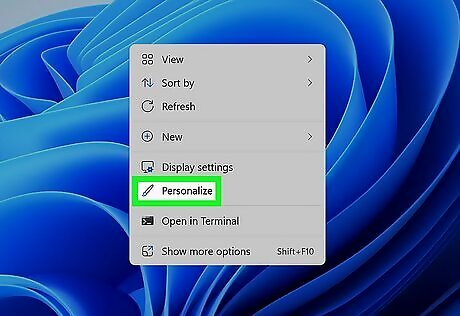
Right-click the desktop and select Personalize. Now that you’ve downloaded Windows 10 wallpaper, you can use it as your background.
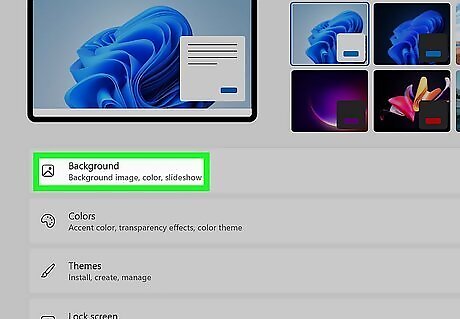
Click Background. A list of personalization options will appear.
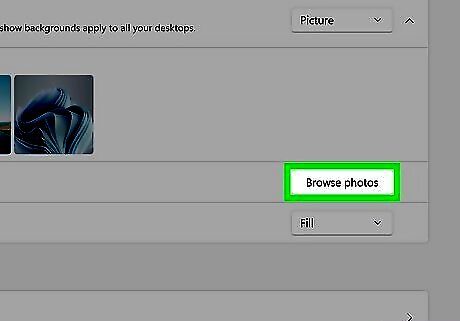
Click Browse photos. You'll see this next to "Choose a photo."
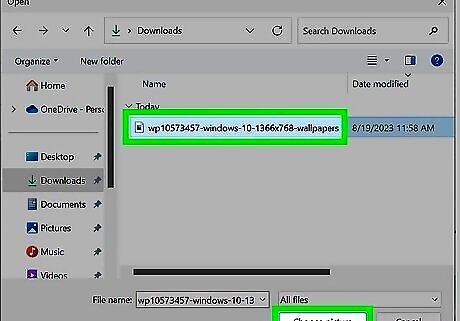
Select the wallpaper you downloaded and click Choose picture. This changes your background.
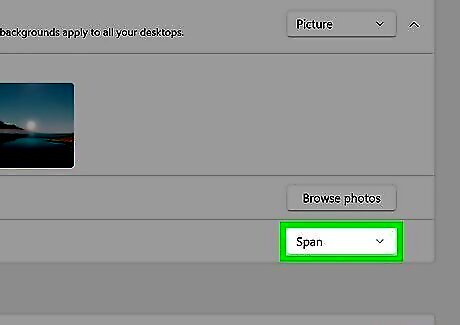
Choose a fit. By default, the wallpaper is centered on your screen. Click the "Choose a fit for your desktop image" menu and select Span or Stretch to fit it on your screen.
Disable Rounded Corners
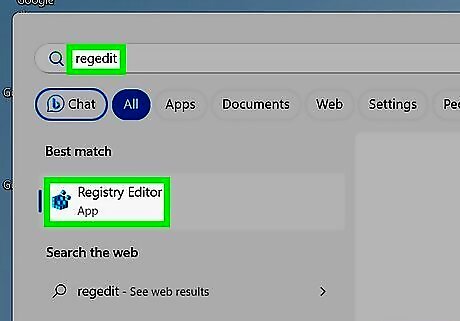
Open the Registry Editor. If you find the Windows 11 windows too "round" compared to Windows 10, you can make a quick registry change to disable rounded corners. To open Registry Editor: Click the Search bar. Type regedit. Click Registry Editor. If you prefer not to edit the registry, you can also disable rounded corners in ExplorerPatcher.
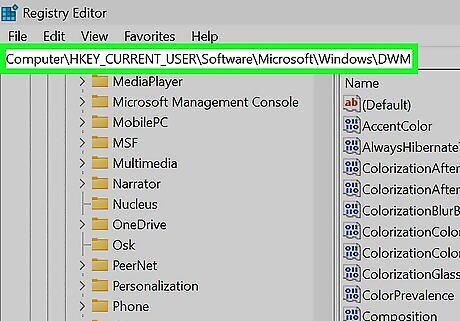
Go to HKEY_CURRENT_USER\Software\Microsoft\Windows\DWM. You can copy and paste that path into the address bar at the top of the Registry Editor, or navigate to HKEY_CURRENT_USER > Software > Microsoft > Windows > DWM.
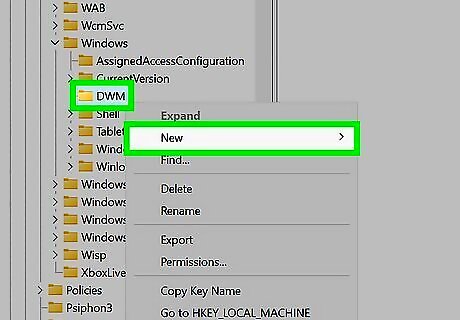
Right-click "DWM" and select New. You'll see DWM in the left panel. Another menu will expand.
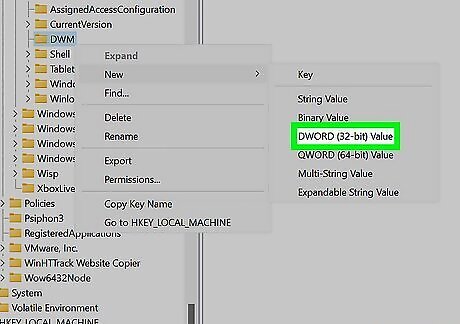
Click Dword (32-bit) value. This adds a new Dword to the right panel.
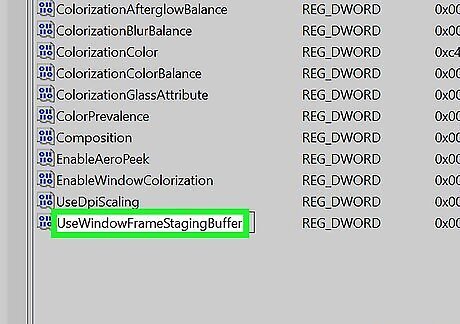
Name the Dword "UseWindowFrameStagingBuffer." To do so, type or paste UseWindowFrameStagingBuffer and press Enter.
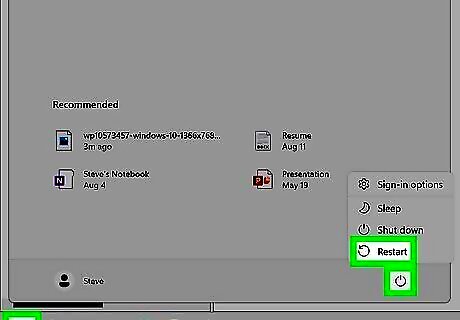
Restart your PC. When your computer comes back up, app windows will look more like Windows 10 than Windows 11. You can undo this change by deleting the Dword you created.
Bring Back the Blue Screen of Death
Install Winaero Tweaker. Windows 11 and Windows 10 both replaced the helpful technical information from the traditional Blue Screen of Death error with a more simplified error with a smiley face. If you miss the old Blue Screen of Death, you can get it back with this free tool. Go to https://winaero.com/winaero-tweaker. Click the Get Winaero Tweaker link and then click Download Winaero Tweaker. Unzip the downloaded file (winaerotweaker.zip), which you'll find in your Downloads folder. Double-click WinaeroTweaker-1.55.0.0-setup.exe (the version number may vary) and follow the on-screen instructions to install. Once installed, click the new icon in your Start menu to launch the tool and agree to the terms. This tool also allows you to make other Windows 11 features look like Windows 10, including restoring the original context menus and restoring classic folder options to File Explorer.
Open Winaero and agree to the terms. You'll only have to do this the first time you launch the tool.
Click Show BSOD, Disable Smiley. You'll see this near the bottom of the "Behavior" section in the left panel.
Check the box next to "Show BSOD details instead of the sad smiley." A reboot message will appear at the bottom-left corner of the app.
Click Reboot now. Once your computer reboots, your Blue Screen of Death preferences will be saved. The next time your computer throws you a BSOD error, you'll see the Windows 10 blue screen instead of the Windows 11 "friendly" message.


Comments
0 comment