
Adding the Plaster to Water

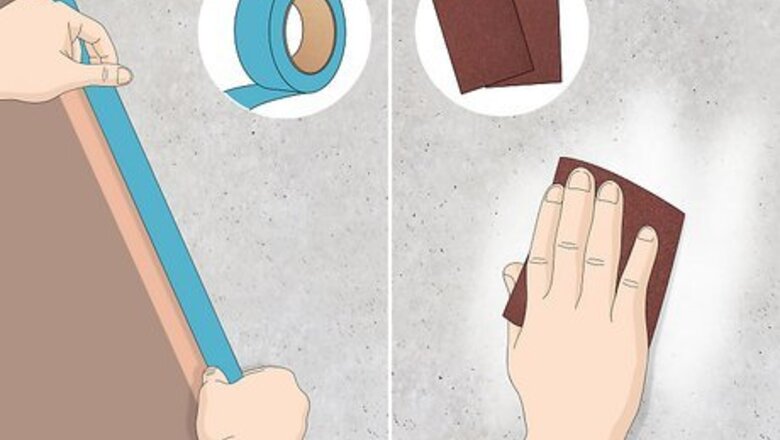
Prepare the wall for plastering. Before you get started, make sure the wall you're finishing has already been taped and sanded, and any seams have been touched up with a base coat. That way, all you'll have to worry about is spreading the plaster, which will require your full attention. Plaster is best applied to wood or metal lath, or bare walls stripped of paint and wallpaper. If the wall has semi-gloss or gloss paint on it, you should prime it before adding plaster. Use plastic sheeting and painter's tape to cover areas you don't want plastered.

Protect your work area. Working with plaster can get pretty messy. To safeguard your surroundings and avoid an extensive cleanup process later on, it's a good idea to lay down a drop cloth or tarp. Make sure you have all the tools and equipment you need on hand to avoid wasting valuable time searching later on. Consider putting on a change of old clothes that you don't mind getting dirty. It can also help to wear a respirator and eye protection, if you're sensitive to dust.
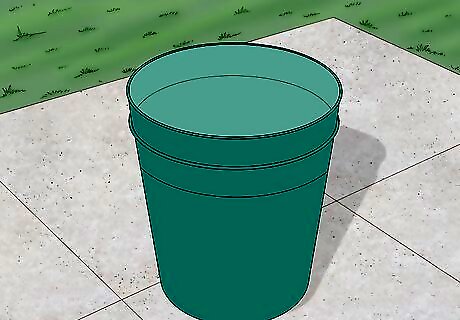
Set a large bucket outdoors to do your mixing in. It's best to mix plaster outdoors to minimize cleaning up the splatter from the mixing paddle. The exact size of the bucket you'll need will depend on the amount of plaster you're preparing. In most cases, however, a 5 or 7 gallon (18.9 or 26.5 L) bucket will be ideal. If you're using a smaller bucket, you may have to work in batches. Keep in mind that plaster expands, so it's better to have a couple more gallons (around 7 L) worth of room than you need just to be on the safe side. Hose out the bucket to flush away sediment and other residue if you've previously used it for other projects.
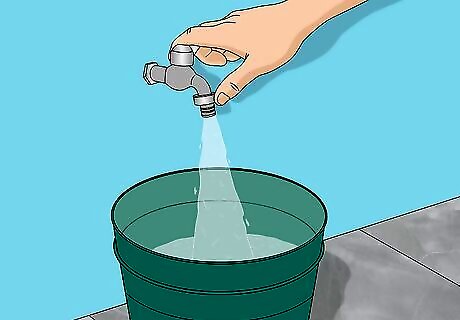
Fill the bucket with clean water. Add 1–2 gallons (3.8–7.6 L) (3.8-7.6L) of room-temperature water. It's essential that you add the plaster to the water, not the other way around. This will help prevent troublesome lumps and give you more control over how thick the mixture turns out. If the water is too cold, it can make the plaster harder to mix. If it's too warm, it may cause it to set prematurely.
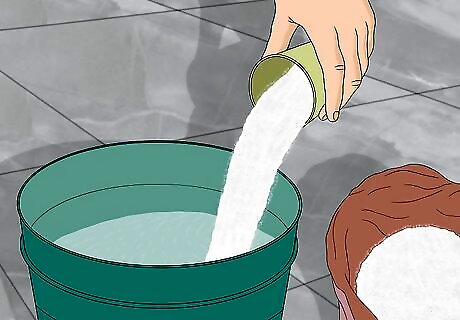
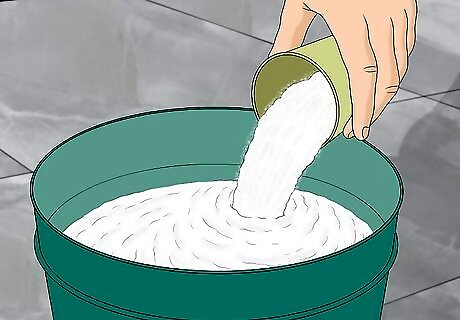
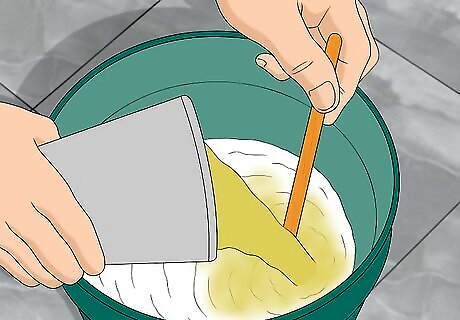
Add plaster to the water gradually. Scoop out a small amount of plaster from the bag using a plastic cup and dump it in the bucket. Generally, you'll want to use approximately a 1:1 ratio of plaster to water—in other words, half and half. However, you should add only about half of the plaster at this point as more will be added later. Try not to take more than a couple minutes to sift the plaster, or it will begin to set. The plaster will need to soak for 2-3 minutes before you begin mixing.
Mixing to the Proper Consistency
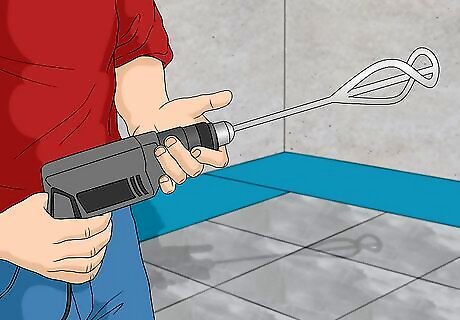
Attach a paddle mixer to your drill. You'll get the best results with a corded mixing drill, as these offer the distance and convenient control you need to work comfortably. Thread the end of the paddle into the drill, making sure the joints fit together correctly. Run the drill for a few seconds at a low speed to check that the mixer attachment is secure. Wire cage-type mixers can cut through clumps rather than just push them around.

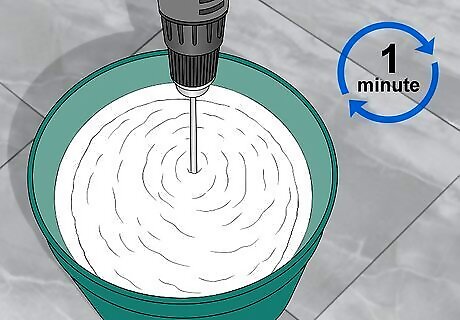
Mix the plaster thoroughly. Lower the paddle into the plaster to the bottom of the bucket and switch on the drill. As you mix, raise and lower the paddle and swirl it in both a clockwise and counterclockwise direction. This will help the blades hit the plaster from as many different angles as possible. Set your drill to a slow speed to prevent splashing. Aim to mix the plaster for 1 to 2 minutes, or just long enough to wet it throughout. Scrape the sides and bottom of the bucket periodically with your trowel to loosen dry, stuck-on bits.
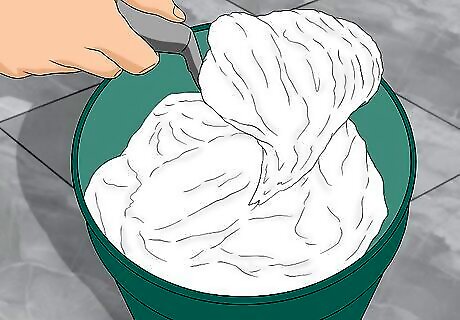
Add more plaster to achieve a thick, smooth texture. Cut off the drill and add a small amount of plaster into the bucket, then resume mixing to incorporate the fresh plaster. Continue sifting and mixing until the plaster is roughly the same consistency as peanut butter. A good rule of thumb is to only add about half the amount you originally used on follow-up mixes. Sifting the plaster by the handful may be more precise than pouring straight from the bag as you get closer to the optimal texture. Rinse off splatter or plaster powder from your surroundings before it dries.
Test the thickness of the plaster. Let the plaster sit for a few minutes after you're finished mixing. At that point, the plaster should be thick enough to heap onto the trowel without running off. Another useful test is to route the top of the mixture with your trowel and watch for it to fill in gradually—thin, soupy plaster will puddle instantly, while you may not notice any change in overly thick plaster at all. If you accidentally thicken the mixture too much, you can add more water to thin it out.
Working with Fresh Plaster
Avoid under- or over-mixing. Keep your mixing time to no less than 1 minute and no more than 2. When plaster isn't properly mixed, it has a tendency to separate. On the other hand, overmixing can cause bubbles to form, which may decrease the strength of the plaster or ruin the smoothness of the finished wall. Perfectly-mixed plaster will be opaque, creamy, and free of lumps, bubbles, or grit.
Add pigment for bolder colors. A splash of vibrant color can make walls pop. Stir dry powdered pigment into a container of water to create a slurry, then add the slurry to the plaster bucket just prior to mixing. This will make for effortless blending and help you sidestep common issues like spotting and clumping. When incorporating pigment, you can add up to 10% of the total weight of the plaster you used, or until you reach the desired depth of color. Colored plasters allow certain paint shades to show up better. For instance, royal blue paint will stand out boldly over a blue-tinted plaster base without the need for as many coats of paint as you would need for plain white plaster. They can also be quite attractive on their own, providing a more earthy, natural look to a room.

Apply the plaster right away. Once it's been mixed, pour the plaster onto a damp spot board to prepare it to be scooped onto a hawk. Depending on the working time of the plaster, you'll have somewhere between 5-45 minutes to get it onto the wall before it begins to harden, so don't delay. For best results, always mix your plaster just before you smooth it on. Plaster spreads and sticks best when it's fresh.


Comments
0 comment