
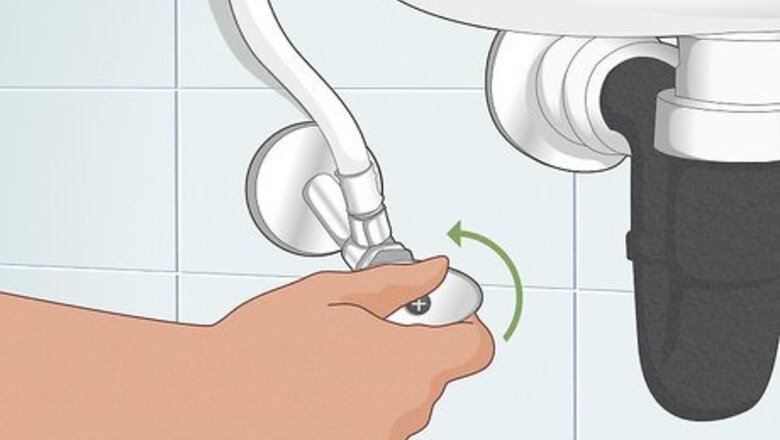
- Close the water supply lines under the sink to turn off the water and stuff a rag in the sink before you get to work.
- Disassemble the handles by looking for a small screw slot and unscrewing the fastener. If there isn’t a slot, pry the handle off manually.
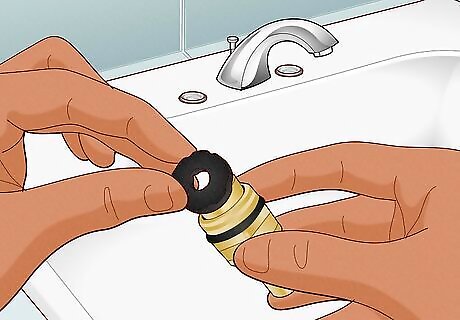
- Depending on the style of your sink, you’ll either need to replace the rubber O-ring on the valve inside or replace the entire assembly.
Preliminary Steps
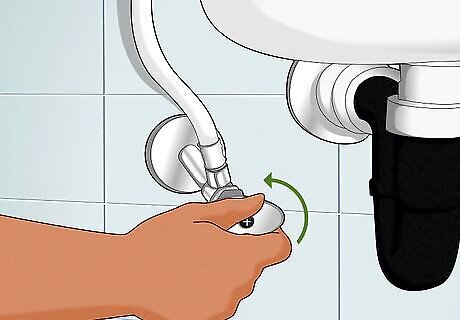
Turn off the water to your faucet. Look underneath your sink for the water supply lines that run up to the handles. Locate the valves where those pipes feed into the wall and turn them counterclockwise all the way. This will shut the water off and help you avoid making a mess.
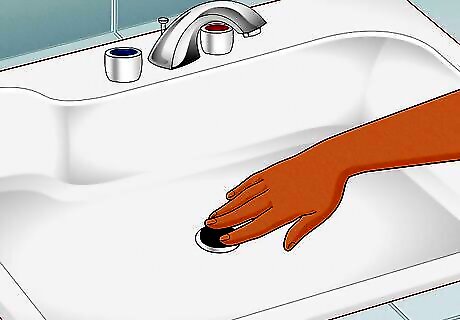
Plug the drain to avoid losing any small parts. Use a sink plug if you have one. If you don’t, shove a rag inside of the drain to block it. Nothing will ruin your day faster than watching a screw or washer you need slide down the drain when you accidentally drop it.
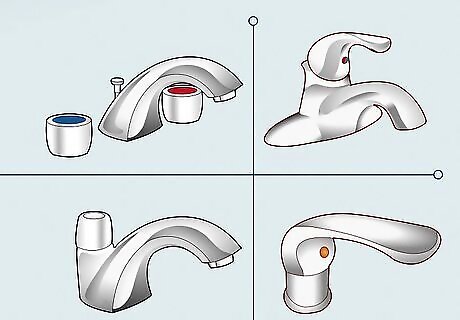
Figure out what type of faucet you have. There are tons of different styles out there, but there are really only 4 types of faucet assemblies. How you repair your faucet depends on the type of faucet, so figure this out first before proceeding. You may need to take your faucet apart before you can sort this out. A compression faucet is the most basic type. It relies on a small stem that raises up or down to control the flow of water. Most “cheap” faucets are compression-style. A ball faucet contains a ball bearing. The faucets with a single handle where you move it left or right to make the water hot or cold are ball faucets. A cartridge faucet contains a cartridge that rotates to allow the flow of water. The materials of the cartridge will vary, but the handle often has a decorative cap. Most “fancy” faucets have cartridges. A ceramic-disk faucet contains 1-2 ceramic cylinders that spin to allow water to flow. The high-end faucets with the single handle on the side (not the back!) are usually ceramic-disk faucets.
Compression Faucet
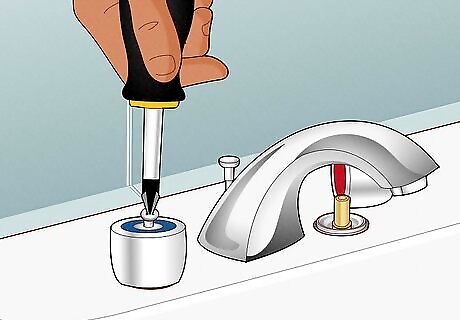
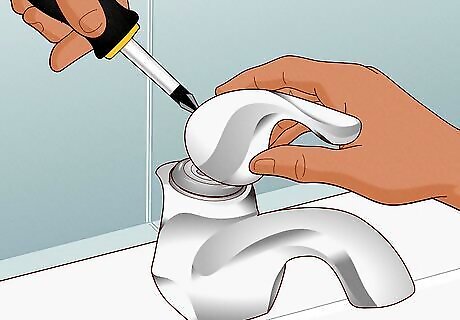
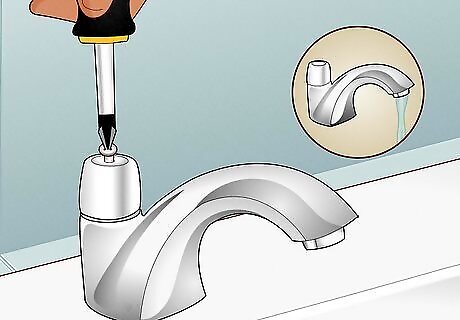
Remove each handle with a screwdriver and gentle force. Pry off the decorative cap if there is one. If there are screw slot openings, grab a screwdriver and remove the fasteners. Then, take the handles off. If you’re only adjusting one leaky faucet handle, you don’t need to remove both of the handles. The decorative cap might be a label for “hot” or “cold,” or it may be a little circular piece covering up a screw slot. Cheaper compression faucets are unlikely to have these pieces.
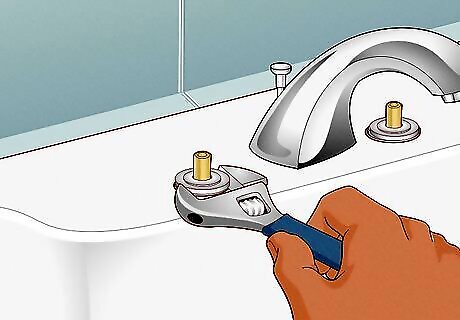
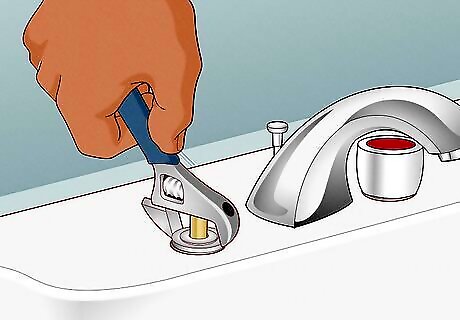
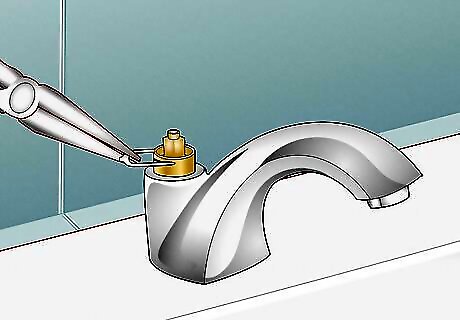
Use a wrench to remove the nut. There is a stem under the handle that sits on top of the O-ring, which sits on top of a seat washer. The seat washer is usually made of rubber, which can get worn out after a while. If your faucet is dripping, this is mostly likely the culprit.
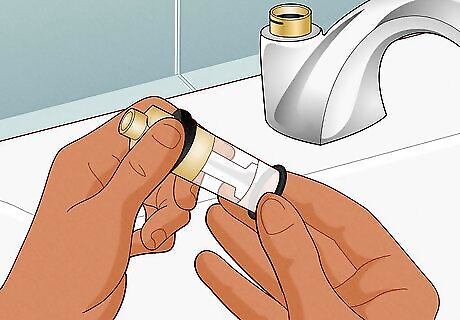
Pull out the stem using a wrench or your hands. If the stem won’t come out when you twist it or pull on it, use a wrench to pry it out or unscrew it. This will expose the O-ring, which will be thinner, and the seat washer, which will be thicker. If the handles are leaky replace the O-ring. Take the old one to the hardware store and use it to find a replacement. Reassemble the faucet handle and test the water once you replace the O-ring.
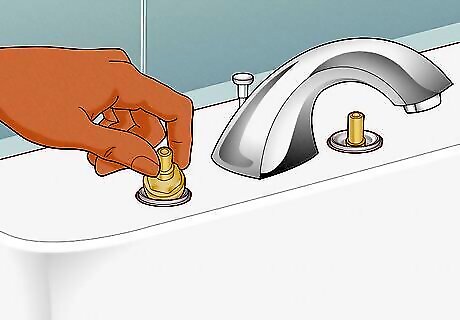
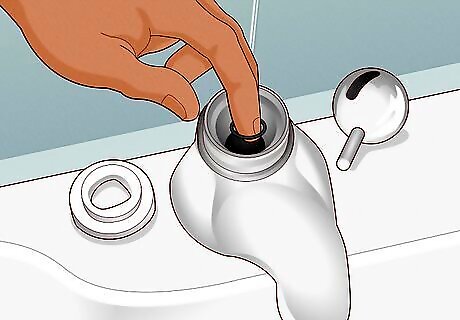
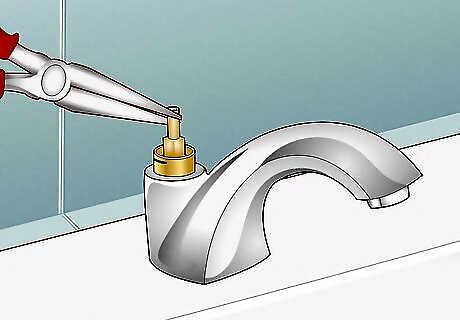
Remove the seat valve washer. This is the upside-down brass screw. Either unscrew it by hand, or use a wrench to loosen and remove the valve washer. If your faucet is leaking, this is probably the main culprit.
Replace the seat washer with an exact replica. Since these washers aren’t universal, take it with you to the hardware store to find a replacement. If you can’t find a replacement, contact your faucet’s manufacturer to order one directly from them. Coat the replacement in plumber’s grease before installing it back in the valve. You can use petroleum jelly instead of plumber’s grease if you prefer.
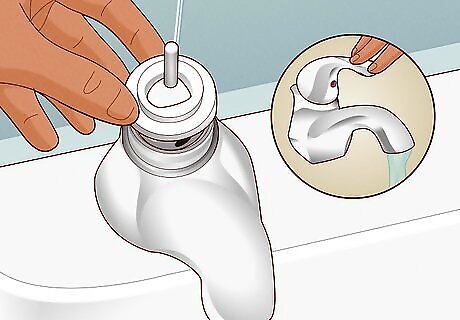
Reassemble each handle and check your work. Put everything back together the same way you took them apart. Tighten any screws or fasteners you removed. Then, turn the water on and let it run for a few minutes to wash out any debris. Any minor leaks should now be fixed. If you do find any leaks, confirm that you installed the O-ring and seat washer correctly. If there’s still a leak, you likely have to replace the entire faucet.
Ball Faucet
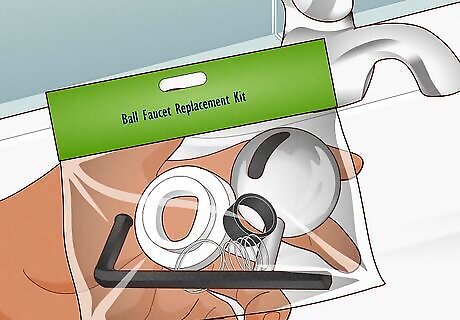
Buy a replacement kit for your ball faucet. Ball faucets have several parts that require replacement. They need special tools, too. You won't need to replace the entire faucet, just the faucet cam assembly. All of the stuff you'll need, including the tools, should be included in this type of kit that runs about $20. Look for a kit that specifically mentions your specific faucet brand and model as compatible.
Unscrew the handle and remove it. Lift off the handle and place it aside. You may need to unscrew a small faster that holds the lever in place on top of the ball cap. Pop off the spout and handle.
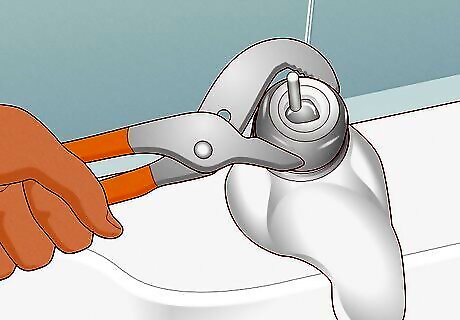
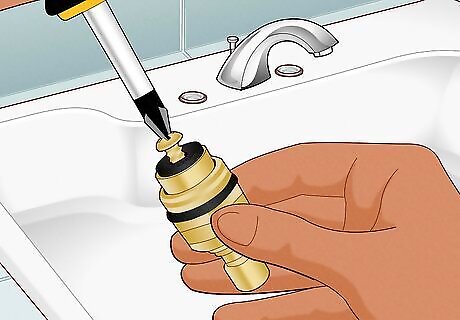
Use pliers to remove the cap and collar. Loosen the faucet cam, which is the threaded bit on top of the entire valve assembly. There is a specific tool in your replacement kit for this purpose, so follow the instructions that came with your kit. Remove the faucet cam, washer, and ball. This will look like a "ball and socket" joint in your body—a movable (usually white) rubber ball plugs the socket, which stops the water and releases it.
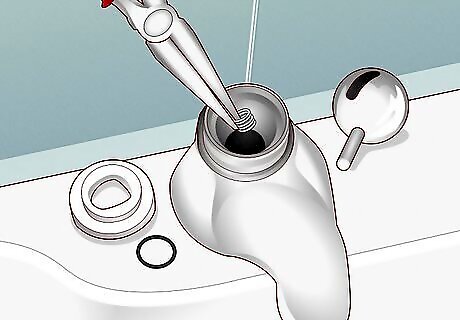
Remove the inlet seals and springs. Reach inside of the faucet body using needle-nose pliers and pull out the small seals and springs. Note how these components are attached to the valve, which should help when it’s time to reassemble your faucet.
Replace the O-rings by sliding them on by hand. Cut off the old O-ring and coat the new one in plumber’s grease. Slide it onto the assembly where the old O-ring was located. In the vast majority of cases, the O-ring is the culprit for the leak. You can use petroleum jelly instead of plumber’s grease if you prefer.

Install new springs, valve seats, and cam washers. These are all be included in your kit, and should be essentially the reverse of the process you completed. Wherever you took a spring or washer off, install a replacement. Even though the O-ring is likely to blame, replacing the springs and whatnot will keep you from needing to replace them in the near future.
Reassemble the handle and test your work. The leak should now be repaired, but double-check just to be sure. Turn the water on and let it run for a few minutes to wash out any debris. Then, check under the sink and around the faucet to confirm you don’t have water leaking anywhere.
Cartridge Faucet
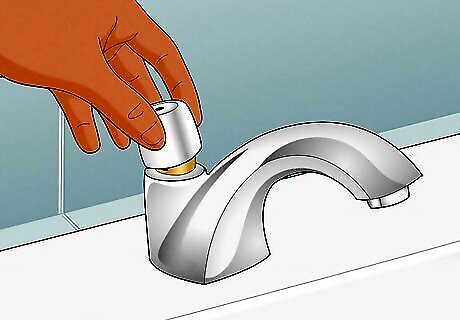
Remove the handle to access the valve underneath. Pry off the decorative cap if you have one. Then, look for a small opening on each handle where the screw goes. Use a small screwdriver to unscrew the fastener and then remove the handles. If you don’t see any screw slots, try gently prying the handle up by hand or twisting it “backwards” until it comes off.
Remove the retaining clip if necessary. In some niche models, a retaining clip holds the cartridge in place. This is a circular, threaded piece that’s usually made of plastic. Use pliers to pry it off of the cartridge.
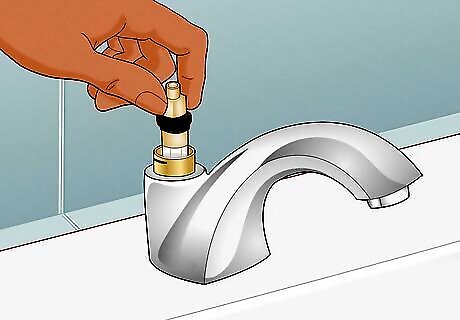
Pull the cartridge out or stand it up straight. The cartridge may come right out. If it doesn’t, pull it up until you hear a click. This is the position the cartridge sits in when the water is on full blast.
Remove the faucet spout if the cartridge doesn’t come out. Slide the spout up off of the cartridge and set it aside. Locate the O-rings at the base of the cartridge.
Replace the O-rings or swap out the cartridge entirely. If your cartridge looks undamaged and it’s inside the faucet opening, simply clean it off with a damp cloth and replace the O-ring. However, if the cartridge looks damaged or it simply looks unreasonably old, purchase a replacement and stick it inside the opening. The cartridge will click in place when you insert it. There’s only one way for the cartridge to go in, so it’s impossible to get this one wrong. You must purchase a replacement cartridge designed specifically for your faucet brand and model.
Reassemble the handle and confirm everything works. The leak should now be repaired. Put the handle back over the cartridge, install the retaining clip if there was one, and turn the water back on to confirm everything is smooth.
Ceramic-Disk Faucet
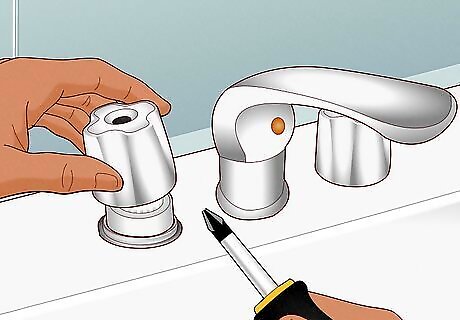
Take out the handle and remove the escutcheon cap. Unscrew the handle by turning it counterclockwise until it comes loose or removing the fastener holding the handle in place. Locate the escutcheon, which sits directly beneath the handle and is usually made of metal. Lift the escutcheon off to reveal the cylinders underneath.
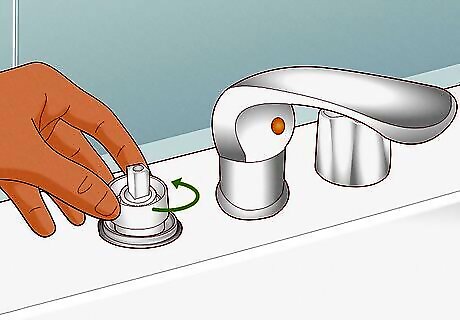
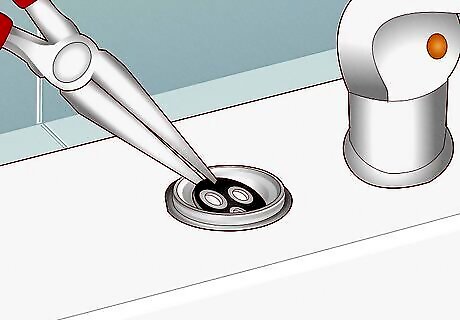
Unscrew and remove the disk cylinder. Every ceramic-disk faucet is going to be different, but you typically use a screwdriver to loosen the retainer nut or mounting screw that holds the disk cylinder in place. Then, lift the cylinder out of the opening in your faucet. Depending on the design of your faucet, you may have multiple disk cylinders. Take all of them out if you do, but note the way they’re arranged on top of one another.
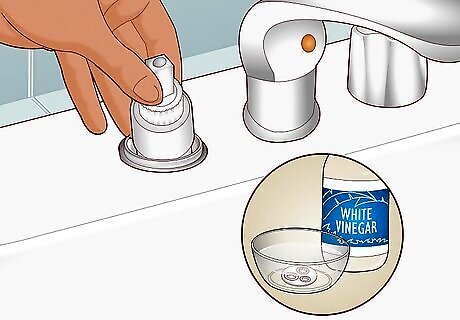
Pry out the seals and clean the cylinders. White vinegar would work well for this, especially if you have hard water. Soak the disk(s) for 2-3 hours to work out the build-up and then assess whether or not they're reusable. Use your gut with the disks. If they look like trash, they probably need to be replaced.
Replace the seals or cylinder disk if they look damaged. If the seals look pitted, frayed, thin, or otherwise worn but the disk is fine, simply take it to the home improvement store and buy a replacement. Otherwise, purchase a new disk deigned specifically for your faucet model.
Reassemble the handle and turn the water on. Put everything back the way it originally was. Then, turn the handle for a few minutes to allow the water to flush out any debris. Check under the sink and around the faucet handles for leaks to confirm everything works.


Comments
0 comment