views
Changing a Pitcher or Dispenser Filter
Soak the replacement filter in cold water for 15 minutes. Place the new filter in a clean container that’s deep enough so you can fully submerge it. Fill the container with cold water and leave it alone for at least 15 minutes. During this time, any excess carbon from the filter will lift out and separate so it doesn’t get in your drinking water. Soaking the filter also ensures that water flows evenly when you use it. Don’t use water warmer than 86 °F (30 °C) since it could damage the filter.Warning: Avoid using third-party filters with your PUR pitcher or dispenser since they may not fit as well or have been tested as efficiently.
Twist the old filter counterclockwise to remove it. Take the lid off of the pitcher or dispenser and set it aside. Then, lift up the pour tray, which is the blue plastic reservoir on top, and take it out. Grab the cylindrical filter from the bottom and rotate it counterclockwise so it unhooks from the filter. Pull the old filter out through the top of the pour tray and throw in the garbage. Wait until the pour tray is empty to change your filter, or else it may be difficult to remove or you may spill.
Rinse the new filter under your faucet for 10 seconds. Take the filter out of the container when it's finished soaking and hold it underneath your faucet. Turn on cold water and rotate the filter so you can rinse it off completely. After 10 seconds, turn off the water and shake out any excess that’s still in the filter. Don’t use hot water to rinse the filter off, or else you may damage it.
Screw the filter clockwise into the pour tray to secure it. Slide the long, cylindrical part of the filter through the hole in the middle of the pour tray and push it down as far as it goes. Hold the filter by the bottom and rotate it clockwise until you hear it click into place. Try tapping on the end of the filter to make sure it doesn’t pop out from the pour tray. Place the pour tray back into the pitcher or dispenser before replacing the lid. If the filter does pop out of the pour tray, then you didn’t properly secure it. Reinsert it and try turning it clockwise again. PUR filters for pitchers and dispensers usually work for 40 gallons (150 L), or approximately 2 months.
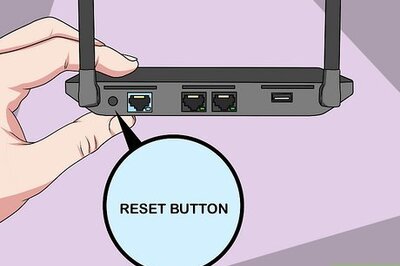
Hold the Reset button down for 5 seconds if your pitcher or dispenser has one. Some newer PUR pitchers and dispensers have sensors that detect when you need to replace the filter. Right after you replace the filter, press the Reset button on the lid and keep it held down for 5 seconds. A green light will blink on the lid once the sensor resets. Older pitchers or dispensers may not have an electronic display.
Replacing a Faucet Filter
Unscrew the filtration system from your faucet. Support the weight of the filtration system with your nondominant hand so it doesn’t fall and break. Rotate the plastic locking nut holding the filtration system to the faucet counterclockwise to loosen it. Once you unscrew the system completely, carefully lift it away from the faucet and set it down on a countertop or towel. Water may spill out from the faucet when you unscrew the filtration system. Some models of PUR filtration systems may snap onto the faucet. If it doesn’t unscrew, try pulling it straight down from the faucet.
Twist open the top cover of the system to remove the old filter. Hold the filtration system so the rounded end of the large cylinder points up. Unscrew the top from the cylinder by rotating it counterclockwise, and set the cover aside. Pull the old filter straight out from the system and throw it away in your trash. The top cover is always on the opposite end of the spout that dispenses water.
Set the new filter inside of the system and screw on the cover. Make sure the narrower end of the filter is on the bottom and the logo is right-side up. Place the filter into the filtration system so it has a loose fit. Set the top cover back over the filter and screw it into place to secure it.
Reattach the filtration system to your faucet. Hold the filtration system against the bottom of the faucet so the threadings are perfectly horizontal, or else they won’t form a tight seal. Rotate the locking nut clockwise onto the faucet and continue tightening it until it’s hand-tight. Turn on the water and make sure it doesn’t drip or leak at the seam. If your filtration system doesn’t screw on, line it up with the faucet and apply firm pressure to snap it on.
Run cold water through the filtration system for 5 minutes. Turn the handle on the right side of the filtration system to divert the water through the filter. Allow the water to run through the filter for 5 minutes to get rid of any residue inside so it works more efficiently. After that, you can use the filter immediately after turning it on. PUR faucet filters work for 100 gallons (380 L) of water, or about 3 months of use. Don’t run water over 100 °F (38 °C) through the filter since you could damage it.Warning: The water may sputter or look cloudy when you first use the new filter, but it will get better as you run water through it.


Comments
0 comment