
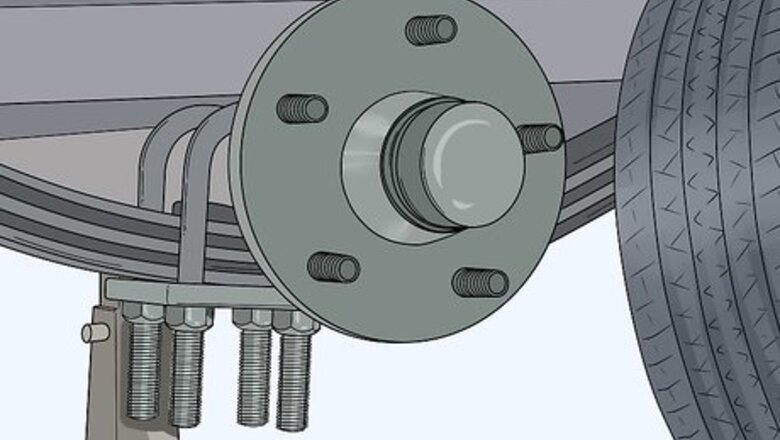
Removing the Hubs and Bearings
Take 1 wheel off the trailer to access the hub assembly. Loosen the nuts on all wheels with a lug wrench while the trailer is on the ground. Jack the trailer up just enough to lift the wheels off the ground. Finish unscrewing the nuts on 1 wheel with the lug wrench, remove them, and slide the wheel off the hub. You will need to use a lifting jack, such as a bottle jack, to get the trailer up off the ground. Make sure to do this on a hard, flat surface. You do not need to go under the trailer for any part of this process.
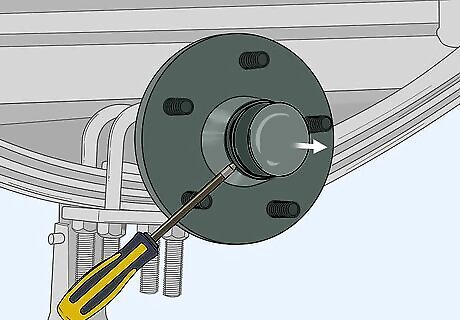
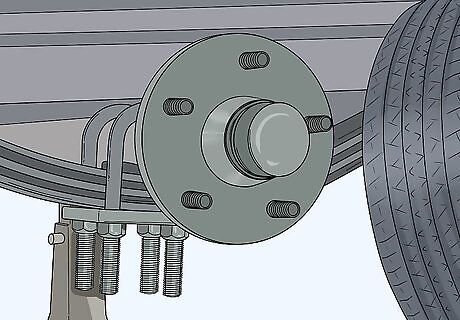
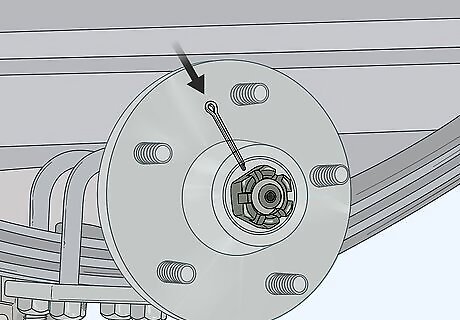
Pry off the dust cap with a flathead screwdriver. The dust cap is a metal cap that sits in the middle of the hub. Slide the tip of the screwdriver under the lip of the dust cap, tapping it in with a hammer if you need to. Use the screwdriver as a lever to pry up the dust cap using. Work your way around the perimeter of the cap until it is loose enough to pull off. The dust cap is also known as a grease cap. It covers the nut that holds the hub assembly to the spindle shaft of the trailer. You need to remove it so you can take the hub off the spindle and access the bearings.
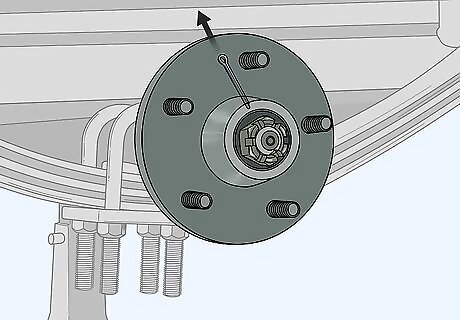
Bend the cotter pin straight and pull it out. A cotter pin is a metal fastener that has 2 tines which are bent after installing it to fix it in place. It goes through the side of the nut in the middle of the hub and through a hole in the end of the spindle shaft. Use pliers to straighten out the cotter pin, then pull it out once it is straight. The cotter pin is also known as a split pin. You need to pull it out so you can loosen the adjusting nut to remove the hub assembly.

Unscrew the adjusting nut and remove the washers. The adjusting nut is the nut in the middle of the hub right under the dust cap that you removed. Use an adjustable wrench to remove the adjusting nut and set it aside. Pull off the washer underneath the nut and set it aside as well. Some adjusting nuts are surrounded by a cage-like structure that secures them even more. If you see this, you can pry it up using your flathead screwdriver to free the nut so you can loosen it.

Pull the hub assembly off the spindle shaft and place it on a flat surface. The hub assembly is the round metal part right behind the wheel that holds the wheel to the spindle shaft, which is the shaft under the trailer that spins the wheels. Grab the hub assembly with both hands and place your thumbs over the outer bearing so it doesn’t fall out. Pull the whole hub assembly carefully towards you until it slides completely off the spindle shaft, then set it face-up on a flat work surface. If the hub doesn’t slide off easily, try rocking it gently back and forth to loosen it. You can also try using a mallet to gently tap the back of the hub assembly in a few different spots to knock it loose.

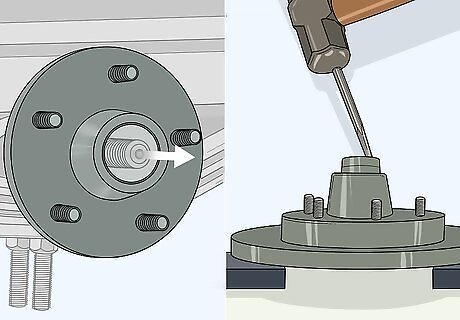
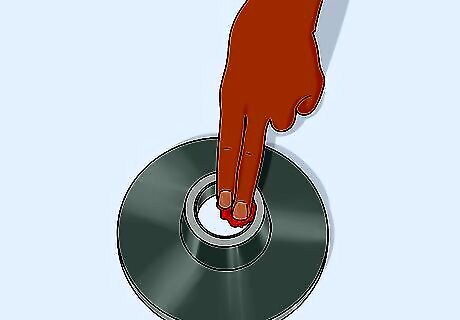
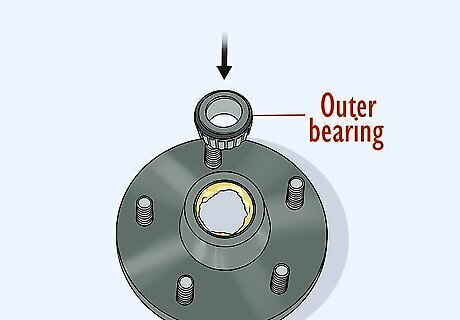
Lift the outer bearing out of the hub. The outer bearing is the bearing in the middle of the hub that faces outwards towards the wheels, right underneath the adjusting nut and washer that you removed. Slip your fingers in the middle of the outer bearing, lift it up and out, then set it aside. Each bearing consists of a pair of races, or rings, that hold the ball bearings in between them, called the outer race and inner race. When you pull the bearing out, it will be the whole piece consisting of these 2 rings with little metal balls inside them.
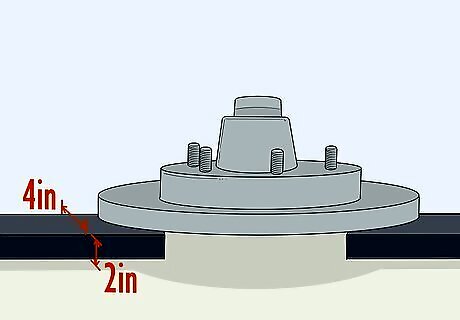
Set the hub on a pair of 2x4s. Put 2 2x4s on your flat work surface so there is a gap between them larger than the diameter of the bearings. Place the hub assembly face-up on the 2x4s so the inner bearing, which is the bearing facing towards the underside of the trailer, away from the wheels, is aligned with the gap between them. This will allow you to knock it out.Tip: You could also use a hollow cinder block or anything else you have handy that can support the hub assembly with a gap underneath the inner bearing. The inner bearing is held in place by a seal, so you have to knock it out from the other side to pop the seal out with it. You can’t just lift it out as you did with the outer bearing.

Use a hammer and punch to tap out the inner bearing. Place the tip of a punch inside the hub against the inner bearing. Tap the back end of the punch with a hammer to knock out the inner bearing and seal. Work your way around the bearing until it falls out underneath the hub. A punch is a metal rod with a sharp tip at 1 end and a blunt end on the other side. If you don’t have a punch, you can also use a wooden dowel rod as a punch to knock the inner bearing out.
Repeat the process for all the remaining wheels. Take off all the other wheels, 1 at a time, by loosening the lug nuts with your lug wrench, and set them aside. Repeat the process for removing each hub assembly and all of the bearings.
Installing New Bearings in the Hubs
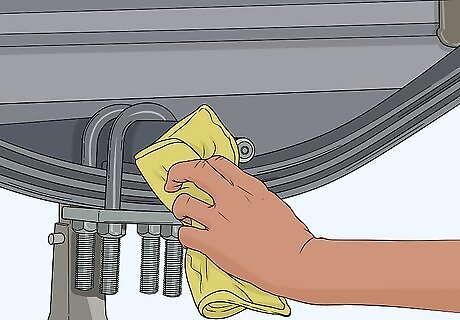
Wipe off all the old lubricant from the spindle shaft and hub with a rag. Use a spare rag to wipe off as much grease as you can from the outside of the spindle shaft. Do the same for the inside of the hub assembly. Grease gets dirty over time, so it’s important to remove the old grease and relubricate everything with new, clean grease.

Clean the spindle shaft and hub assembly with kerosene or solvent. Soak a clean rag in kerosene or grease solvent and wipe the spindle clean. Place the hub in a container and fill it with kerosene or solvent. Let it soak for a few minutes, then use a rag to wipe off the rest of the grease from inside the hub. You can blow-dry the parts with compressed air if you have it available. If not, wipe them dry with a clean rag and let them completely air dry before applying new grease. Kerosene can cause skin irritation after prolonged contact with skin, so wear a pair of rubber gloves while cleaning to avoid this. You will also need to dispose of dirty kerosene at a hazardous waste collection site.

Apply a light coating of grease to the spindle shaft. Stick 2 of your fingers in a bit of new wheel bearing grease and scoop up a small dab of it. Wipe it all over the clean spindle shaft to lightly lubricate it. This will make reassembly easier and also help with cooling.
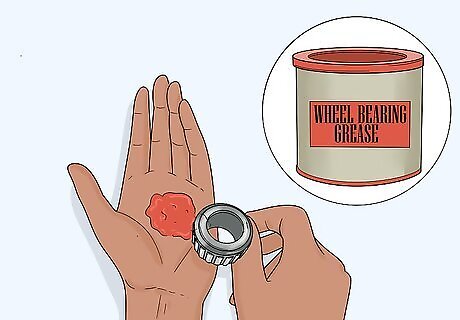
Pack the new bearings with wheel bearing grease. Remove your new bearings from their packaging. Fill the palm of your non-dominant hand with grease. Pack grease under the balls of the bearings by smashing and scraping the large side of the bearings against the grease in your palm to force it inside until you see grease coming out the small side.Tip: Even when you don’t need to replace your bearings, you should remove them and repack them with new wheel bearing grease once a year. Trailer bearings are tapered, so 1 side is slightly larger than the other.
Fill the hub with wheel bearing grease. Scoop some grease up in your hand. Generously apply it to the entire inside of the hub where the bearings will sit. You don’t need to put lubricant where the seal will sit on top of the inner bearing.

Place the inner bearing in the hub and put the new seal on. Put the hub face-down on your work surface and insert the inner bearing small-end-first. Place the seal on top so the lip is facing the bearing and tap it in gently with a hammer until it is flush. The lip of the seal is the non-metal part of the seal. It needs to face the bearing so it holds the grease in.
Insert the outer bearing. Flip the hub over so it is face-up on your work surface. Insert the outer bearing small-end-first. Your bearings are now installed and you can put the hubs back on the trailer.
Putting the Hubs Back on the Trailer
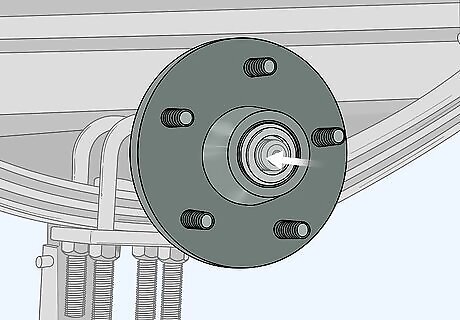
Slide the hub assembly back onto the spindle shaft. Pick up the hub with both hands and hold your thumbs over the outer bearing so it doesn’t fall out. Push the hub all the way back onto the spindle shaft.Warning: Be careful not to hit the seal on the back of the hub when you slide it onto the spindle or you might damage it. The hub will slide on easily as long as you lubricated the spindle shaft enough. If not, then set it down again and apply a little more grease to the shaft.
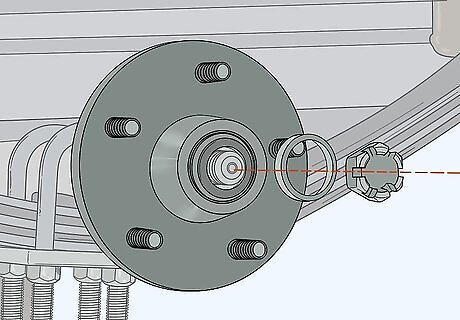
Put the washer and adjusting nut back on. Slide the washer back over the end of the spindle shaft so it covers the outer bearing. Start screwing the adjusting nut back on by hand, then finish tightening it with an adjustable wrench. To make sure the adjusting nut is properly tightened, tighten it all the way once, loosen it a bit, tighten it again, loosen it again, then finally tighten it all the way.
Slide a new cotter pin in to lock the nut. Loosen the nut about 1/4 of a turn and slide a new cotter pin through the end of the spindle shaft. Bend the cotter pin with pliers to lock it in place. Keep in mind that once you secure the cotter pin in place, the adjustment nut can’t be turned anymore.
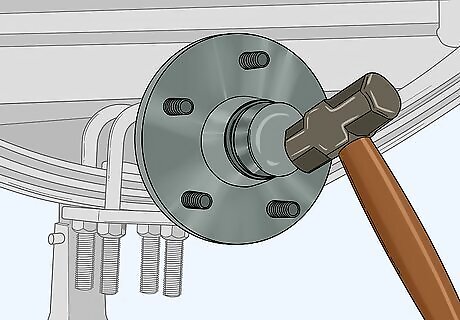
Hammer a new dust cap onto the hub. Place the dust cap over the adjustment nut. Tap it with a hammer around the entire perimeter to secure it in place. The dust cap protects the outer bearing and grease from getting and dust and dirt in it.

Reattach the wheels to the trailer. Slide the wheels back over the hubs and put the lug nuts back on with your lug wrench. Jack the trailer back down so the wheels are resting on the ground again, then finish tightening the lug nuts. You can now take your trailer for a test drive!


Comments
0 comment