

Changing Editable Text

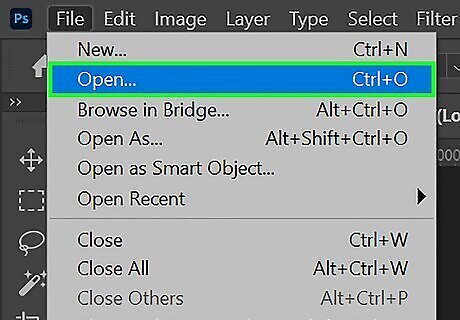
Open a project in Adobe Photoshop. You can change the text color when adding new text or editing existing text.
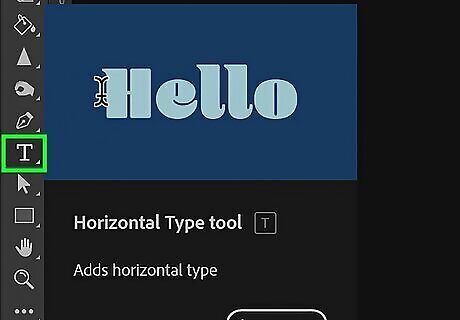
Select the Type Tool. You can use the Horizontal Type Tool or Vertical Type Tool. You can also press T on your keyboard.
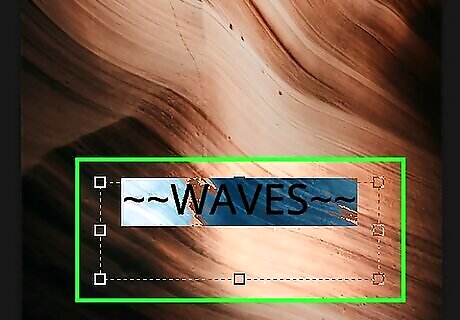
Select your text. If the text is still editable, you should be able to highlight the text within the text box by dragging your cursor. If the text is already rasterized, see the next method.
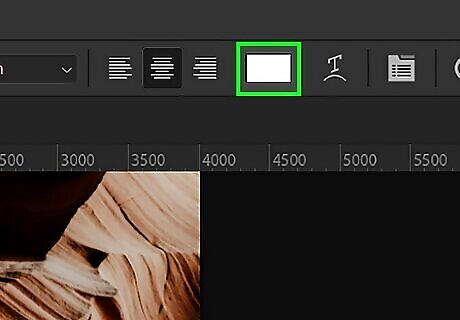
Click the color swatch box. When the text is highlighted, you'll see this box in the top toolbar, next to the text alignment icons.
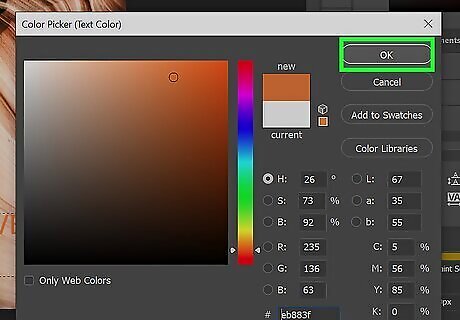
Select a new color and click OK. This will apply the new color to your text.
Changing Rasterized Text
Open a project in Adobe Photoshop. Use this method if the text has been rasterized.
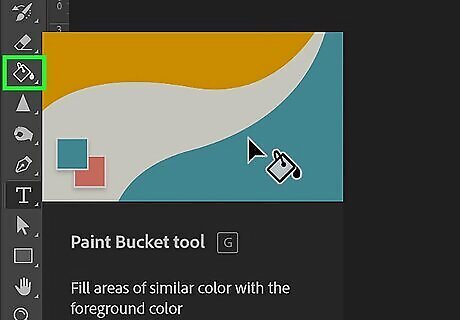
Select the Paint Bucket tool. This will be in the toolbar. If you can't find it, click and hold the Gradient tool to show more options. You can also press G on your keyboard.
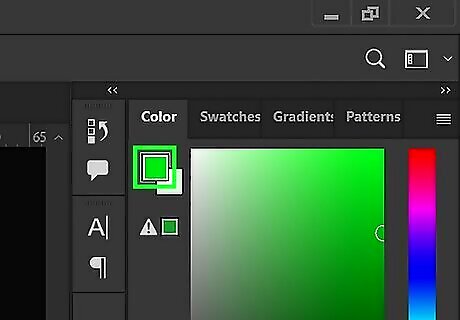
Click the upper color selection box. This is the topmost square.
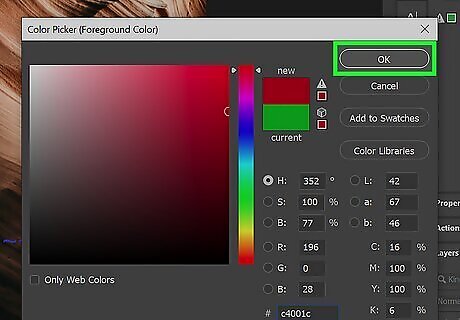
Select a new color and click OK. This will be the new color of your text.

Click the rasterized text. This will apply the new color using the Paint Bucket tool. If the color doesn't change, make sure to specify to fill the selection with the foreground color in the tool options bar.


Comments
0 comment