
Maintenance for a New Cricket Bat
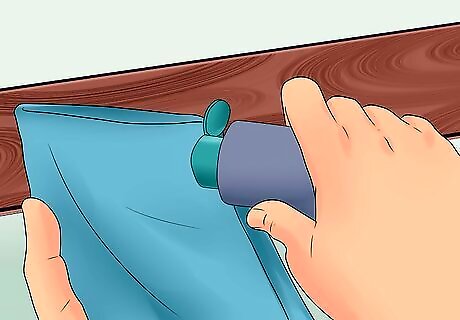
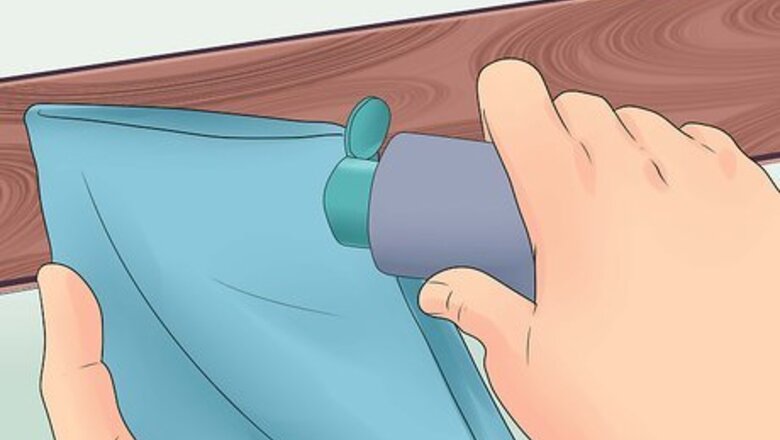
Apply linseed oil to your bat. Oiling your cricket bat seals moisture into the wood so it’s less likely to dry out and get damaged. Lay the bat horizontally and apply a coin-sized amount of linseed oil to the face. Spread a thin layer of oil over the bat’s face with your fingers. Then, flip the bat over and apply another coin-sized amount of oil to the backside and edges. Leave your bat face-up horizontally for 24 hours so the oil absorbs into the wood. Apply a second layer of oil to the surface and let it sit for another 1-2 days so it has time to dry out. If you don’t want to use your fingers, then spread the oil with a lint-free cloth. Avoid applying oil around the handle or bottom edges because it could cause damage over time. Using too much oil can soften your bat too much and make it more prone to damage.
Hit the bat face with a mallet to knock it in. Knocking in your bat compresses the wood so you get more consistent hits. Hold the bat firmly in one hand, and start gently tapping the face of your bat. Move up and down the length of the bat with the mallet, and hit the wood harder as you go. Be sure to focus on the edges and toe of the bat the most because that’s where it’s most vulnerable. Plan on knocking in your bat for a total of 4-5 hours for an adult bat, or 2-3 hours for a junior bat. Try hitting a cricket ball with your bat. If the ball leaves an indent, go back and knock your bat in for a little longer.
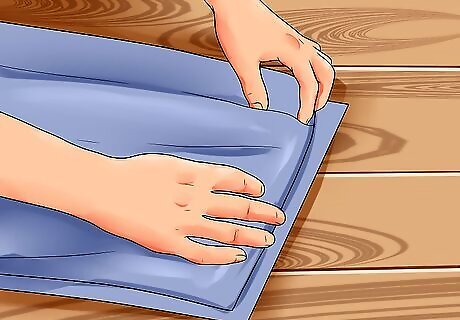
Apply anti-scuff sheets, edge tape, and toe guards. Anti-scuff sheets, edge tape, and toe guards all protect the wood from marks, scuffs, and light damage. While they’re not required on your bat, they all preserve your bat so it lasts through multiple seasons. Anti-scuff sheets: Trace the shape of your bat onto the anti-scuff sheet’s backing paper, and cut it out with scissors. Slowly peel the backing paper off and press the sheet onto the face of your bat. Smooth the sheet out to remove any bubbles. Edge tape: Cut a strip of edge tape to the length of the bat’s edge. Press the tape firmly onto the wood and smooth out any bubbles. Toe guard: Heat the toe guard with a hair dryer so it’s more flexible and easier to move. Apply a thin layer of super glue to the toe of the bat and press the toe guard on firmly.
Regular Cricket Bat Maintenance
Clean off dirt and marks with a damp microfiber cloth. Scuffs and marks are bound to happen when you hit a ball, but they’re simple to clean. Dampen a microfiber cloth and wring out all the excess water. Gently wipe your bat to remove dirt from the surface. For any tougher marks, apply a little pressure to scrub them off. Use a dry cloth to remove any excess moisture that’s left on your bat. Leaving moisture on your bat could soften the wood or cause damage.
Inspect your bat for damage after each use. Whenever you’re done using your bat, look it over for any cracks, nicks, or loose pieces. If you notice some smaller cracks or superficial damage to your bat, you may be able to repair it on your own. Otherwise, contact a sporting goods store or the bat’s manufacturer to see if it can be repaired. Jump to our section on repairs you can make at home.
How to Properly Store a Cricket Bat
Store your bat inside a protective cover in a cool, dry place. Whenever you’re not using your bat, put it in a case or cover to prevent damage. Find a place that maintains consistent temperatures and is out of direct sunlight, such as a closet. Lay the bat horizontally with the face pointing up. If you don’t have the space to store your cricket bat horizontally, it’s okay to store it vertically too. Just set it so the handle points up. Avoid storing your cricket bat outdoors or in an area with frequent humidity changes, like a basement, garage, or attic.
How to Make a Cricket Bat Last Longer
Oil your bat at the start and end of each season. To keep your bat from drying out and getting brittle, apply a thin layer of linseed oil before your first use and after your last use. Always let the oil sit for 24 hours so it soaks into the wood, and then apply a second coat. If you put anti-scuff sheets on your bat, still apply some linseed oil to the back.
Replace your grip and scuff guards when they’re worn out. The more you play, the more your grips and scuff guards will wear down and become less effective. When you notice the guards and grips breaking apart, remove the old ones and replace them with a fresh set. Grip: Roll the old grip up toward the end of the handle to remove it. Place the new grip onto a bat cone and roll it up toward the other end. Slide the rolled grip onto your bat handle, and unroll it. Scuff guards: Heat the scuff guards up with a hair dryer or heat gun, and slowly peel them off the surface. Wipe your bat with a damp cloth, and dry it before applying a new sheet.
Cycle between multiple bats. Pick up an extra bat or two if you’re able to, so that you have a few options to choose from. Rather than using one bat until it breaks or wears down, alternate which bats you use. Use one bat just for training and practicing, and use the other when you actually play a game.
Can you repair a damaged cricket bat?
You can repair minor cracks on your bat. Minor cracks on the front of your bat are usually superficial and won’t affect your performance. However, you can still easily repair them with a little repair glue, such as wood glue or super glue: Spread the glue underneath the cracked or delaminated wood using a syringe or your fingers. Tape the wood down with packing tape. Clamp a flat piece of wood over the glued area. Let the glue set for the time listed on the packaging. Lightly sand the surface with 180-grit sandpaper until it’s smooth. Apply linseed oil to the wood and let it sit for 24 hours.
Check if professional repairs can fix heavy damage. If your bat has a lot of structural damage or you don’t feel confident repairing it on your own, contact a sporting goods store or the bat’s manufacturer. They may be able to do larger repairs or even send you a replacement. If your bat cannot be repaired, then it’s time to get a replacement.
When to Replace a Cricket Bat
Get a new bat if it vibrates or has less power when you use it. If you notice that your bat isn’t hitting as well as it used to or if you feel the handle vibrate in your hands, it’s a sign your bat is getting old. When you get a new bat, make sure you oil and knock it in before using it so it lasts a long time. Replace your bat when it’s severely damaged as well. As a good rule of thumb, if you have to pay more than half the bat’s price for repairs, it’s best to just get a new one.
Common Cricket Bat Maintenance Mistakes

Too much oil Over-oiling your bat can actually soften the wood and make it more prone to damage when you’re playing. Stick to using a coin-sized amount, and always wipe up the excess when you’re finished.
Harsh or abrasive cleaners Harsh and abrasive cleaners can damage the wood on your bat, so it’s best to completely avoid them. Stick to using a damp microfiber cloth to remove marks. If there are still scuff marks, try lightly sanding the surface with 180-grit sandpaper to remove the mark. Just be sure to apply linseed oil to the spot you sanded.
Improper storage Storing your cricket bat in an area with high humidity or frequent temperature changes can cause the wood to warp. Always make sure to find a well-ventilated spot with consistent temperatures to keep your bat safe and sound.


Comments
0 comment