
Replacing the Chime Cover

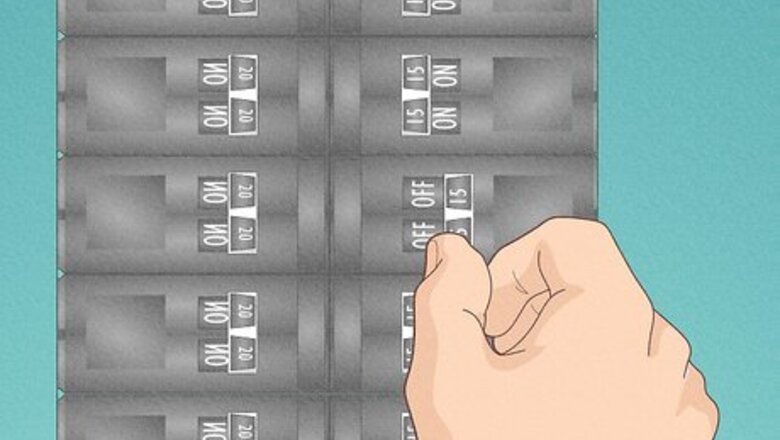
Turn off the power if you have a wired door chime. Head to your home’s electrical panel and switch off the breaker that powers your doorbell. If your breaker switches aren’t labeled well, switch off the most likely candidate(s)—the breaker(s) that power items in the vicinity of the doorbell chime. To confirm that you switched off the right breaker, try ringing the doorbell. If it doesn’t work, the power is off! This step is recommended but not absolutely necessary, since wired doorbells run on low voltage and present a very low risk of causing any type of serious electrical shock. Skip this step altogether if you have a battery-powered wireless doorbell.
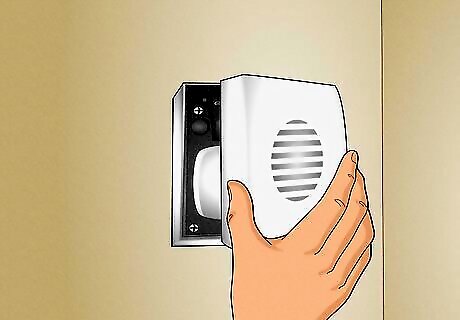
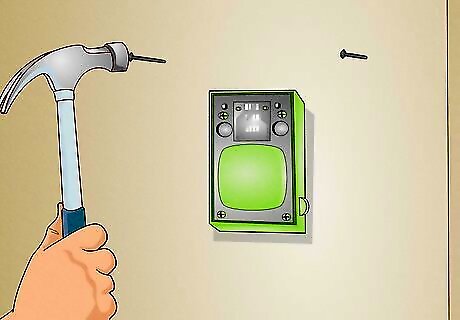
Unscrew, slide, or pop off the existing chime cover. Refer to your user’s manual, if you have it, so you know exactly how to remove the chime cover. In most cases, expect to do one of the following: Slide the chime cover up and off of the chime box. Press a tab at the bottom (and possibly also the top) of the chime cover and pop it off of the chime box. Remove 2 or more screws that hold the chime cover in place. Keep track of the screws for later use.
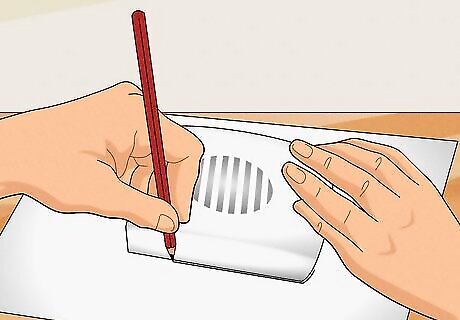
Trace or diagram the cover on a piece of paper. To trace the cover, lay it face-side up on a sheet of paper and follow the outline carefully with a pencil. Alternatively, sketch a rough drawing of the cover on a sheet of paper, then carefully measure the dimensions of the cover and add these to your diagram. In both cases, make sure to measure and write down the depth of the cover—how far it sticks out from the wall. If the cover has screw holes or tab locations, measure and mark these locations on your tracing or diagram as well. Take your time—that way, you can be confident that the new chime cover will fit!

Measure the depth of the uncovered chime box if you’d like a lower-profile cover. With the chime cover now off, stretch out a tape measure to see how far the uncovered chime box sticks out from the wall. If this measurement is at least 0.5 in (1.3 cm) less than the depth measurement of the cover you just removed, you can buy (or make) a new cover with a lower profile that won’t stick out from the wall so far. Add 0.25 in (0.64 cm) to the chime box depth measurement to determine the minimum chime box cover depth you need. For example, if the old cover is 6 × 6 × 2 in (15.2 × 15.2 × 5.1 cm) and the uncovered chime box depth is only 1.25 in (3.2 cm), you can pick out a 6 × 6 × 1.5 in (15.2 × 15.2 × 3.8 cm) replacement cover.
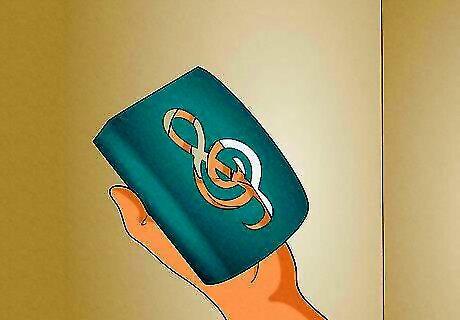
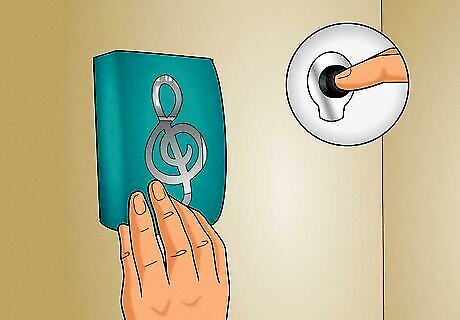
Buy or make a cover that fits the chime and suits your style. Take your diagram and the old chime cover with you to a home improvement store, then pick out a new chime cover that has the right look for your style and the right dimensions for your chime box. Or, use the diagram to shop online and order a new chime cover that fits well and looks great. Make sure the new cover fastens to the chime the same way (and in the same locations) as the old one. For example, if the old cover used 2 screws along the sides, the new one should use 2 screws in the same spots. Refer to your diagram and measurements. If you want a more unique look, shop online for handcrafted doorbell chime covers. Or, if you’re the DIY type, try your hand at making your own out of materials like punched metal and scrap wood!
Install the new cover, turn on the power, and test the doorbell. Put on the new cover the same way you took off the old one—likely by either sliding it on, popping it into place, or securing it with screws. If you turned off the power, head back to the electrical panel and switch the breaker back on. After that, head to the doorbell button and give your newly-beautified doorbell chime a ring!
Hanging a Canvas in Front of the Chime

Remove the chime cover to reduce the chime box’s profile. Most chime covers come off in one of the following ways: by sliding it up and off; by removing 2 or more screws; or by pressing 1 or 2 tabs and popping the cover free. If you have the product manual for the doorbell chime, use it to guide you. It’s not required to remove the chime cover, but doing so reduces the profile of the chime box. This, in turn, reduces the amount that the canvas cover you’ll be hanging has to stick out from the wall. Wired doorbells run on low voltage, so it’s not essential—but it is recommended—to shut off the power first. Go to your home’s electrical panel and flip the appropriate breaker switch off while you’re working, then turn it back on when you’re done.
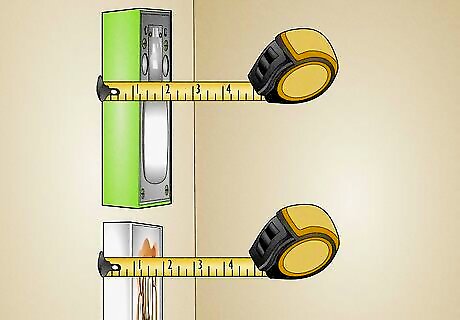
Measure the profile of the chime and your unframed canvas’s depth. Measure out from the wall and write down how far the uncovered chime box sticks out. Lay your unframed canvas, such as a painting or photo print, upside-down on a towel and measure the depth of the stretcher bars that give the canvas its shape. When you’re done, compare the canvas depth and chime profile measurements—for example: If the canvas's depth measurement is greater than the profile measurement of the chime box, you can use any thickness of wood spacers in the next step. If the chime box’s profile is greater than the canvas's depth, subtract the latter from the former and add 0.5 in (1.3 cm). This is the minimum thickness of wood spacers you’ll need in the next step.
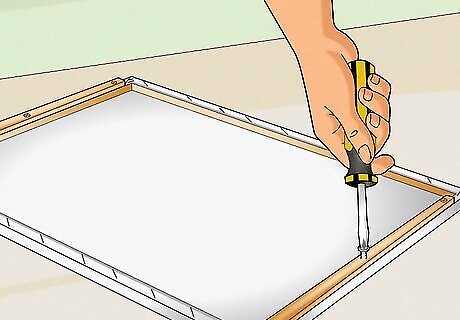
Attach scrap wood spacers to the top and bottom stretcher bars. Put on eye protection and grab a hand saw or power saw. Cut 2 scrap pieces of lumber—for example, from a 1 in × 2 in (2.5 cm × 5.1 cm) board—so they’re equal in length to the canvas's top and bottom stretcher bars. Drill 2-4 pilot holes through the spacers, then attach the spacers to the back of the top and bottom stretcher bars with screws. Pick screws that are 0.25–0.5 in (0.64–1.27 cm) shorter in length than the combined depth of the wood spacers and the canvas’s stretcher bars. Drill pilot holes that are equal to the diameter of the screws. If you want to paint or stain the spacer pieces, whether to blend them in with the wall or to make them stand out, do so before attaching them to the back of the canvas. The spacers provide enough room for the chime box to fit behind the canvas. They also create gaps between the sides of the canvas and the wall so that the sound of the chime isn’t significantly muffled.
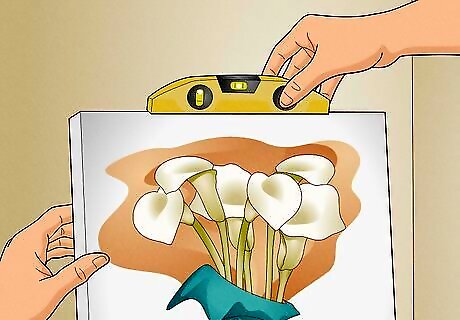
Level and mark the wall locations for 2 hanging nails. Hold the canvas against the wall where you want it to hang, making sure the chime box is fully concealed behind it. Place a carpenter’s level on top of the canvas and adjust the positioning until it’s level. Mark the top left and right corners of the canvas on the wall with a pencil. Measure in 2 in (5.1 cm) from each corner mark and make a pair of “X” marks to indicate where the hanging nails will go. Confirm that the nail locations are level by holding your carpenter’s level between the pair of “X” marks.
Tap in a pair of 2 in (5.1 cm) nails partway and hang the canvas. Hold each nail level and tap them in cautiously so that they remain perpendicular to the wall. Leave each nail sticking out about 0.75–1 in (1.9–2.5 cm). Hang the canvas by resting the top spacer bar on the pair of hanging nails. An unframed canvas is usually light enough that you don’t need to worry about driving the nails into wall studs. If you’re using an exceptionally large and heavy canvas, though, either nail into studs or use wall anchors and screws to hang it. If you turned the power off earlier, flip the breaker switch to turn it back on. Then, test out the doorbell with the canvas in place. Thanks to the spacers, you should still be able to hear the chime loud and clear!
Putting a Shelf Below the Chime
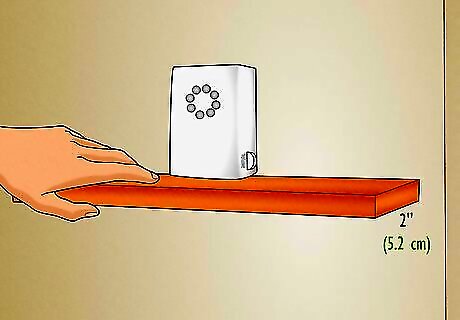
Choose a shelf with a depth at least 2 in (5.1 cm) greater than the chime’s profile. To determine the chime’s profile, simply measure how far it sticks out from the wall. Add 2 in (5.1 cm) to this measurement, then use the result when selecting a shelf. Keep in mind that the greater the depth of the shelf, the better job it will do of concealing the chime. For example, if the chime sticks out 3 in (7.6 cm) from the wall, pick a shelf that’s at least 5 in (13 cm) deep. In this case, a 6–8 in (15–20 cm) deep shelf will do an even better job. Be sure to pick out shelf brackets that are designed to hold a shelf with the depth measurement you choose. Shelves and brackets may be sold as single kits or separately.
Find and mark the wall studs in the area of the chime. Use an electronic stud finder to locate the wooden framing studs behind the finished wall, or gently tap on the wall with a hammer and listen for the “deadened” sound that indicates a stud. Mark these stud locations with a pencil. Use these markings when deciding where to locate the shelf. If possible, position the shelf so that 1) it conceals the doorbell chime and 2) its brackets are secured into the wall studs. If the studs aren’t conveniently located, you’ll have to rely on wall anchors to hold the brackets in place.

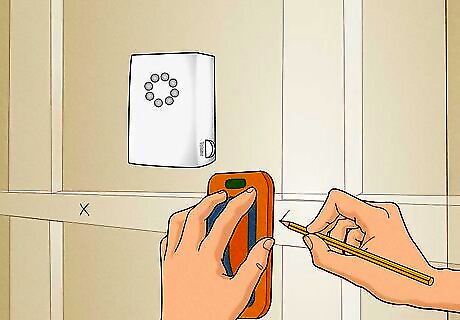
Set the shelf’s location so its ledge will be just below the chime box. Hold a carpenter’s level against the wall about 1 in (2.5 cm) below the doorbell’s chime box. Draw a line on the wall with a pencil, following the top of the level. Hold your chosen shelf against the wall so that its top aligns with the pencil line, then mark lines along the bottom and sides of the shelf with your pencil. You can center the shelf under the chime box if you wish, but this isn’t necessary since your goal is to conceal it!

Mark the spots for the shelf brackets and the screws that will hold them. Use the wall outline of the bottom and sides of the shelf as your guide for locating the brackets. Measure in about 2 in (5.1 cm) from each end of the shelf and mark a bracket location. Then, mark a bracket location for every 18–24 in (46–61 cm) of shelf length between the end brackets. Once you’ve marked all the bracket locations, hold a bracket up at each spot so that its top aligns with the bottom line of the shelf. Use your pencil to mark the holes for the screws that will secure each bracket to the wall. Line up the brackets over the studs you located and marked earlier, if possible. Otherwise, rely on wall anchors to hold the brackets in place. If your shelf is a complete kit, use all the brackets that come with it according to the recommended spacing.
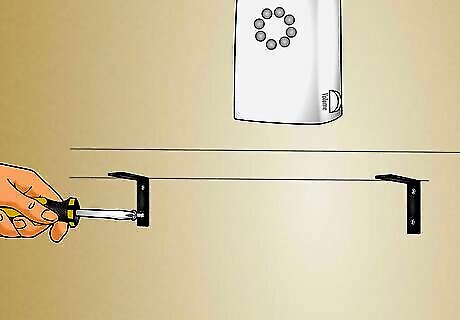
Attach the shelf brackets to the wall, using anchors if needed. If a bracket is positioned over a stud, drill small pilot holes (no larger in diameter than the screws you’ll be using) through the wall finish and into the stud at the screw hole marks. Hold the bracket in position and drive screws into the pilot holes to secure the bracket. If a bracket isn’t over a stud, drill pilot holes that are equal in diameter to the wall anchors you’re using. Tap the wall anchors into the wall so that they’re flush with the wall finish, hold the bracket in place, and drive the screws into the wall anchors. Use the screws and anchors that came with the brackets, if available. If not, screws and anchors that are 1.25–1.5 in (3.2–3.8 cm) in length are typically sufficient for hanging shelves.
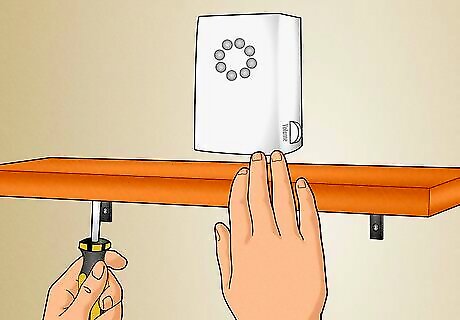
Lay the shelf on the brackets, securing it with screws if necessary. If your shelf attaches to the brackets with screws, lay the shelf in position and mark the screw locations on the underside of the shelf, through the holes in the bracket arms. Remove the shelf and, at the marked locations, drill shallow pilot holes that go no more than halfway through the thickness of the shelf material—don’t drill all the way through! Put the shelf back in position and drive short screws (shorter in length than the shelf’s thickness) through the bracket holes and into the shelf’s underside. Some shelf styles simply rest unsecured on the brackets. In this case, just set the shelf in place and move on!

Put items on the shelf that largely conceal the doorbell chime. Use pictures, knick-knacks, or whatever else suits your decor to block the view of your unsightly doorbell chime. No, the chime won’t be 100% hidden, but you’ll have to look really closely in order to see it! If you block the view of the chime completely by lining the shelf with books, you may muffle the chime’s sound somewhat. If that’s not an issue for you, go for it!


Comments
0 comment