
Beginning to Draw
Open your drawing pad or sketchbook and turn it into a fresh sheet. The cardboard backing will act as your support board. Have a sharpened, ordinary, number 2 pencil with an eraser.
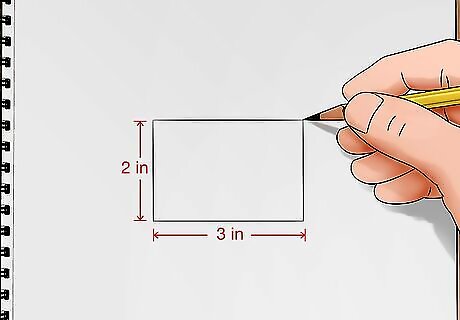
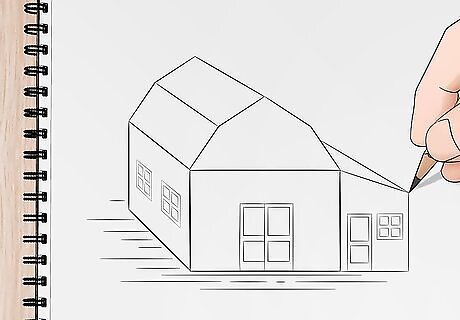
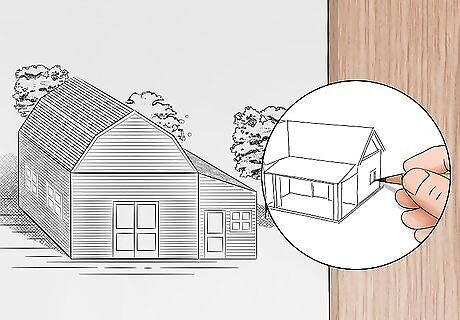
Draw the front view of the barn. Start by drawing a rectangle, in the center of your paper. Do this freehand and go quite slowly, concentrating on keeping your lines straight and light. Make this shape approximately three inches wide and two tall. A glance at the straight edges of your paper to judge whether the rectangle is upright and not leaning to either side. Correct it if needed. Erase wrong lines.
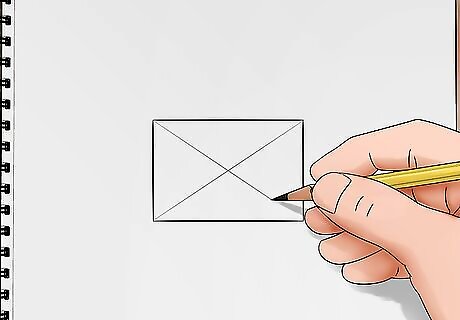
Find the center of the rectangle. Draw a light “X” from corner to corner of the rectangle. Draw a light line, freehand, upward line from the place where the two lines intersect. Make it as high as you want the tallest peak of your barn to be.
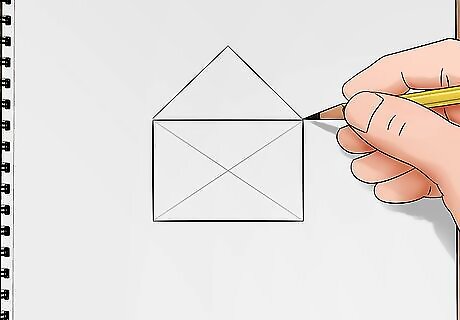
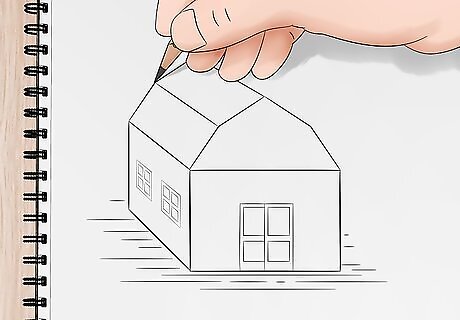
Create a gable roof. Draw lines from the top point to the sides. This encloses the shape and creates a triangle, an ordinary pointed roof.
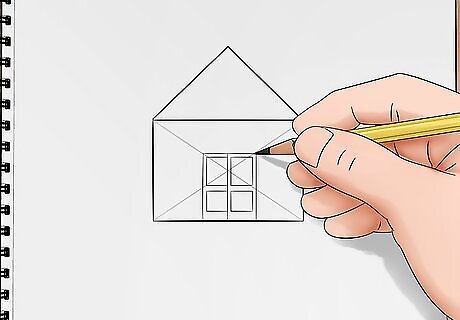
Draw a double-wide barn door. Place this in the center. Add a hay loading door. Draw a small square near the roof's peak for this. Erase guidelines.
Adding Perspective
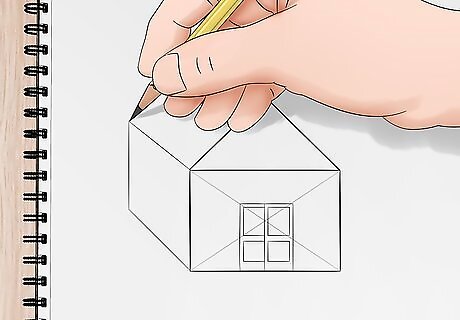
Draw the side of the barn. At the top and bottom of the barn, draw lines that slant slightly toward each other. Use a vertical line to show where the building ends. Erase lines that overshoot the barn's length.
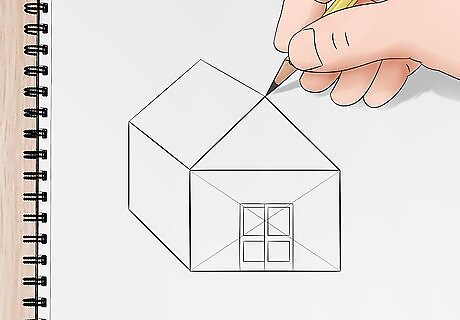
Do the side view of the roof. From the point of the roof, draw a slightly slanting line to the end of the building. Place your pencil on its side against the slant of the roof to assess the angle and move it across to the end of the roof to copy that angle. Draw that line for the rear edge of the roof. Check to see if it looks right and correct it if you need to.
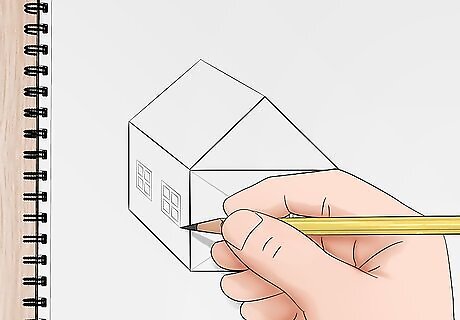
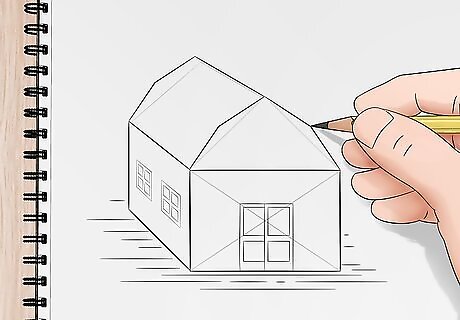
Do windows on the side of the barn. Draw two guidelines going the length of the side of the building. Add a series of windows, eyeballing the space they take up and the space between them.
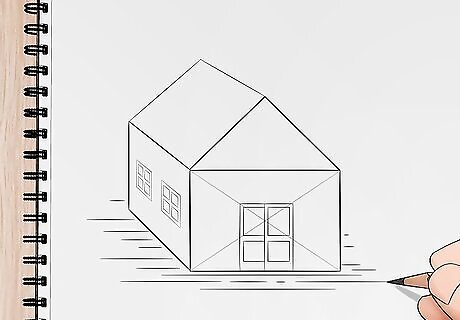
Anchor your building to the earth. Place lines on either side of your barn to give the sense that it is sitting on the ground.
Change this “Gable” roof into a “Gambrel” roof. The most common barn shape is one that has a roof made of two planes. A shorter one near the top and a longer one. Return to your building's front and draw rounded lines on either side of the peak. Try to keep them even.
Create the two planes for the roof. Simply draw over the curved lines to make them two flat lines. Indicate two planes with a line near the top along the side of the roof.
Add a small additional room attached to the barn. Indicate a roof by drawing a slanted line at the place where the roof and building are connected. Drop a line downward to show where the small attachment ends. Draw a line across the bottom to contain the space. Add a door and a small window.
Adding Details
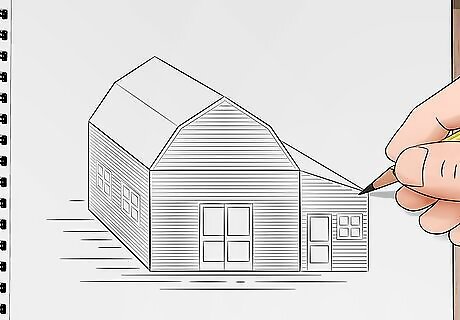
Add extras and embellishments to your barn. Do siding with lines going horizontal or vertical to represent boards. Add trim around all the windows and doors. Give the roof thickness by doubling the visible edges. Make sure the roof overhangs the building.
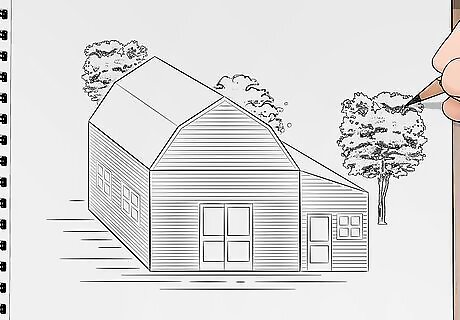
Include a setting. Trees and other landscape components will help to communicate the scale of your building. The setting will tell volumes about the type of structure you are drawing.
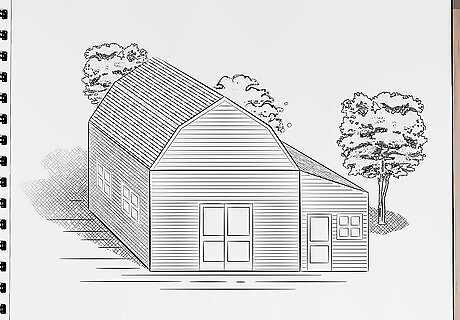
Shade, tone, and texture your drawings. Keep them in a portfolio with a sheet of drawing paper between them.
Practice drawing small buildings. Do those you see as you travel about. Look at pictures in magazines and on the internet. Find simple line drawings by Googling: Coloring pages of (whatever type you seek) barns, cabins, small houses, cottages, etc. You will soon start to see how uncomplicated many houses, barns, sheds, and similar structures are. The trick is to look past the embellishments and at the main structure.


Comments
0 comment