
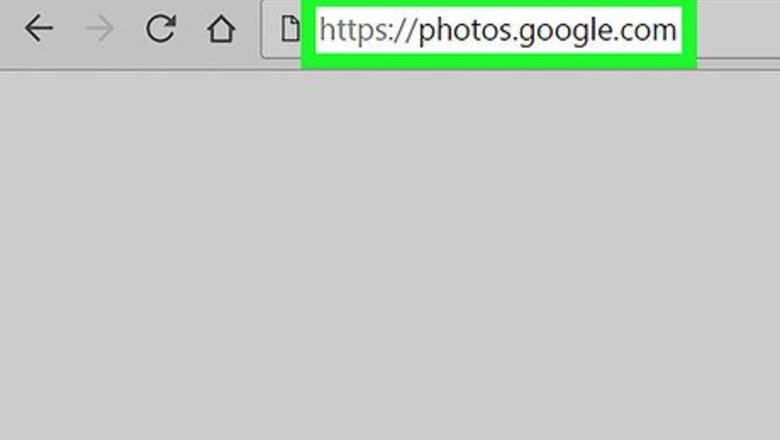

Open Google Photos in your internet browser. Type photos.google.com into your browser's address bar, and hit ↵ Enter or ⏎ Return on your keyboard. If you're not automatically signed in, enter your email or phone, click NEXT, enter your password, and click NEXT again.

Click the photo you want to edit. Find the image you want to edit in the Photos tab, and click on it. This will open the selected photo in full-screen mode.
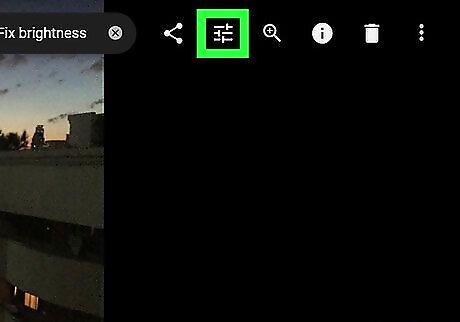
Click the Android 7 Tune button on the top-right. This button is next to the Android Share icon in the upper-right corner of your screen. It will open the editing panel on the right-hand side.

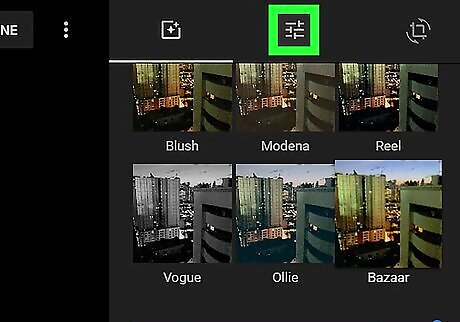
Select a filter for your photo. You will see a list of filter options on the editing panel. Click a filter to apply it to your image. If the editing panel opens up to a different tab, click the Color filters icon on the top-left of the panel to see filters. It looks like a page with a "+" sign.
Click the Android 7 Tune tab at the top of the editing panel. This will open the image customization tools. You can adjust the Light, Color, and Pop parameters here.
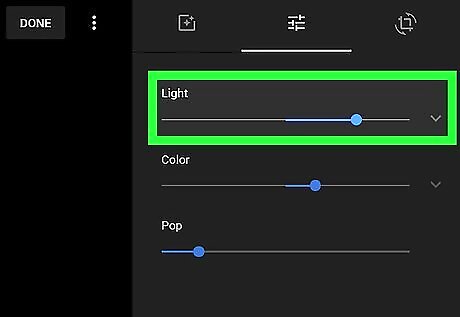
Adjust the Light slider to make your photo brighter or dimmer. Click and drag the slider to the either side to change the Light level. Drag the slider to the right to add more light and make the image brighter Drag the slider to the left to decrease light and make the image dimmer. Optionally, click Android 7 Expand More next to the slider, and adjust individual light components such as Exposure, Contrast, and Vignette separately.
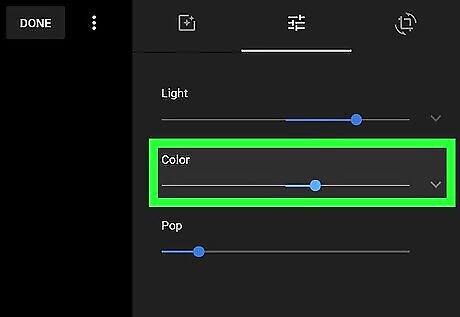
Adjust the Color slider to edit the colors in your photo. Click and drag the slider to either side to change the Color value. Drag it to the right if you want the colors in your photo to pop out with higher saturation. Drag it to the left if you want to dim down the colors towards grayscale. Optionally, click Android 7 Expand More next to the slider, and adjust individual color components such as Saturation, Warmth, and Tint separately.
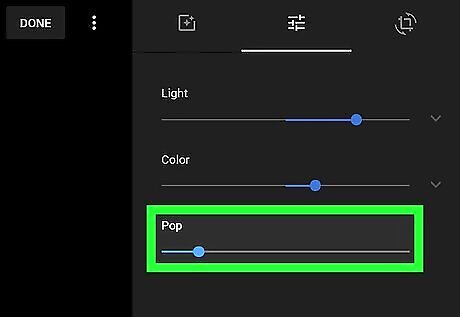
Adjust the Pop slider to adjust the texture of your photo. Click and drag the slider to right for a harsher texture of light and colors.
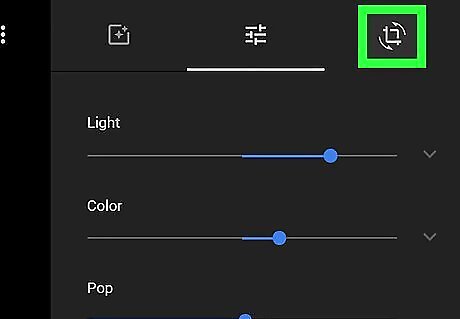
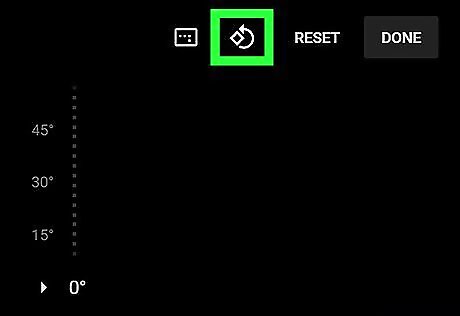
Click the Android 7 Crop Rotate button next to the Android 7 Tune tab. This will allow you to crop your image and edit its perspective angle.
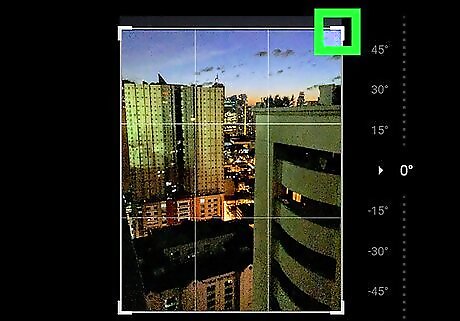
Click and move one of the corners of your photo. This will allow you to adjust the crop frame. Once you adjust the frame size, you can click and drag the frame around the image and capture the best crop.
Click the Android 7 Rotate 90 icon to rotate your photo. This button is located in the upper-right corner. It will rotate your image 90-degrees counter-clockwise.

Click and move the angle slider on the right-hand side. This will rotate your photo, and change its perspective angle. The slider's default setting is set to 0 degrees.
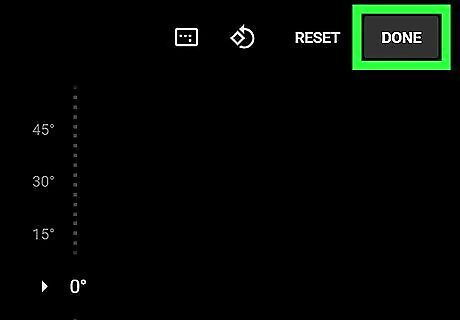
Click DONE. This button is located in the upper-right corner of your screen. It will save all your edits to the photo.


Comments
0 comment