views
Gripping a Standard Chef’s Knife
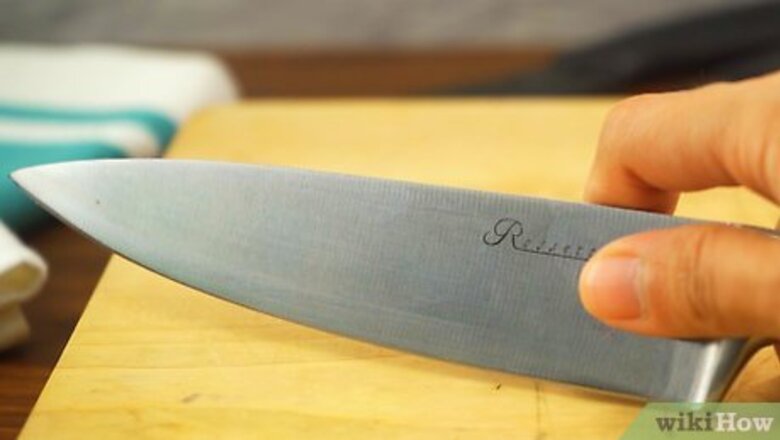
Grab the handle directly behind the blade. Professional chef Ollie George Cigliano recommends wrapping the middle, ring, and pinky finger of your dominant hand around the handle, just behind where the blade meets the handle. Keep your fingers close together so you don’t see the knife’s handle between them. The knife should fit comfortably in your palm while you’re holding it. If you have to twist or position your fingers awkwardly, readjust your grip or try a different knife. Avoid holding the knife by the end of the handle since you won’t be able to get a firm grip.
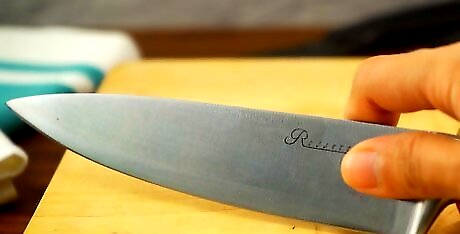
Pinch the base of the blade with your thumb and index finger. Cigliano recommends the “pinch” grip, where you pinch the back end of the knife with the side of your pointer finger and thumb. Curl your pointer finger slightly and press the side of it against the blade. This hand position keeps your wrist in line with the blade so it’s more comfortable to use. Cigliano says that while the grip might unnatural at first, it gives “more control over the knife and [puts] less pressure on your wrists and hands.” You can wrap your index finger and thumb around the handle just behind the blade if it’s comfortable for you, but you won’t have as much control when you make precise cuts.Warning: Avoid resting your index finger along the blunt edge on top of the blade while chopping. It gives you less power and tires out your hand more quickly.
Place your finger on the spine of the knife for deboning. The pinch grip works for almost all kitchen prep, but you can get better control while deboning by holding the knife with your pointer finger on the spine. Use the tip of the knife to remove skin and the long edge to slice away from the bone.
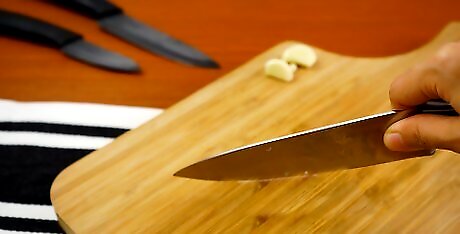
Keep the blade in line with your wrist and arm. Imagine you have a line running from your shoulder to your elbow to your wrist. Grip the knife tightly while holding it on that line. Don’t twist your wrist, or you’ll put strain on it and lose cutting power. If you have to cut at an angle, twist from your shoulder.
Best Cutting Techniques
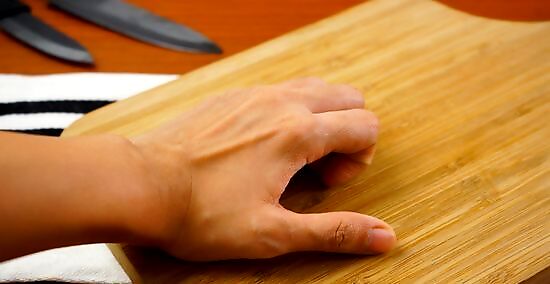
Curl the fingers on your non-dominant hand into a claw. Lay your non-dominant hand flat on your countertop or table with your palm face-down. Push your fingertips into the surface to lift up your palm. Curl your fingertips back so they’re behind the first knuckles on your finger. When your hand is in the right position, it should look like the letter C. Pretend you’re holding an imaginary baseball to get your hand in the correct position. Never extend your fingertips past your knuckles since you’re more likely to cut yourself.
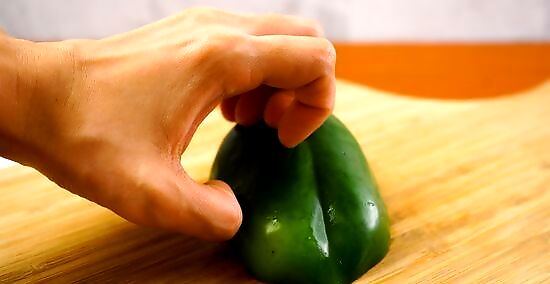
Rest your fingertips on the food you’re cutting. Keep your hand locked in the claw shape and position your arm so your wrist is parallel to the edge of your cutting board. Press your fingertips into the ingredient just behind where you want to make your cut. Make sure the first knuckles on your fingers are in front of your fingertips. Position the ingredient so the flattest side is on the bottom. That way, it’s less likely to rock or move around when you try to cut it. If you’re working with a round or irregularly shaped ingredient, cut it in half before you continue to chop it.Tip: Always check that you have a stable cutting surface. If your cutting board rocks or shifts, try putting a towel underneath it to help keep it steady.
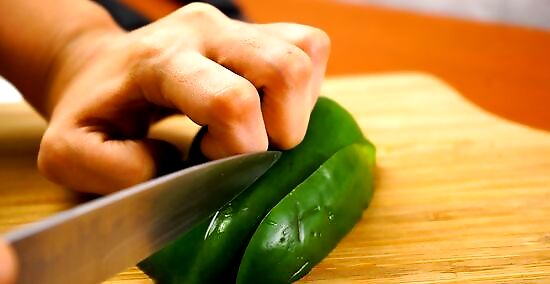
Rock the knife blade forward to cut through ingredients. Hold the knife at a 30- or 45-degree angle so the tip touches your cutting board. Push the knife forward as you bring the base of the blade down. Use a single, fluid motion while you slice through the ingredient to make the cleanest cuts. Be careful not to lift up the knife so much that the cutting edge lifts over your knuckle, or else you may cut yourself. Avoid lifting the knife straight up and down since you won’t get clean cuts and can cause the blade to slip.
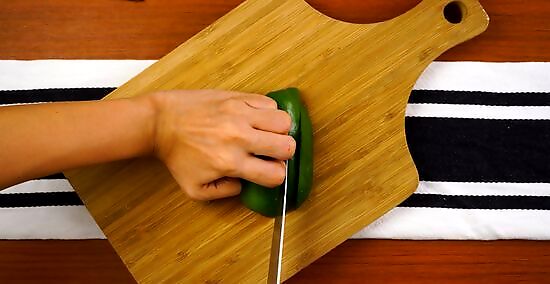
Move your guide hand backward as you’re cutting. After each cut, slide your non-dominant hand further back along the ingredient. Check the width of the first piece you sliced, and shift your guide hand back enough to cut another piece that’s the same size. It’s okay if you cut slowly when you’re first starting. As you practice and feel more comfortable using your knife, you’ll be able to increase your speed. Always keep your fingertips behind your knuckles when you reposition your hand.
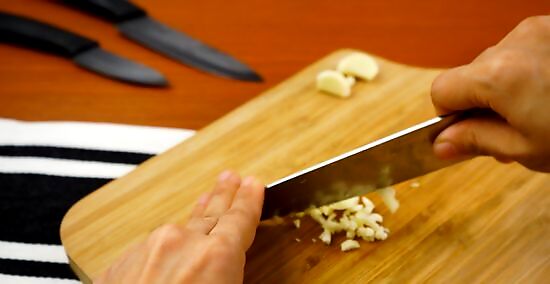
Place your guide hand on top of the blade’s tip if you’re mincing. Press the tip of the knife into the cutting board. Rest the fingers of your non-dominant hand on the blade’s blunt edge right above the tip. Keep the blade tip against your cutting board as you rock the handle up and down to make your cuts. Keep the blade parallel with the long edge of the cutting board. This works great for breaking down herbs, onions, garlic, and other ingredients into small, fine pieces.
Walking With a Knife
Point the knife straight down with the blade facing backward. To reduce your risk of nicking someone, hold the knife at your side with the tip facing down and the blade pointed behind you. Bend your elbow so the knife is closer to your hip. That makes it less likely to cut your calf while you’re walking.
Tell other people in the kitchen that you’re walking with a knife. If you have to pass by other people while holding a knife, say something like “sharp behind” or “knife behind” so they know to not make any sudden movements.
Other Knife Safety Basics
Keep your knives sharp. Dull knives are more likely to slip off food and cause an accident. To sharpen your knives at home, Cigliano recommends soaking an 800 grit whetstone in water for 45 minutes, then running the blade along the stone at a 15-20 degree angle. Place the whetstone on a washcloth designated for knife sharpening. While you’re sharpening, a pool of abrasive liquid will form, which can’t be washed out of fabric. Sharpen your knife until a “burr” forms on the other side of the blade. Check for burrs by running your thumb down perpendicular to the sharp point of the blade. If something catches on your thumb, it’s a burr. It may take 30-40 strokes to develop. Cigliano says to fully dry your stones after use and store them in a clean kitchen towel away from grease; grease ruins whetstones and can’t be removed.
Cut away from your body while deboning. If you’re not using your knife to chop, keep your body out of line with the knife. That way, if you suddenly cut through something and accidentally pull the knife back, you won’t cut yourself.
Switch knives with people by putting them down on a cutting board. If you’re working in a kitchen with other people and don’t have enough knives to go around, give the knife to someone else by putting it down and letting them pick it up by the handle. That way no one touches the blade. If someone starts speaking to you while you’re using a knife, put it down until the conversation is over.
Don’t try to catch knives if they fall. If you drop your knife, move out of the way and let it fall to the ground. If you try to catch it you could accidentally grab the blade. Rest knives fully on a surface without any part hanging over the side while you’re not using them.



Comments
0 comment