views
Installing
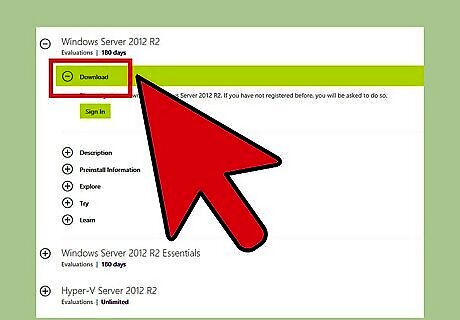
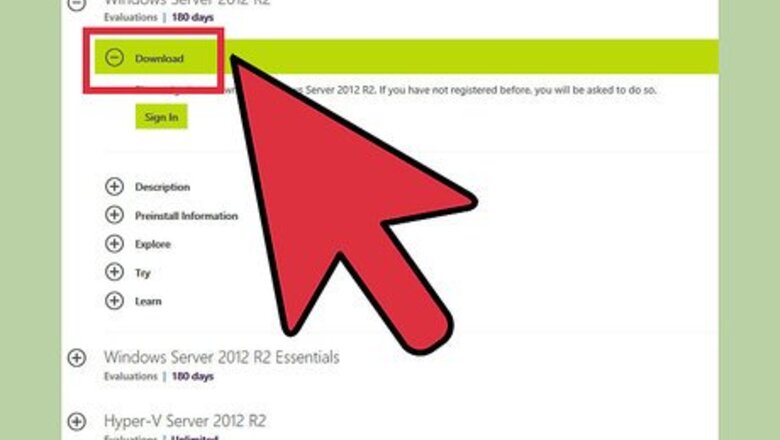
Create the operating system media. If you do not already have a DVD with Windows Server 2012 R2, you can download an ISO file and burn it to a bootable CD or DVD. You will need the product key to install, so make sure you have that handy. Download Windows Server 2012 R2 and save it to your hard drive. Make a backup copy of the .iso file by copying it onto a DVD from the hard disk.
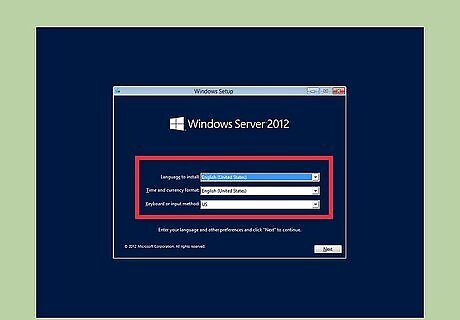
Start the installation. Insert the Windows Server 2012 R2 DVD into the CD/DVD drive. Power on the PC to boot the operating system from the DVD. Watch as the system boots from the Windows Server 2012 R2 DVD. After booting begins, you will see the display Loading files… followed by the Windows Server 2012 R2 Setup screen. Expand the drop-down and review optional preferences, including the language you can select for the installation. Click Next to continue.
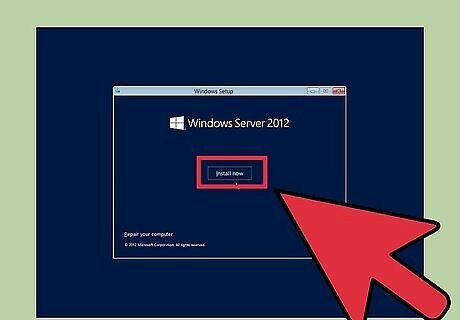
Click Install now. Unless you are upgrading Windows Server 2012, you will need to select this option.
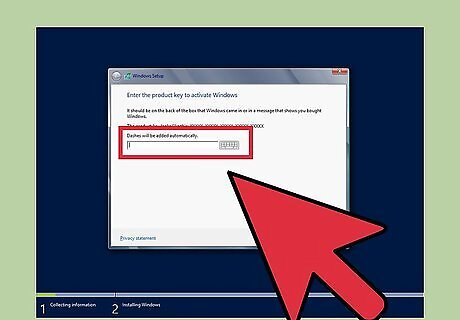
Enter the product key and click Next. If you are installing from a DVD that came with a textbook, you may not need a key.
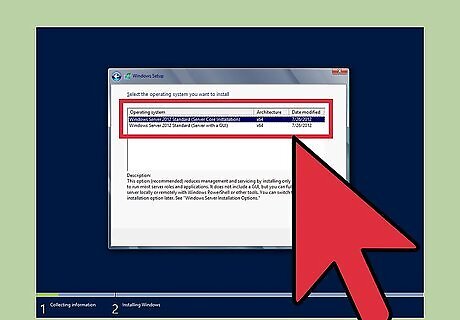
Select the OS version to install. Notice that depending on the DVD you are using, you may see a slightly different set of options. However, regardless of which DVD, Windows Server 2012 R2 Server Cores is the default. Select Windows Server 2012 R2 Standard (GUI installation), with the arrow key or mouse. Click Next to continue.
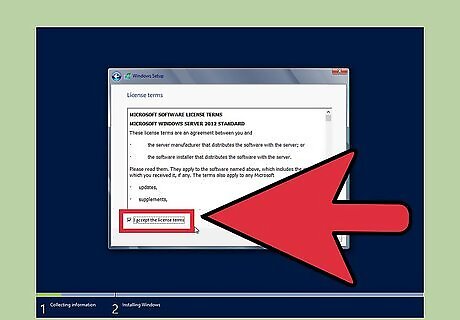
Select license terms. Review the Microsoft license agreement. Click the checkbox next to "I accept the license terms." Click Next to continue.
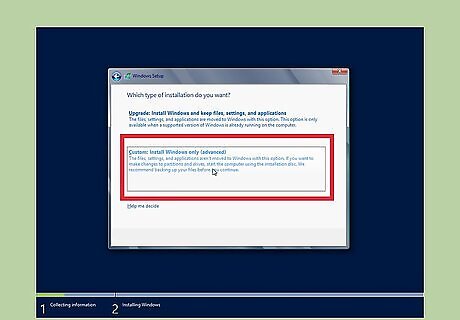
Configure your custom install or upgrade. Review the notes for these options because they are very different; upgrade lets you upgrade a qualified Windows OS. Whereas with custom, you can install the OS on a newly created space. Click Custom to manage disk space and display the disk configuration. Highlight where you would like to install the operating system; you can use the arrow key or mouse. Click Next.
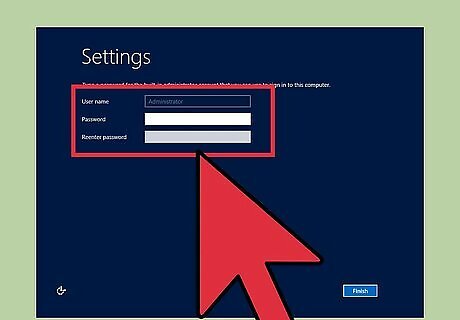
Create a password. Create an Administrator password at Windows Setup Settings prompt. Type the password and click Finish.
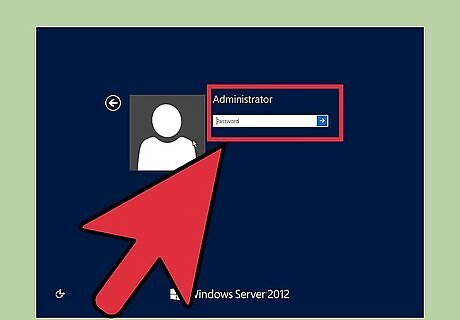
Log on to the server. Note that this action, displaying the password prompt, will depend on the installed environment, real or virtual. Click Ctrl + Alt + Delete to display the password prompt. Enter the administrator password. Click the arrow to display Networks so you can tell setup how to configure network parameters.
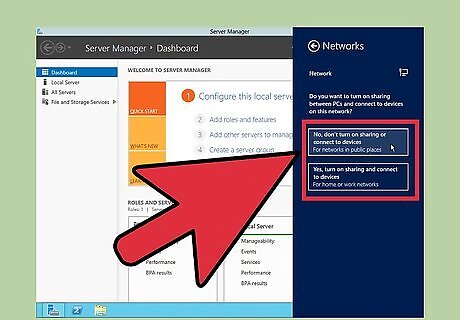
Choose your network settings. Configure network visibility is needed even if you plan to isolate the server; your intentions must be known to network settings. Click Yes so your computer is visible to other network devices.
Configuring the Network
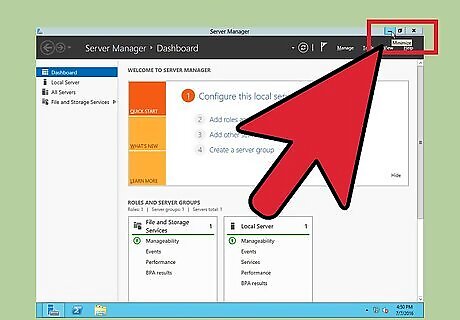
Minimize Server Manager. These steps demonstrate how to configure TCP/IP settings, which are needed to verify network connectivity with another machine, such as Windows 7. Click Minimize to minimize Server Manager, which is displayed when the OS completes booting.
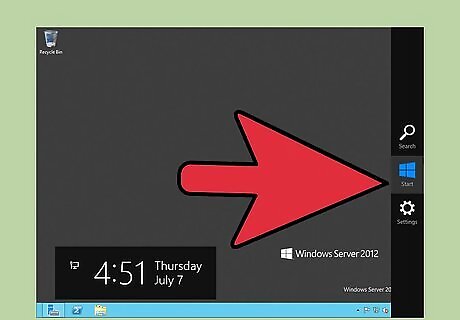
Display menu items.
Click the Start menu. When Server Manager is minimized, you will see the Recycle Bin and Taskbar; there are also menu items, such as Start, that are visible when the mouse is located at the bottom right. Move your mouse along the taskbar to the right and hover it to the right of the time and date; this action displays a number of icons, and to see their names, such as Search, Start, and Settings move the mouse straight up. If the icons are not shown, slightly move the mouse in any direction to display them.
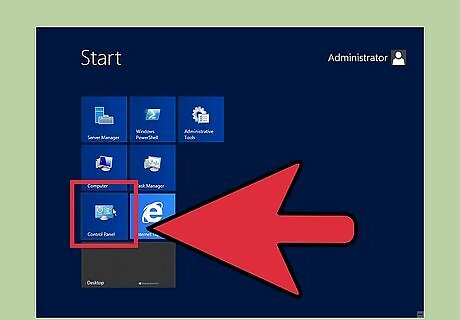
Click Control Panel.
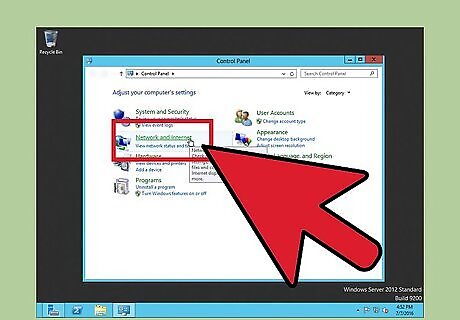
Click Network and Internet.
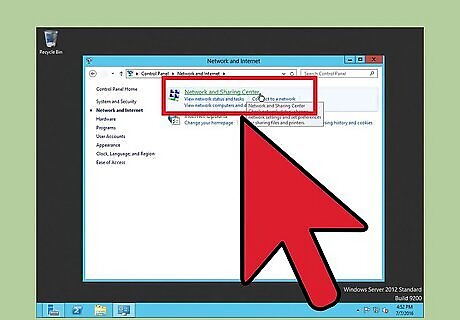
Click Network and Sharing Center.
Click Change adapter settings.
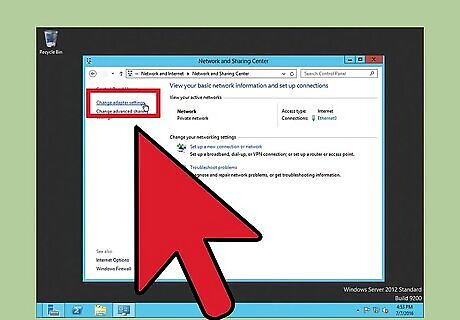
Right-click Ethernet and select Properties. Network Connections (Ethernet) Properties.
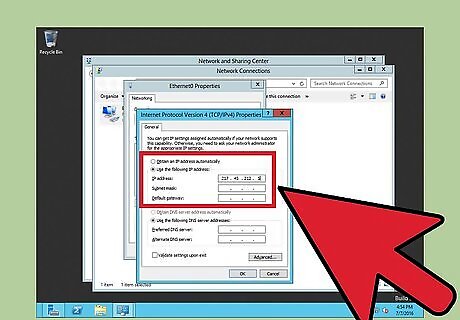
Display TCP/IP Properties. Select Internet Protocol Version 4 (TCP/IPv4) and click Properties. Click Use the following IP address.
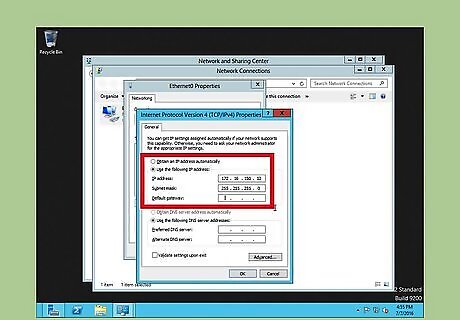
Configure TCP/IP settings. Notice there are a number of textboxes, but to test connectivity, only the IP address and subnet mask are needed. Type 172.16.150.10 in IP address field. Change the entry in Subnet mask to 255.255.255.0. Click OK. Click Close. Click X to close both Network Connections and Network and Sharing Center.
Testing
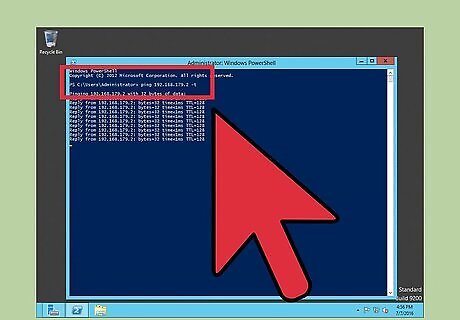
Verify Connectivity. After the OS is installed and network parameters configured, it is time to test both activities; an important test is to verify the server can communicate with another machine, such as a Windows 7 client, and the client can communicate with the server; you can do this using the Command Prompt, and after testing is complete, you can shutdown the server. Click the Start menu and select Apps > Command Prompt. Ping the second machine. From the second machine, ping the server.
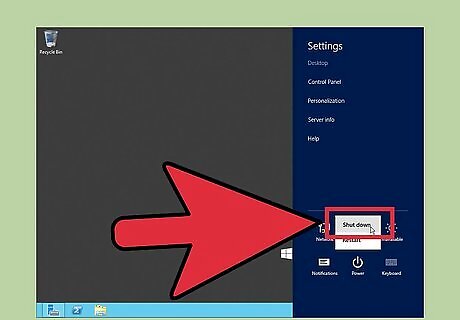
Shutdown the server. Open Start and go to Settings > Power > Shutdown.




Comments
0 comment