
Installing Snap-on Guards
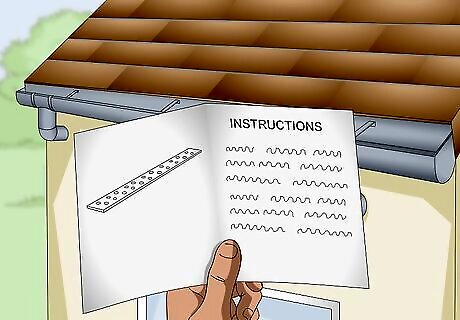
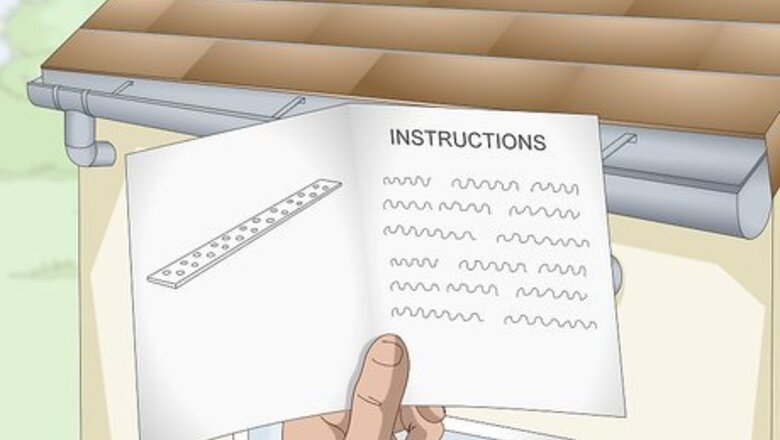
Read the instructions before installing your product. Specific steps vary by design, so read your product’s manual carefully. Installing your guards incorrectly could cause your gutters to malfunction. Additionally, you’ll void your warranty if you don’t follow the manufacturer’s installation instructions.Tip: Consider buying a small section of guard material for a test run. That way, you can check its effectiveness and make sure it’s not too hard to install.
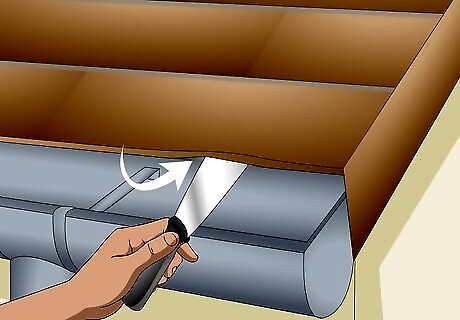
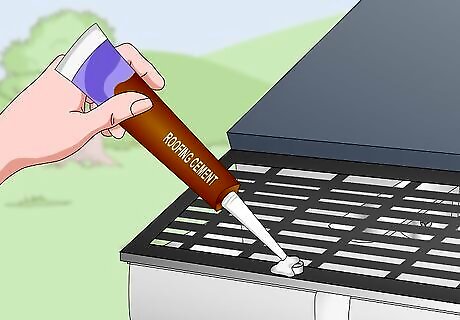
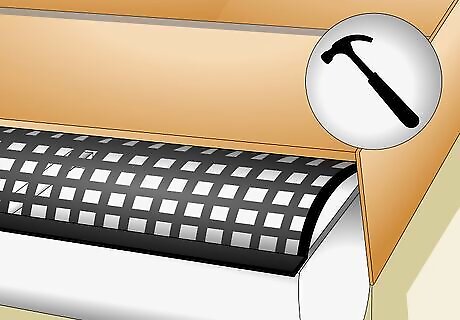
Lift the shingles carefully with a putty knife. Starting at the end of the gutter run opposite the downspout, insert your putty knife between the shingles and the underlayment, which is the roof’s waterproof barrier. Don’t lift the underlayment from the roof’s wooden structure. Carefully loosen about halfway up the first row of shingles, or just enough to accommodate the edge of the guard. Take care not to damage the shingles when you lift their edges. If you accidentally crack a shingle, slide the guard section into place, then use a putty knife to apply roofing cement over the crack.
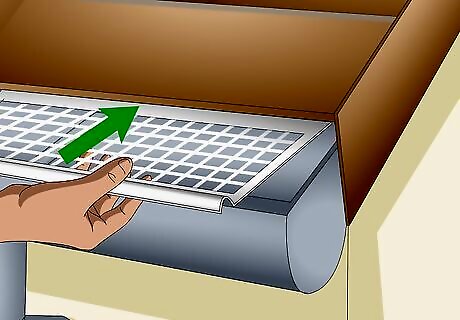
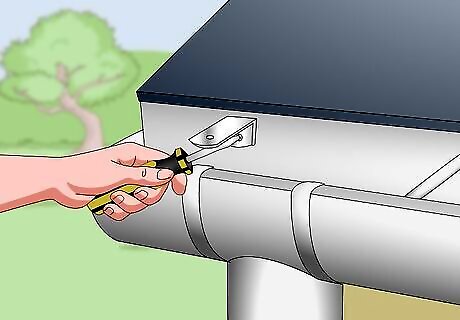
Slide the back edge of the guard section under the shingles. Align the guard section with the roofline, then insert it under the shingles you’ve lifted. Continue to lift shingles and slide in the gutter guard until you’ve reached the end of the first guard section. Most products come in 4 to 6 ft (1.2 to 1.8 m) sections. If you have trouble handling a section on your own, recruit a helper to hold 1 side of the guard steady while you work from the other side.
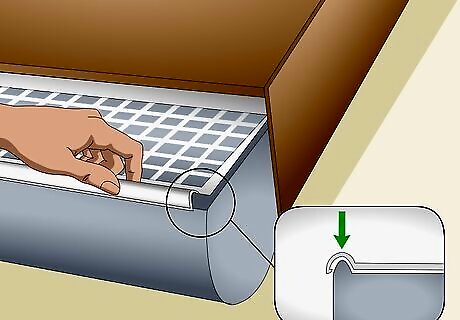
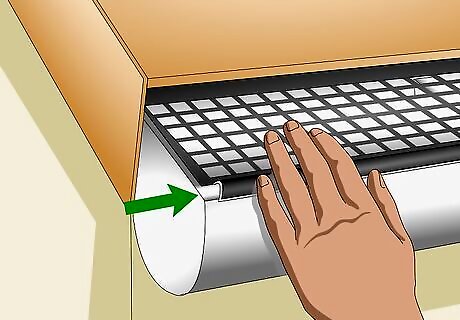
Clip the front of the section onto the gutter’s lip. The exact process varies by product, so check your installation guide. In general, align the outer edge of the guard section with the rim of the gutter. Then pinch the clipping mechanism over the gutter’s lip to snap the guard into place. Continue until you’ve finished snapping the rest of the guard section into place. Some products have several individual clipping mechanisms. For others, the clipping mechanism runs continuously along the outer edge.
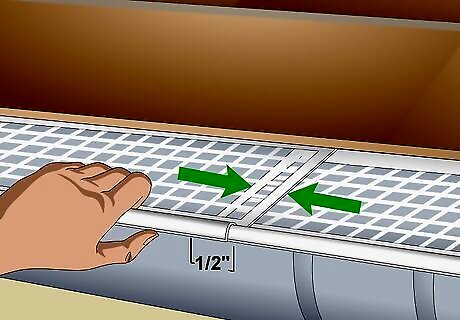
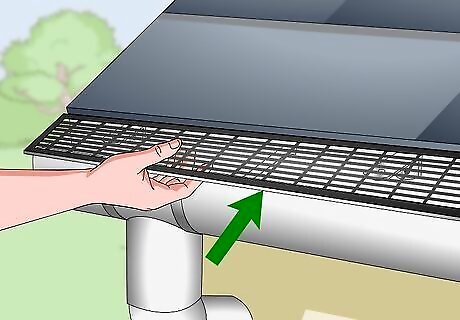
Overlap the sections by ⁄2 in (1.3 cm), unless directed otherwise. Repeat the steps to install the remaining guards. Many manufacturers recommend overlapping the sections by ⁄2 to 1 ⁄2 in (1.3 to 3.8 cm), especially if you’re installing meshes or grates. However, check your installation guide and follow your product’s specific instructions. If you need to cover a corner, you can simply butt-join most mesh or grate guards, or line up 1 section perpendicular to another. However, for some systems, you’ll need to cut miter joints in guard sections that meet at corners.
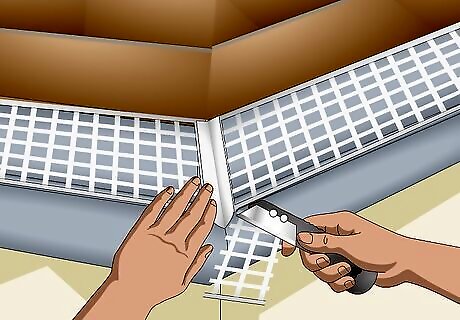
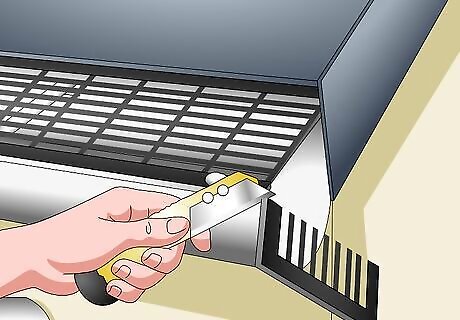
Cut miter joints to connect hooded covers at corners. For hooded surface-tension guards, sections that meet at corners require miter joints. Use a miter box or protractor to measure a 45-degree angle in the end of a guard section. Mark the angle, then trim the end with tin snips or a utility knife. Repeat the steps to cut a corresponding 45-degree angle into the end of another guard section. The pair of adjoining sections can now meet at a corner without leaving any of the gutter uncovered. Before cutting, double check that you’ve aligned the sections correctly. Make sure the sides that slide into the roofline face inward and the ones that connect to the gutter face outward.
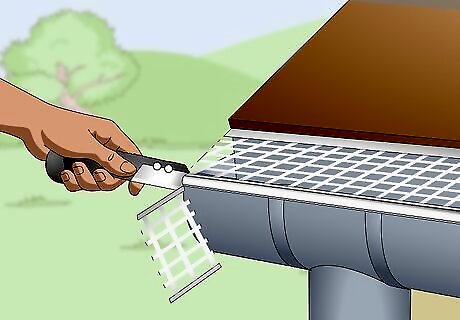
Trim the end of the last guard section with a utility knife or tin snips. When you’re near the end of the gutter run, measure the distance between the last guard section and the end of the gutter. If it’s shorter than a full guard section, cut one to match that length, then snap it into place. Suppose your total gutter length is 150 ft (46 m), and your sections are 4 ft (1.2 m). After installing 37 full-sized sections, you’ll have 2 ft (0.61 m) leftover, and you’ll need to cut a section to match that size. You’ll need a good pair of tin snips to trim a metal gutter guard. Products made of plastic are easier to cut, so you’ll probably only need a utility knife or box cutter.
Mounting Screw-Fastened Guards
Install support brackets, if necessary. Some surface-tension covers are secured with brackets, which are screwed into place along the roofline. If your guard system includes brackets, mount them with 3 in (7.6 cm) self-tapping roofing screws. Check the installation guide and space the brackets along the roofline as directed. To maintain a watertight seal, apply a small amount of roofing cement around the screws that secure the brackets to the roof. Brackets are more common in top-quality gutter guard systems, which are often professionally installed.
Slide the back edge of the guard under the shingles. Carefully loosen the bottom edges of the first row of shingles. Then slide the inside edge of the first guard section beneath the shingles. Take care not to loosen the underlayment, or the waterproof layer, beneath the shingles. Slide the guard section into place between the shingle layer and the underlayment, not between the underlayment and the roof deck.
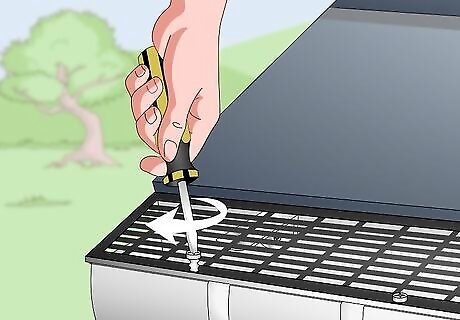
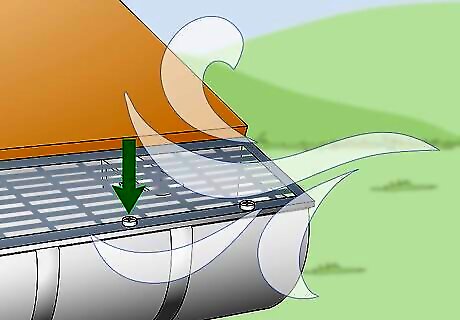
Mount the guard to the gutter lip with self-tapping metal screws. If your guard system didn’t come with screws, use 2 in (5.1 cm) self-tapping sheet metal screws, or go with the length specified in the installation guide. Align the first section’s pre-drilled holes with the top of the gutter’s lip, then drive the screws into the gutter with a cordless power drill. Self-tapping screws are designed drill their own hole, so pre-drilling holes into the gutter’s lip is unnecessary.Variation: If your guard system uses brackets, mount your guard sections onto the brackets according to the installation guide.
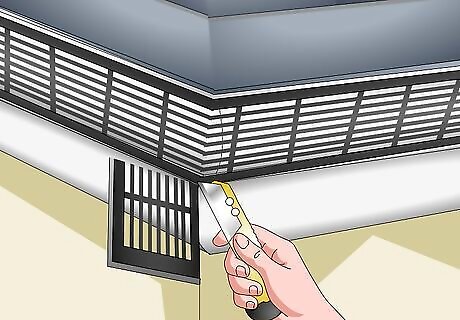
Cut miter joints where sections meet at corners. If you’re installing surface-tension guards, 2 adjoining sections that meet at a corner will need miter cuts. Use a miter box or protractor to measure a 45-degree angle at the end of a section, mark your line, then cut the edge with tin snips or a utility knife. Cut a corresponding angle in the section that will join with the first. Double check that you’ve aligned the 2 sections correctly before cutting. When lined up with each other, the 45-degree slants in each section should meet flush so the 2 sections form a 90-degree corner, or a right angle. Make sure the inner and outer sides of each section face the right direction.
Seal the screws with roofing cement. After you’ve installed a guard section, dab a small amount of roofing cement over the screw holes. If you’re installing mesh guards, take care not to clog any openings with cement. Sealing the screws helps ensure water will flow into the gutter instead of running through the holes in the lip.
Trim excess lengths of guard with tin snips or a utility knife. Repeat the steps to install sections until you’ve reached the end of the gutter run. Then measure the remaining distance between the last full section and the end of the gutter. If necessary, use a pair of tin snips or a utility knife to cut a guard section to match the remaining length of gutter.
Choosing a Gutter Guard System
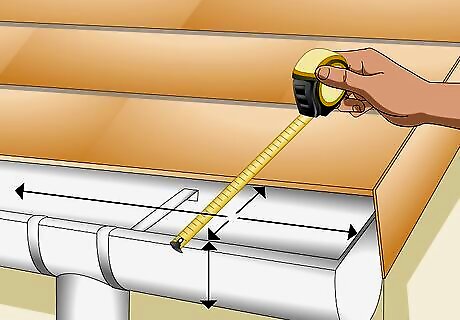
Measure your gutters’ height, width, and length. As with any other home project, measure twice and cut once. That way, you’ll know the size and amount of guard material you’ll need. Additionally, knowing the total length you’ll need will help you set your budget and compare prices. As insurance, plan on purchasing about 10% more guard material than your gutters’ total length.Tip: When you measure your gutters, see which type of debris it collects. Large leaves and twigs are pretty easy to manage, but flower buds, evergreen needles, and seeds can slip through coarse-mesh gutter screens.
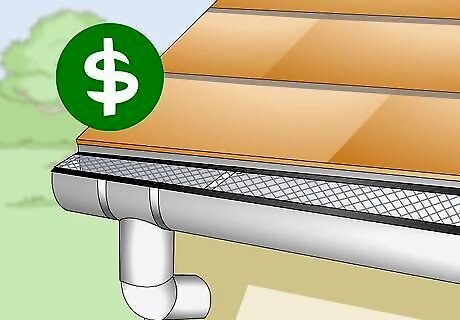
Go with mesh guards for an easy, affordable option. Mesh and grated guards are easy to install and typically cost between $1 and $3 (U.S.) per foot (30.5 cm). On the downside, they’re usually not quite as effective as surface-tension gutter covers. Still, they’re the way to go if you want an easier, less expensive product that doesn’t make a big visual impact. Mesh and grate guards made of lightweight plastic are the cheapest option, but they're easily damaged or dislodged. Metal and heavy-duty plastic products are more durable. Inexpensive coarse-mesh screens are good options for keeping out large leaves and twigs. However, since debris tends to get stuck in coarse-mesh screens, they’re generally harder to clean. A fine-mesh guard is more effective for needles, seeds, and other small debris. That said, large leaves and twigs can sometimes collect on top of fine-mesh products, so you may need to sweep or hose down the guards from time to time.
Choose surface-tension hoods for the most durable option. Surface-tension covers curve over a gutter, allow water to drip inside, and block debris from entering. They typically last longer, stand up better to the elements, and generally require less maintenance than screens and grates. Cost and complexity are the major drawbacks. At $6 to $10 (U.S.) per foot (30.5 cm), they’re expensive. Some models must be professionally installed, which can push the cost per foot (30.5 cm) up to $15 to $20. If your gutters’ pitch is too steep, they may need to be rehung or the opening between them and the cover will be too wide. In addition, if you want an inconspicuous option, most gutter covers are bulkier and more obvious than screens. If you’re budget-conscious and don’t want to hire a professional, consider PVC surface-tension covers. They’re not as durable as metal covers, but they’re cheaper and easier to carry up a ladder.
Purchase snap-on guards if convenience is your priority. Both surface-tension covers and mesh screens come in snap-on and screw-fastened varieties. Regardless of the gutter guard system you choose, you’ll need to remove the guards and clean your gutters periodically. If convenience is a priority and you're less worried about weather damage, go with a snap-on option. There are also screen guards that are simply wedged into a gutter. They cost as little as $0.10 per foot (30.5 cm), but they’re ineffective. With no fasteners at all, they don’t keep out debris, and they easily become dislodged.
Look for screw-fastened guards if you live in a windy or stormy area. Snap-ons are easier to install and remove, but they’re more susceptible to strong winds, heavy rain, falling branches and snow. For the sturdiest option, go for guards that are fastened to the gutter with screws. Screw-fastened products require more work and are usually a bit more expensive than snap-on versions.

Steer clear of foam inserts and brushes. Other designs on the market include foam and brush strips that are inserted into the gutter. These guards are inexpensive and easy to use, but they’re not very effective and need to be cleaned out frequently. Leaves and other debris can get caught in brush fibers. Foam tends to collect seeds, which can sprout and grow without regular maintenance. Unless it’s absolutely necessary, avoid inserts and screens without fasteners. You’re investing time and money, not to mention going through the hassle of climbing up a ladder, so you want to make sure your product does its job.


Comments
0 comment