
Putting on the Snow Chains

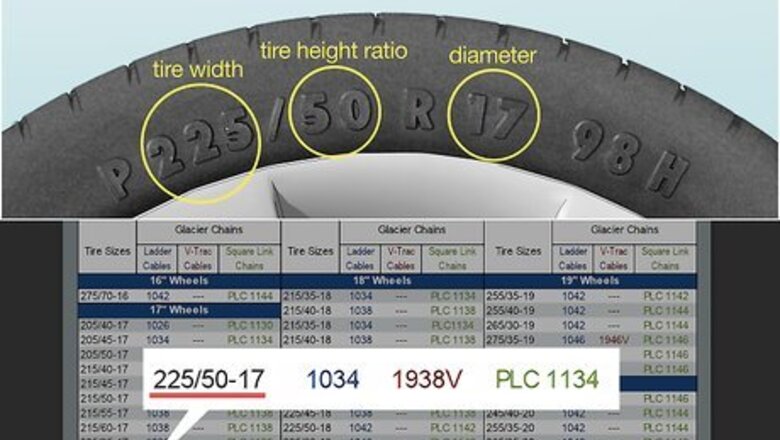
Get snow chains that match the size measurements on your tires. Find out the size of your tire in order to know which snow chains you need for your vehicle. Look along the outside edge of your tires for a long string of letters and numbers. You'll need this information when you go shopping for snow chains. The first number tells you the tire width; the second numbers tells you the tire height ratio (the ratio of the sidewall height to the width); and the third number tells you the diameter of the wheel, usually denoted in inches. The chain packaging will indicate which size tires they fit. If you have questions, don’t be afraid to ask a store employee for help.
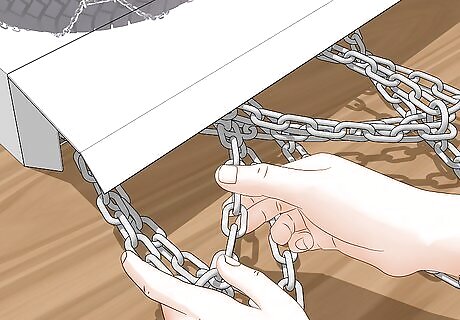
Remove the chains from their packaging and untangle the links. Undo any twists or kinks in the metal so that the chains are hanging freely in a web shape. This process can take longer than you might expect, so it’s best to be prepared and put your chains on before they are actually needed.

Lay the chains on the ground next to the tires you are installing them on. If your vehicle is front-wheel drive, put the chains on both front wheels; if your vehicle is rear-wheel drive, put the chains on both rear wheels. For 4-wheel or all-wheel drive, install the chains on all 4 tires. You may opt to put chains on all four tires of a front or rear-wheel drive vehicle for added safety and control during extreme weather conditions.

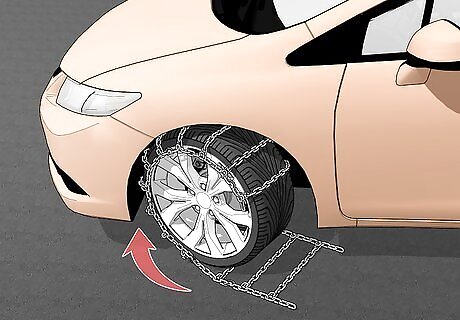
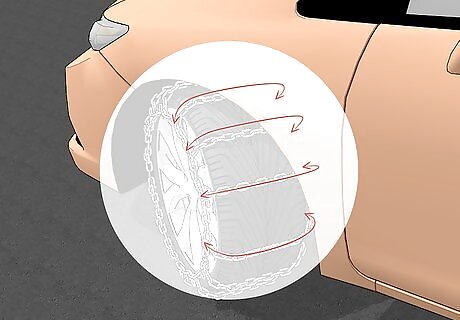
Fit the snow chains over the top of the tire you are installing them on. Make sure that your car is in park and the parking brake is engaged before you begin. Straighten the length of the chains over the top of the tire so that it hangs down along the sides. It should cover about three-quarters of the tire. Make sure that the chains running from side-to-side across the width of the tire are straight as well. Tuck the chains between the bottom of the tire and the ground to hold them in place when you drive forward. Some types of snow chains will have rings fastened to the chains. These rings go along the inside of the wheel and should rest on the bottom of the tire, near the ground, during installation. This type of chain will require you to get under your car in order to install them, and may require a little adjusting to make sure they are on straight.

Drive your vehicle forward to expose the unfitted portion of the tire. Check your surroundings before disengaging the parking brake. Then put your vehicle in gear and roll forward slightly. Remember, only a small portion of the tires are unfitted, so only drive forward a little bit.
Turn the wheel toward the inside of the vehicle for easier access. When you’ve determined that you've pulled forward enough to ensure full coverage of the tire, turn the wheel toward the inside of the vehicle. This will give you better access to the connections and make it easier to finish securing the chains. If you are installing the chains on the left tires, turn your steering wheel to the right to point the tire inwards. If you are installing the chains on the right tires, turn your steering wheel to the left to point the tire inwards. Put the car in “park” and engage the parking brake once more.
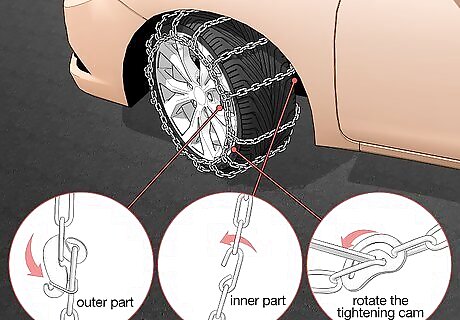
Connect the chains together to cover the remaining portion of the tire. Starting from the inner part of the tire near the axle, connect the two hooked edges. Then connect the hooked edges on the outside portion of the tires. Rotate the closer link or tightening cam to tighten the chains so they are as snug as possible. Traditional chains can be tightened with a link-tightening tool, but try not to use these tools on link unit chains. A bungee cord with hook fasteners is a common way to make chains fit even tighter over your tires, especially if the chains don't have built-in tightening cams. These can usually be bought anywhere where snow chains are sold.
Make sure the inner and outer connections of the chains are aligned. Look to make sure that the chains are going mostly straight across the width of the tire. If the inner portion of the chain is tight, but the outside is loose, you will need to adjust the chains on either side to make sure they are straight and then re-tighten them.

Repeat the exact same process for the other tire(s) on your vehicle. Fit the chains over the top of the tires and tuck them underneath, drive forward to expose the unfitted portion, connect the chains together, then make sure they are in alignment across the tire. Once you've had a bit of experience putting on snow chains, you can start installing chains on your front or rear tires simultaneously. This will drastically speed up the process.

Drive about 100 feet (30 m) and re-tighten the chains. The snow chains will shift a bit over the course of driving. To make sure they are tightened enough for safe travel, use the closer link or tightening cam to re-tighten all of the chains after you take a short drive.
Removing Snow Chains
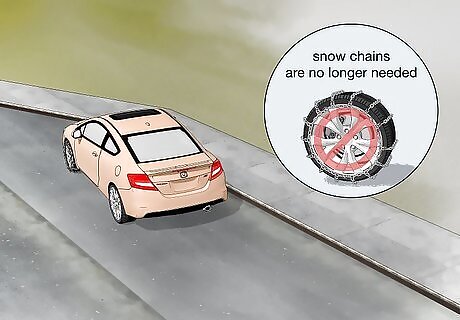
Remove your snow chains as soon as you reach clear road. Take off your chains if the driving conditions improve or you come across a sign indicating that snow chains are no longer needed. Don't keep driving with your chains if they aren’t necessary—it’s hard on the road as well as your tires.

Disconnect the rings or chains from the inside of the wheel. You will need to get down on the ground to reach the connections. If it helps, turn the wheel hard towards the inside to get better access to the inside of the wheel. If the tire is resting on top of the connections, you will need to pull forward a little bit until you can fully access them. If you attached additional bungee cords during the chain installation, you will need to remove those before you begin removing your snow chains.
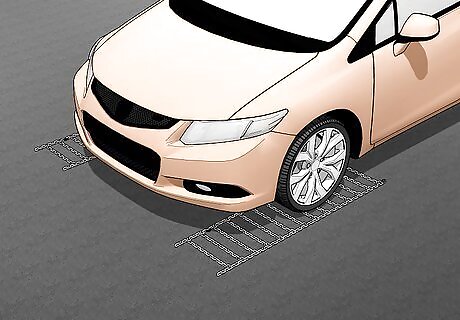
Open up the snow chains and lay them out as flat as possible. The chains will be stuck underneath your wheel for now. Laying the chains flat will help ensure that you don’t cause any damage to your tire when you drive over them. Make sure that the chains are not stuck around your vehicle’s wheel or axle.

Drive your vehicle forward slowly. Pull forward just enough for the tires to clear the chains. Once the chains are fully exposed, carefully slide them away from the vehicle. Allow the chains to dry before putting them back in their packaging so they don’t rust. Take care not to twist or tangle the chains so that they will be easy to install the next time they are needed.


Comments
0 comment