views
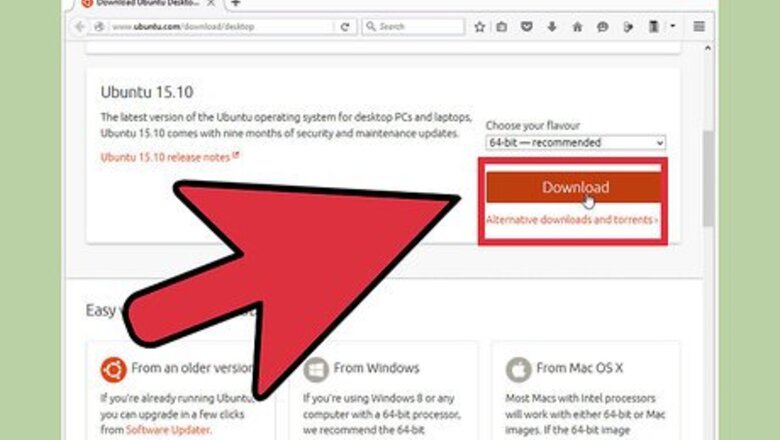
- Get the latest Ubuntu image from https://ubuntu.com/download/desktop.
- Download the universal USB installer from https://pendrivelinux.com.
- Use the USB installer to create your Ubuntu install drive, then boot from the drive to install Ubuntu.
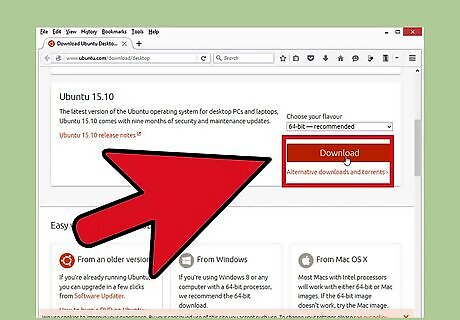
Download an Ubuntu image from https://ubuntu.com/download/desktop. Click the "Download" button for the version you want. Ubuntu typically offers two versions: the LTS version and the latest stable release. The LTS (long-term support) release will get security and system updates for five years, and is the recommended option for most users. The newest release will get nine months of updates before you're expected to move on to the next new release. Most newer computers can run the 64-bit version of Ubuntu. If you're using an older computer and aren't sure if it's 64-bit, click here. You can install Ubuntu from any USB drive that has at least 2 GB of space. Make sure that the drive doesn't have any important files on it, as the drive's contents will be deleted when creating the USB installer. You'll need at least 7 GB of free space on your computer to install Ubuntu, but you'll want more if you intend to install programs or download lots of files. You'll be able to install Ubuntu alongside Windows or replace Windows entirely. If you're planning on replacing your Windows installation, make sure that all of your important files are backed up. Ubuntu will erase the drive containing Windows if you choose to replace it.
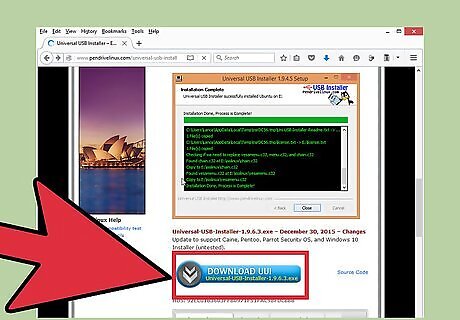
Download and install the Universal USB Installer from https://pendrivelinux.com. This free tool formats your USB drive, adds the Linux installation files, and makes the USB bootable.
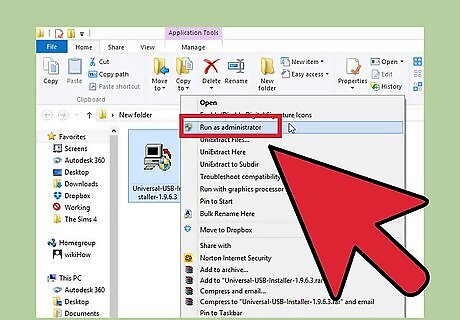
Run the Universal USB Installer program. Make sure that your USB drive is inserted and that it doesn't have any important files on it.

Select Ubuntu from the first drop-down menu. You can use this utility to create a USB for any Linux distribution. Make sure to select Ubuntu so that it is formatted correctly.

Click the Browse button and select your downloaded ISO file. You can usually find it in your Downloads folder.
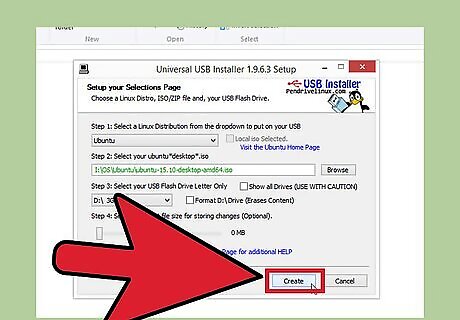
Select your USB drive and click Create. This will begin formatting the USB drive and copying the Ubuntu files to it so that your computer can boot from the USB.

Reboot your computer after the USB drive is ready. You'll need to set your computer to boot from the USB drive. The process for this varies from computer to computer. Press the BIOS or BOOT menu key as your computer starts up. This key will be displayed on the same screen as the manufacturer logo. Common keys include F2, F11, F12, and Del. Select the BOOT menu in your BIOS and set your USB as the primary boot device. If your computer boots directly into Windows 8 or 10 without showing the manufacturer logo, you'll need to do an advanced startup. Open the Charms menu (Windows 8) or click the Start menu (Windows 10) and select "Settings". Open the "Update & security" section, click "Recovery", and then click "Restart now" in the "Advanced startup" section. In the "Advanced startup" menu, click "Troubleshoot" and then "Advanced options". Select "UEFI Firmware Settings" and then navigate to the BOOT menu. Change the boot order so that the USB drive is the primary boot device.
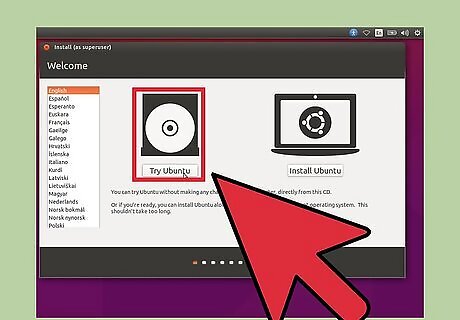
Try Ubuntu before installing (if you'd like). When you first boot from your USB drive, you'll be taken to the Welcome screen. You can pick your language and choose to either try Ubuntu or begin installation. If you opt to try Ubuntu, you can access all of its features (though you won't be able to save anything). At any time while trying out Ubuntu, run the installer on the desktop to begin the installation process.
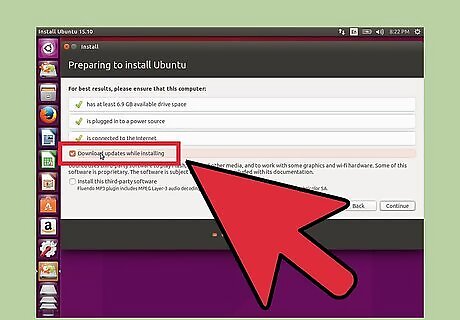
Check the boxes on the "Preparing to install Ubuntu" window. Check both the "Download updates while installing" and the "Install this third-party software" boxes. If you can't check the "Download" box, move on to the next step and then return to this screen after connecting to the network. Connect to a wireless network (if prompted). If your computer is connected to the network via ethernet, you won't see this screen and your network connection will be automatically configured. If you are using a wireless adapter to connect, you'll be asked to select the network you want to connect to and enter the password if necessary. If you're connecting to a wireless network in this step, it is recommended to return to the previous screen after connecting and check the "Download" box.

Decide if you want to replace Windows or dual boot Ubuntu. If you install alongside your copy of Windows, you'll keep all of your files and a new partition will be created out of your free space. You'll be able to select which operating system you want to load when your computer starts up. If you choose to replace Windows, all of your files and programs will be deleted. If you choose to install alongside Windows, you'll be able to use the slider to set how much space will be used for Ubuntu and how much free space will be left for Windows. If you replace Windows, the partition you installed Windows on will be wiped and Ubuntu will be installed on it. The partition will stay the same size as it was originally.
Complete the setup process. You'll need to select your location and keyboard layout, create a user account, set a password, and name your computer. After creating your account, you just need to sit back and wait for the installation to complete. This usually takes about 20-30 minutes.
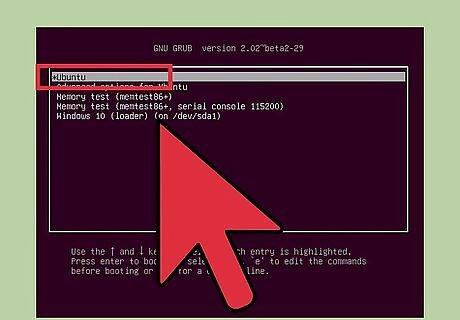
Select Ubuntu when booting up (if you installed alongside Windows). Once the installation is complete, your computer will reboot. If you installed Ubuntu alongside Windows, you'll see a new menu when you first start up your computer allowing you to choose your operating system. Select Ubuntu and you'll either be logged in or taken to the login screen, depending on which option you selected when creating your user. Once you're logged in, you can start using Ubuntu. There are several wikiHow articles available that can help you get familiarized: Click here for a guide on learning basic Terminal commands. Click here for instructions on installing software in Ubuntu. Click here for instructions on setting up a network connection in Ubuntu. Click here for a guide on getting your graphics card drivers installed.


Comments
0 comment