
- Wrap yarn around both sides of the maker, covering them evenly. Move back and forth as you wrap until the inside edges of the maker disappear.
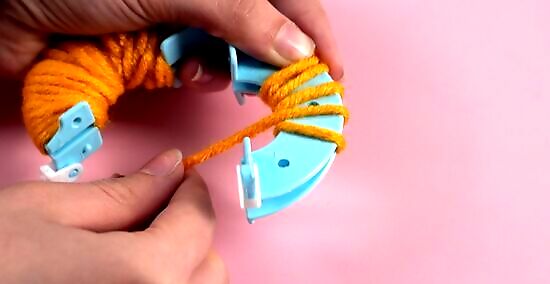
- Close the maker and cut the yarn loops along the grooves on both sides. Cut a 15 inches (38 cm) piece of yarn and wrap it around the grooves.
- Overlap one end of the piece over the other and feed one end of the yarn in the loop created. Repeat twice on both sides of the maker to secure the pom pom.
Using a Pom Pom Maker

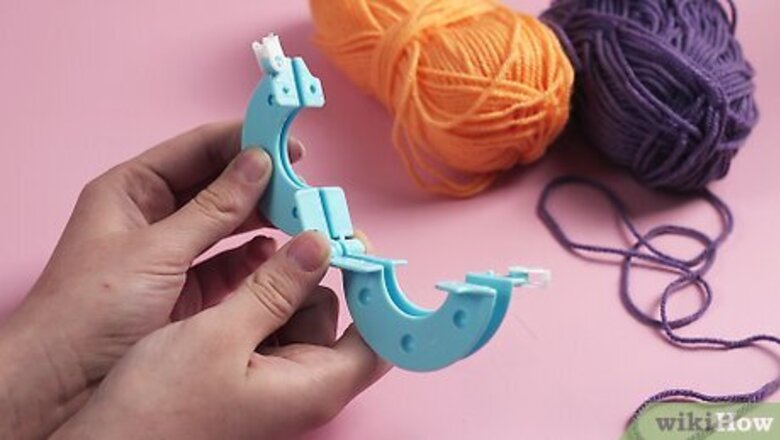
Open up the two sides and make sure the pieces are lined up. Pull on the tabs on either side of the pom pom maker to open up the 4 plastic pieces from the middle section. Align the 2 pieces on either side with each other. If your pom pom maker only has 1 plastic piece on each side, all you have to do is align both sides of the maker and open the plastic pieces slightly. Maker sizes might vary slightly between brands. Check the packet label to see the size of your specific pom pom maker. Generally, the thicker the yarn you use, the fuller and fluffier your pom pom will look.
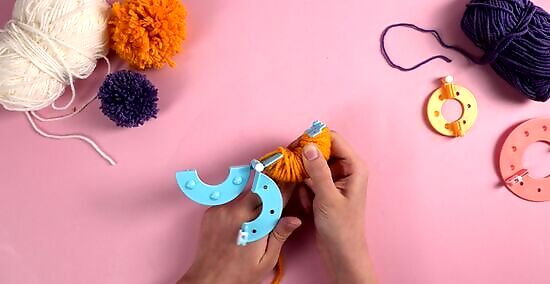
Wrap yarn around one side of the maker, covering it evenly. Tuck the tail end of the yarn between the 2 pieces of the maker. Keep wrapping, moving back and forth, until the inside edge of the pieces disappears and the yarn is even in thickness. Alternatively, tuck the tail end underneath as you wrap the yarn over it. The more layers of yarn you wrap, the denser your pom pom will be. However, make sure it’s thin enough that you can still close the maker comfortably.
Cut your yarn and wrap the other side of the pom pom maker. Cut off the yarn with a pair of scissors so that the tail end is level or longer than the top edge of the pieces. Tuck the tail underneath the other pieces of yarn. Repeat the previous 2 steps to cover the other side of the maker with yarn. Push the yarn over to one side of the pom pom maker when necessary to create an even layer of yarn over each side of the maker.

Close the maker and cut along the groove on the edge. Push the 4 plastic pieces together to close the maker. Most plastic pom pom makers have a small divot on the side, between the 4 yarned plastic pieces. Insert your scissor blade into the hole, then cut along the outside groove to cut the yarn loops on both sides. Use a sharp pair of scissors to more easily cut through the multiple layers of yarn. Hold the center of the pom pom maker tightly as you cut to keep it from moving.

Cut 15 inches (38 cm) of yarn and wrap it around the groove. Wrap the piece of yarn along the exposed grooves along the edge of the maker. Cross one end over the other, insert the first end into the loop, and pull on both ends until the yarn is completely tight. When the yarn slips into the groove, it wraps around the middle of the pom pom inside the maker.
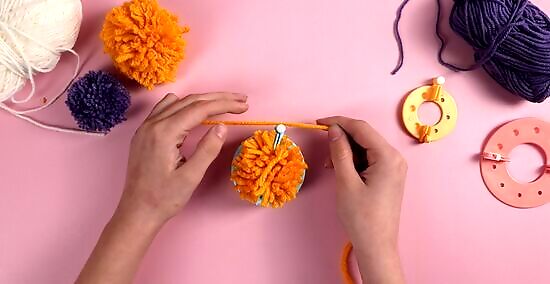
Tie a knot on each side of the maker to secure the pom pom. Cross one end of the yarn over the other and insert it into the loop. Pull tightly, to create a knot. Flip the pom pom maker over and repeat the same motion twice on the other side to create another knot. If you’re worried about the pom pom coming loose, tie an additional knot on each side. You can keep the length of yarn to hang your pom pom up as an ornament or to use it for another project, or you can trim them off.

Pull on the tabs on the sides and separate the pieces to open the maker. Pull on the tabs or latches on the edge of the 4 plastic pieces to separate them from the middle of the maker. Pull on the 2 middle pieces to open the maker completely, releasing the pom pom. If your maker doesn’t have a middle section, opening the 4 plastic pieces will release your pom pom.
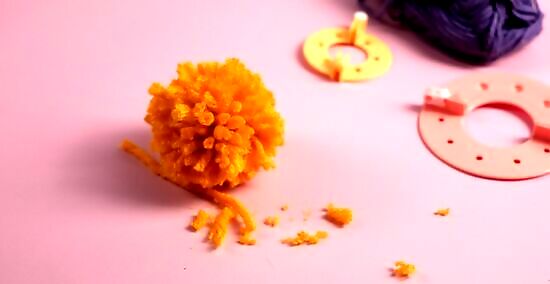
Clean up the edges of the pom pom to make it smooth and round. Using a pair of scissors, trim away any long pieces of yarn sticking up from the pom pom. Now you’ve made a pom pom! If you’re going to attach the pom pom to a knitting project, leave the 15 inches (38 cm) piece of yarn and tie the ends into the stitches on your project. Otherwise, trim them off. Arts and Crafts Specialist Amy Guerrero recommends “adding a pom pom” to a wrapped present “after tying the package with string or ribbon.”
Making and Using a Cardboard Pom Pom Maker
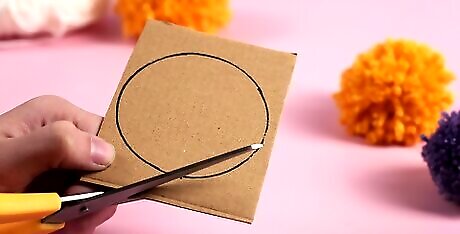
Trace and cut 2 circles the size of your pom pom on cardboard. Trace 2 circles on a piece of cardboard using a measuring cup or another round object that’s about the size of the pom pom you’d like to make. Use a pair of scissors to cut them out. If you don’t have cardboard, use a foam board or a piece of cardstock to make a pom pom. Try not to make your circles smaller than 3 inches (7.6 cm) so you can more easily make your pom poms.
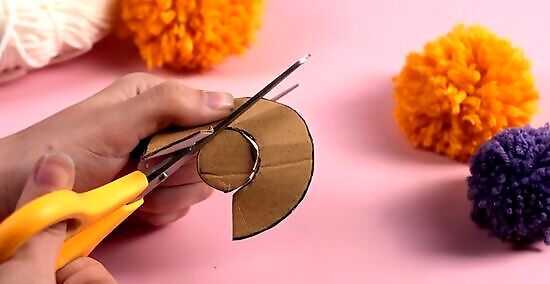
Cut a 1 inch (2.5 cm) circle inside the larger circles and cut a V. Trace a 1 inch (2.5 cm) circle in the center of the larger circle. Cut through the side of the larger circle to the smaller circle and cut it out. Repeat this step for the second larger circle. Make a small “V” where you cut through to the small circle. This “V” creates a notch that can make it easier to pull the yarn through. You can also cut a gap through the circle about 1 centimeter wide.
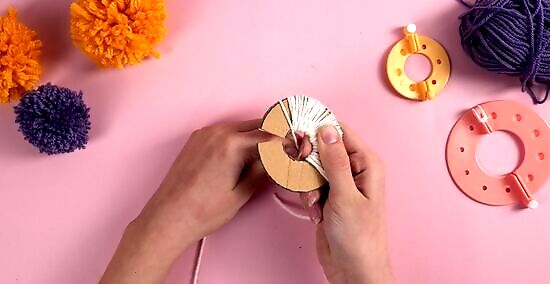
Hold the 2 circles together and wrap yarn evenly around the sides. Place the tail end of the yarn on the cardboard and wrap the yarn around it, entering through the notch. Move back and forth along the circle as you wrap to make sure the yarn is even around all sides. The more layers of yarn you wrap around the circles, the denser your pom pom will be.

Cut the yarn between the two cardboard circles. Insert the lower blade from a sharp pair of scissors between the two circles and cut the yarn around them. Remove both pieces of cardboard to release the pom pom. Hold the cardboard circles tightly to make sure they don’t come apart while cutting.

Cut 15 inches (38 cm) of yarn and tie a knot between the two circles. Pull the piece of yarn between the two cardboard circles. Cross one end of the yarn over the other and insert the end into the loop you create. Repeat this step to make a knot, then make another knot on the other side of the pom pom. Arts and Crafts Specialist Amy Guerrero recommends to “Tie the string as tight as you can around the center of the [pom pom]. This should cause [the yarn] to puff out.”

Trim the edges to make your new pom pom look round and smooth. Use a pair of scissors to trim away any long pieces sticking out. Now your pom pom is complete!


Comments
0 comment