
Preparing the Floor

Determine if the floor has a coating on it. Epoxy coatings will react with other, previously installed coatings, so realize polyurethane and latex floor paints do not make a suitable substrate for epoxy products. If you have one of these coatings on your garage floor, it will require stripping prior to applying the epoxy.

Look for oil or grease stains. If you have spilled lubricants, or your automobile has leaked on the floor, it will have left a residue that must also be removed before beginning the application. An industrial degreaser or solvent based cleaner will be required for this purpose, and care should be used to prevent asphyxiation or combustion while this step is undertaken. Once you've cleaned the floor, it's now time to remove any formation of grease or oil. The cheapest and quickest way to remove grease and oil residue is by using a concrete degreaser. You can buy this in the hardware store. Pour the solution on your floor and start scrubbing away. The next step is a bit unorthodox. Let the degreaser soak in for a number of minutes and pour cat litter over the areas that have stains. Proceed by grinding it using your shoe. Let it stay there for 24 hours and sweep it.

Look for rubber residue from tire scuffing. This material will need to be sanded or ground off, as ordinary solvents do not effectively remove it.

Test random areas for other, undetected sealers or coatings. Take a small cup of muriatic acid mixed at a ratio of four parts water to one part acid. Drip small amounts of the acid solution to various areas of the floor. Pay close attention to those areas that appear different in color, texture, or shininess. The solution should fizz slightly yellow if there is no coating present. If a coating exists, it will have to be removed, depending on the size of the area:Put an Epoxy Coating on a Garage Floor Step 1Bullet5.jpg Small isolated areas: a surface grinder or aggressive sander with 50 grit or coarser sandpaper may do the trick, and then repeat step one. If most or all of the floor will not return a fizz, then this suggests that you may want to rent or purchase a floor grinder, to remove that coating. Repeat the previous step to test again.
Etching the Floor

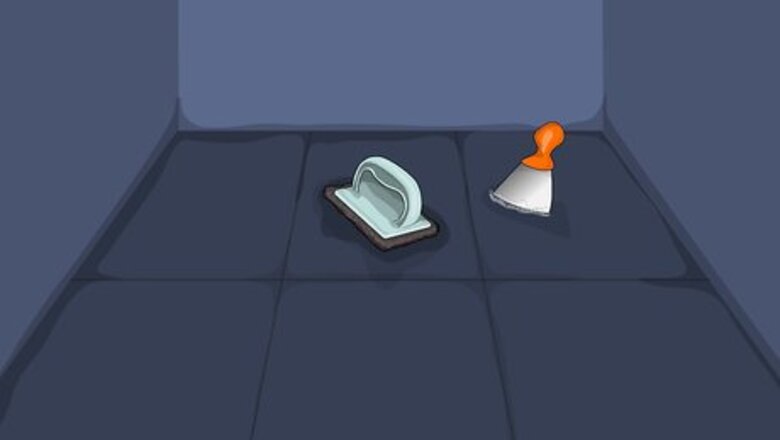
Get a cleaner for etching. Etch the floor with muriatic acid or a masonry cleaner, such as SureClean 600. Most kits provide etching products that you can use. You need to follow the instructions found in your kit. Use your scrub brush so that it can be agitated really well. A home local improvement center can provide you with an etching product if the kit does not have one. Etching is an important process as it opens up the pores of the concrete so that epoxy paint can properly stick. The lack of etching will contribute to an epoxy-coated floor with a lot of imperfections. Etching the floor involves applying muriatic acid or phosphoric acid and neutralize the floor afterward by using a high pressure nozzle.

Presoak the floor. Use a garden hose to wet the entire floor just enough so that the floor is moist.

Mix one gallon of mixed acid/water solution (four parts water to one part acid). Evenly pour out the gallon onto the floor. This amount of solution will cover 70 to 100 square feet. Try working in 'squares' as much as possible. Use a stiff bristled 18 to 24" shop broom. Apply the solution. Use a scrubbing motion to scrub each area. You should get a 'foamy' white reaction. Once this area is fully scrubbed, move to the next area and repeat.

Rinse entire floor well. Once all areas have been completed using above steps, rinse the entire floor well with water. Broom out any excessive water.

Allow the floor to dry completely. Any residual moisture will be trapped beneath the finished epoxy coating, causing the bond to weaken or fail between the coating and the concrete surface. Depending on humidity and temperature, thorough drying should take about a week to ten days. Test the floor's dryness by placing a flat, moisture proof object on it, and allowing it to stay overnight. A vinyl floor tile is perfect for this purpose, and single tiles can often be purchased at your local home center or building supply company. After leaving the tile in place overnight, remove it and look for evidence of condensed water or a darkened appearance of the concrete surface indicating the presence of moisture. First, you have to check to see if there is any sign of moisture on the floor. You can do this by putting duct tape on a plastic that is laid out on the floor. Make sure that all of its edges are sealed properly. You can use 1 gallon (3.8 L) zip lock bag for this testing. Leave it there for 24 hours and check it the next day. It has to be dry because a wet floor means that you can't paint on it. The paint will repel from a floor that is wet. Some manufacturers recommend using a dry method for scouring the concrete because muriatic acid can damage the coating if it is not completely rinsed off.
Coating the Floor
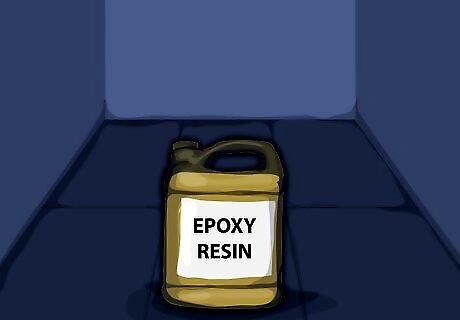
Select the product you will use to coat your garage floor. Epoxies vary, depending on the product manufacturer, but most are comprised of three ingredients. These are: The epoxy resin. This is the main ingredient of the epoxy coating, and is generally a clear, or amber viscous liquid. It is available in quart, gallon, and five gallon containers.Put an Epoxy Coating on a Garage Floor Step 4Bullet1.jpg The catalyst. This is the component of a multi-part epoxy system that causes the resin to harden, and is usually a part B of the package you will be purchasing. Buying your epoxy in a two part package insures the compatibility of the components. Read the mixing directions carefully to insure the proper proportions are mixed.Put an Epoxy Coating on a Garage Floor Step 4Bullet2.jpg Pigment. Since epoxy is a semitransparent or colorless material, a pigment is used to give it its final color. Pre-pigmented packages are the best bet for home installers, but separate pigments can be purchased for your project if you wish to do so.Put an Epoxy Coating on a Garage Floor Step 4Bullet3.jpg Texturing materials. It may be desirable to texture the floor with an aggregate material so the finish is not too slippery. Numerous materials are used for this purpose, from sandblasting sand to PVC plastic granules, giving different textures and degrees of traction. When in doubt, visit a paint retailer and look at samples of the products they offer, and read the manufacturer's literature for recommended products and procedures.Put an Epoxy Coating on a Garage Floor Step 4Bullet4.jpg

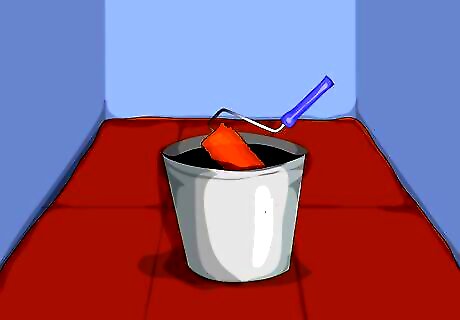
Calculate the amount of material required to do your project. Epoxies do not cover as much surface area as other coatings and paints, so check the application (or coverage)rate for the product you choose. Basically, for a 5 to 6 mil application rate, one gallon of combined material will cover 200 square feet, or a small, one car garage. Because you will want a seamless, one-step application of each coat, be sure to allow for waste and purchase significantly more than you will need.#Install the coating. The rest is install the coatings per the manufacturers instructions. The basic steps will be these: Mix the pigment, if used, with the resin in a clean metal container with twice the capacity of the total amount you will use for each application.Put an Epoxy Coating on a Garage Floor Step 6Bullet1.jpg Add the hardener (catalyst) and mix again. Thorough mixing is essential for best results, so consider using a paint mixing paddle in a power drill, but avoid mixing at a speed so high it creates bubbles in the material.Put an Epoxy Coating on a Garage Floor Step 6Bullet2.jpg Using a ⁄4 inch (1.9 cm) nap roller on an extension handle, apply the material to the floor. Begin at a back corner, so you can work your way toward the exit as you roll, and overlap each roller path by one half its width with each successive roll. Keep plenty of material in the roller, and if it begins tacking, dip it again in your mixing bucket.Put an Epoxy Coating on a Garage Floor Step 6Bullet3.jpg Work the roller as quickly as possible, as the epoxy has a short working time. Most epoxies, mixed according to manufacturer's directions, must be used in less than one hour, excessive hardener will reduce the working time considerably.Put an Epoxy Coating on a Garage Floor Step 6Bullet4.jpg
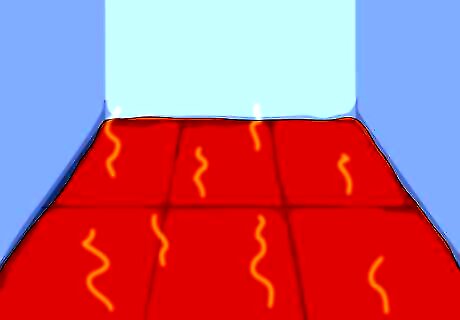
Design it, if desired. If you wish to add paint chips, you should paint a measly 6'x6' section at a time and put the chips afterward. When you're placing them, make sure that you toss them in the air so that they will fall back to your fresh paint. You'll have a more random spread if you do this compared to throwing them directly on the paint.
Finishing Up
Dispose of your used materials. Dispose of your paint roller cover when you have finished applying a complete coat over the entire garage floor. The solvents used for epoxy cleanup are dangerous, and expensive, so cleaning your tools is simply not practicable.
Allow the epoxy to cure completely. Again, read and follow the manufacturer's directions for the product you select, as this time may vary significantly.

Observe the re-coat times carefully. It's best that you put an extra coating to your floor. It will have a more glossy shine that can lock in the chips and ensuring the your floor will last longer. Remember, re-coating after waiting too long can be just as bad as not waiting long enough.


Comments
0 comment