views
X
Expert Source
Jonas JackelOwner, Huckleberry Bicycles
Expert Interview. 18 February 2020.
If you don’t notice any external damage to the derailleur or shifters, it may be time you replace the cable. Luckily, it’s a repair you can easily do at home within an hour using a few tools for both the front or rear cables. Whenever you attach your new cable, just be sure to readjust the derailleur so your bike shifts properly.
Disconnecting the Old Cable
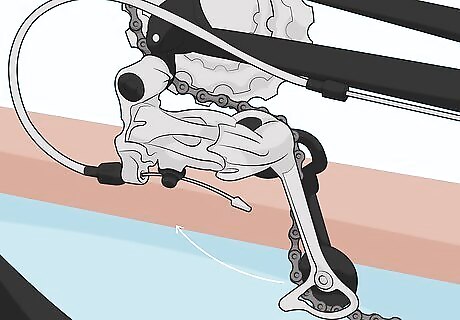
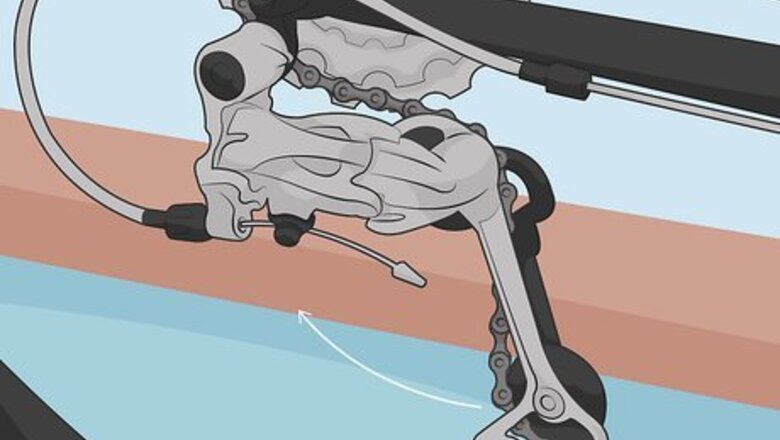
Shift your bike to the highest gear. Take your bike for a short ride or put it up on a bike stand so it’s easier to change gears. As you’re pedaling, use the shifters to move the chain onto the highest gear, which will be the smallest cog on the derailleur. Stop pedaling your bike so you can start your repairs. The derailleur is the set of gears next to the pedals or rear wheel of your bike. Putting your bike on the highest gear takes the tension off of the cable so it’s easier to remove.Warning: Avoid shifting gears without pedaling since the chain could slip off the gears and get damaged.
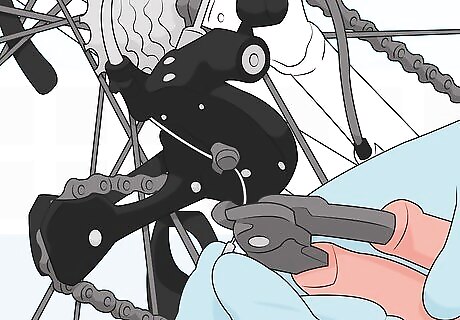
Cut the crimp off the end of the cable. Locate the thin metal cable held against the side of the derailleur by a hex bolt. Hold a pair of cable cutters up against the metal crimp at the end of the cable. Squeeze the handles together to remove the end of the cable so you can easily pull it out. You can buy cable cutters from bike shops or hardware stores.
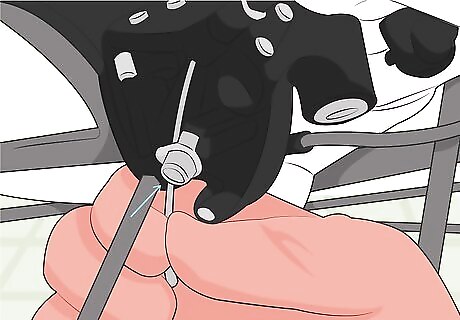
Unscrew the hex bolt to unclamp the cable. Feed an Allen wrench into the hex bolt holding the cable against the derailleur. Turn the bolt counterclockwise until it’s loose. Once you loosen the hex bolt, simply pull the cable out through the back of the derailleur to detach it. Avoid unscrewing the bolt completely, or else it could fall off or be difficult to reinstall.
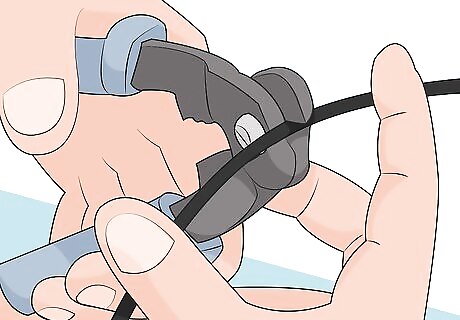
Remove the plastic outer cable and set it aside. The outer cable is made from black plastic tubing that protects the actual metal cable. Pinch the outer cable and slide it off from the gear cable’s exposed end. Keep the cable nearby so you can use it as a reference to size the new ones. You can also reuse the existing outer cables if they aren’t cracked or damaged.
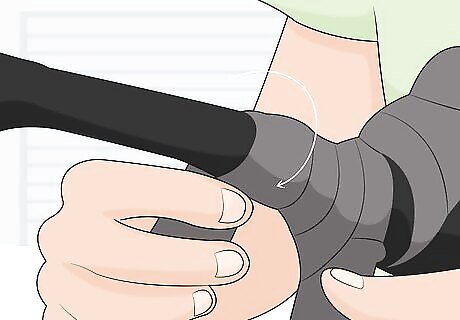
Peel back the handlebar tape and shifter covering. Grab the inner edge of the shifter, which is attached to your handlebars, just below where the cable connects to it. Slowly pull the plastic toward the end of the handlebars to expose the cable housings. If you’ve taped your handlebars, unravel the tape until the outer cable comes free. If you don’t plan on replacing the outer cables, you don’t have to untape your handlebars.
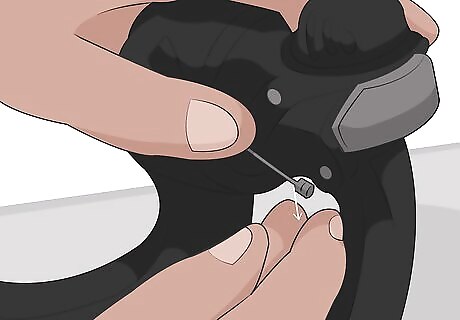
Pull the gear cable out through the shifter. Locate the thicker metal end of the gear cable stuck in the shifter’s housing. Pinch the end of the cable and slowly guide it out from the hole. Once you pull the end of the cable through the shifter, the front outer cable running between the frame and shifter will come loose. You may need to squeeze the shifter level to expose the end of the gear cable. If your bike doesn’t have a visible cable on the outside, it runs through your frame instead. You will still be able to pull the cable straight out from the shifter.
Sizing and Trimming the Outer Cables
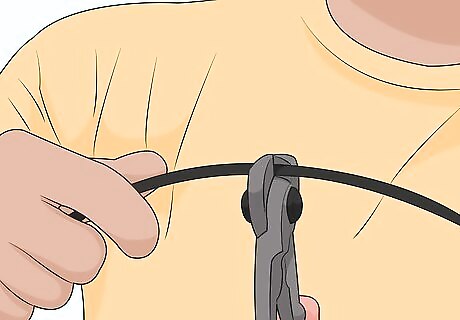
Cut new outer cables to the same lengths as the old ones. Outer cables are universal, so buy any set for your replacement. Line up the metal ends on the old and new outer cables that attach to the derailleur. Mark the length of the old cable on the new one with a marker. Use your cable cutters to trim the outer cable at the mark you drew. Try to make your cut as straight as possible so it connects properly to your bike. Then cut the new outer cable that attaches to the shifter so it matches the size of the old one. You can buy a set of outer cables online or at a local bike shop.
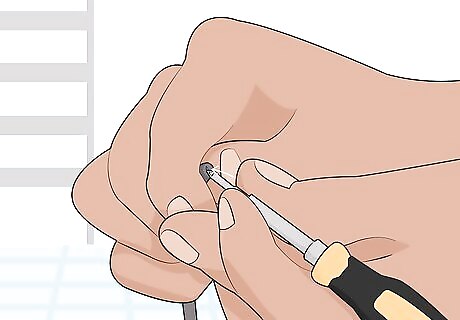
Poke a screwdriver into the cut ends if they get compressed. Pinch the cut ends of the outer cables to widen the opening. Use the smallest screwdriver or awl you can find and poke it into the center of the cable. Push the inner walls of the cable back against the outer casing so there’s a large opening in the middle. If the outer cables are compressed, the gear cable will have more friction and make it more difficult for you to shift gears.
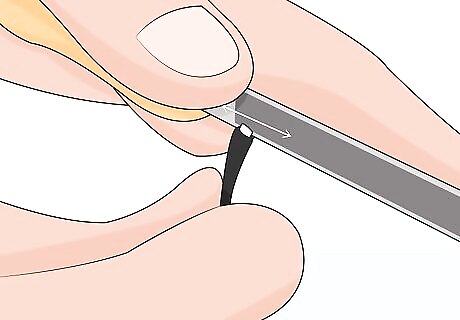
File the ends of the outer cables. Hold a file perpendicular to the end of the cut end of the outer cable. Apply light pressure as you move the file back and forth over the end of the cable to smooth it out. Make the end of the outer cable as flat as possible so it seats properly when you install it. Then, smooth the cut end on the second piece of outer cable as well. If you don’t file the ends of the cable, it may come loose or may not have as tight of a connection.
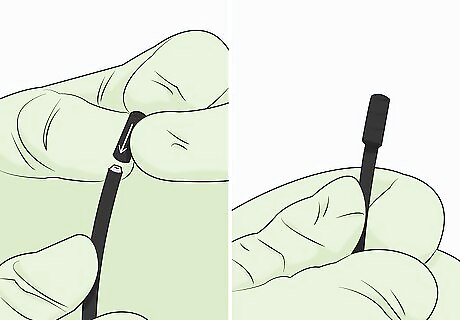
Push the ferrules onto the ends of the outer cables. The ferrules are small plastic cylinders that connect the cables to the shifter and derailleur. Look for the end of the ferrule that has the larger hole and slide it onto the cut end of the cable. Push it on as far as you can so it doesn’t come loose. Attach the other ferrule to your second piece of outer cable. The ferrules you need will be included with the outer cable.
Threading the New Cable
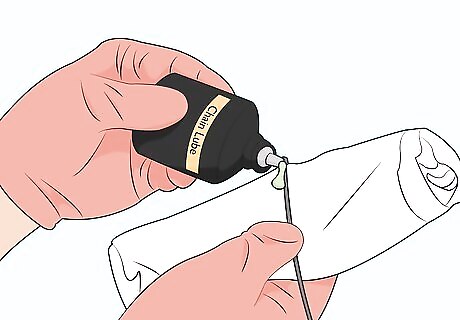
Grease the new gear cable with chain lube. Hold a paper towel underneath the end of your new gear cable that has the thicker metal cap. Squeeze a coin-sized amount of chain lube onto the paper towel and pinch it around the cable. Pull the entire length of cable through the paper towel to lubricate it so you don’t feel as much resistance when you’re shifting gears. You can buy a new gear cable online or from your local bike shop. Wear disposable gloves if you don’t want your hands to get greasy.
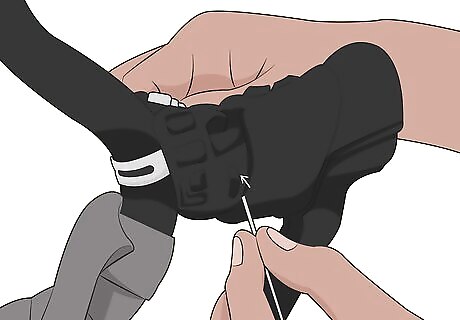
Pull the gear cable through the housing in the shifter. Find the hole on the shifter where you originally pulled out the old gear cable. Feed the thinner end of the cable into the housing and push it through until you see it on the other side. Grab the thin end of the cable and slowly pull the length of cable through the shifter. When you reach the end with the thick metal cap, guide it into the hole so it sits flush. The cable will not fit through the housing if you try to install it the other way. Hold the cable tight in the housing and try shifting through your gears. You should feel the cable get more tense as you shift up and go slack when you shift down.
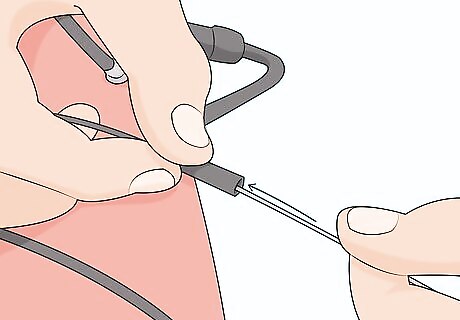
Fit the front outer cable onto the gear cable. Slide the gear cable through the ferrule on the front outer cable. Slide the outer cable as far onto the gear cable as you can until it reaches the shifter housing. Guide the outer cable’s ferrule into the slot on the shifter so it locks in place. There may be a plastic clip or tab that clicks over the ferrule to ensure it doesn’t fall out or come loose.
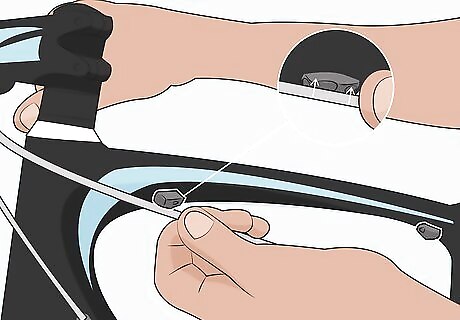
Run the gear cable through the mounts on your bike frame. Look for the 2–3 mounts, which look like small black cylinders, on the bottom horizontal tube of your bike. Feed the exposed end of the gear cable through the mount closest to the front of your bike and pull it tight so the outer cable presses against the mount. Continue running the gear cable through the other mounts until you reach the derailleur.Variation: If your bike doesn’t have exterior mounts, flip it upside down and unscrew the cover at the bottom of the down tube. Feed the end of the cable into the hole in the front of your frame until you see it come out of the down tube. Then guide the cable into the clear plastic sheathing that’s inside your frame.
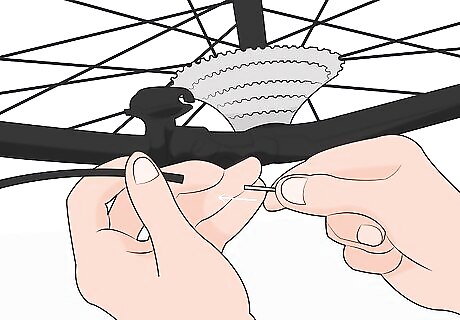
Slide the rear outer cable onto the exposed end of the gear cable. Push the gear cable through the black plastic ferrule on the outer cable. Slide the outer cable as far as you can until it pressed tightly against the frame. Pull the gear cable tight so you don’t notice any slack. There may be an exposed section of gear cable between the 2 outer cables, but that’s fine. Otherwise, there may be too much friction and you could have difficulty shifting gears.
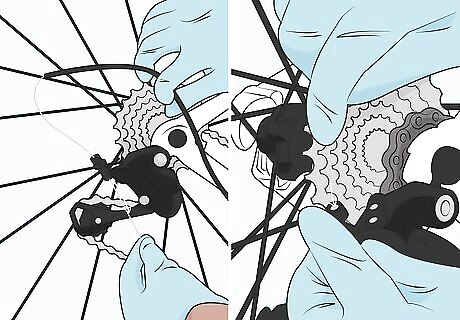
Guide the cable through the derailleur’s barrel adjuster. Look for the black plastic screw that looks like a barrel on the back of the derailleur. First feed the end of the gear cable through the adjuster until you see it come out from the other side. Then firmly push the outer cable’s metal ferrule into the adjuster so it stays connected. Do not turn or screw the adjuster yet since it will change the position of the derailleur.
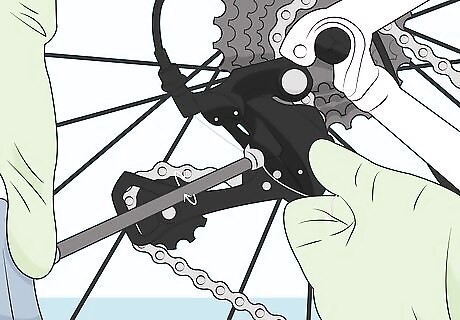
Tighten the hex bolt to secure your gear cable. Feed the end of the gear cable under the hex bolt on the side of the derailleur. Keep the gear cable pulled tight as you rotate the bolt clockwise with an Allen wrench. Screw the hex bolt in until the cable doesn’t move or shift around. Avoid screwing the hex bolt tightly since you may need to fine-tune your adjustment.
Adjusting the Derailleur Alignment
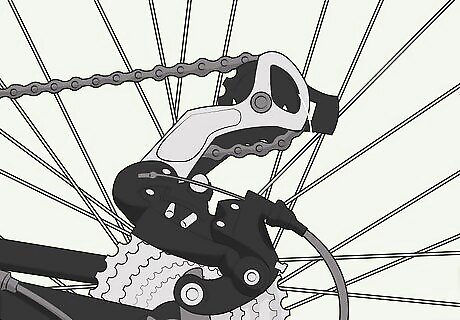
Shift your bike to the second-highest gear. Turn your bike upside down and set it on its handlebars. Slowly move the pedals by hand so it’s easier for the gears to shift. As you’re pedaling, move your shifter down by 1 gear. The chain may not switch between the gears on the derailleur since you’ve just installed a new cable, but this is normal. Avoid riding your bike to shift the gears since the cable and derailleur might not align properly, which may cause damage.
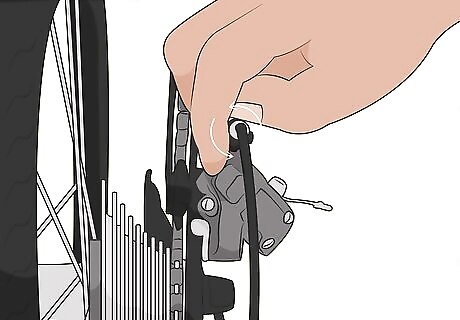
Turn the barrel adjuster counterclockwise so the chain changes gears. Keep pedaling your bike by hand while you make your adjustment. Grab the black plastic barrel adjuster on the derailleur and rotate it counterclockwise by a quarter-turn. Watch the chain to see it switches onto the next largest cog. If it doesn’t, turn the barrel adjuster by another quarter-turn. Continue making the adjustment until the chain switches gears and the bottom of the derailleur lines up with the gears. Test shifting up and down through all of your gears to see if you still have trouble changing between them. If you do, you may need to loosen the barrel adjuster more.
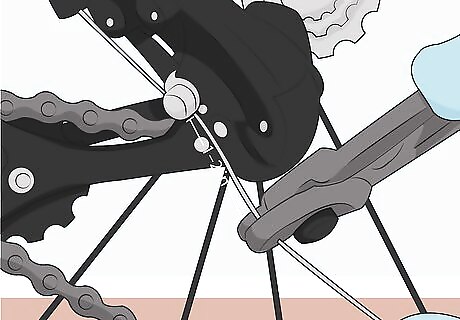
Trim the gear cable down to 1–2 in (2.5–5.1 cm) with your cable cutters. Measure 1–2 inches (2.5–5.1 cm) out from where the end of the gear cable sticks out from the derailleur. Place your cable cutters against the gear cable and squeeze the handles together to cut off the excess. The cable can be sharp after you cut it so avoid touching the end. If you leave too much of the cable exposed, it may get caught in the derailleur or wheel.
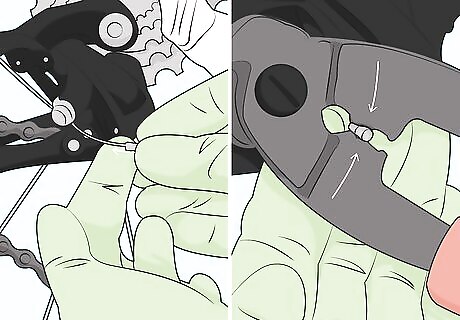
Pinch a crimp onto the end of the gear cable. Slide the metal crimp cap onto the exposed end of the gear cable. Hold onto the crimp with your pair of cable cutters and lightly squeeze the handles together. Lightly tug on the crimp to make sure it doesn’t come off of the cable. Crimps prevent the cable from fraying and getting damaged while you’re riding.Tip: Your new cable will come with a crimp so you don’t have to buy one separate.







Comments
0 comment