

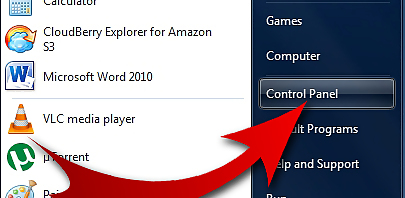
Click on Control Panel on your computer to open it.
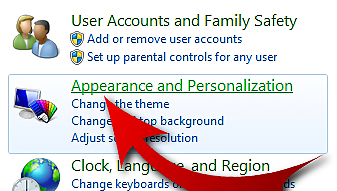
Turn Your Favorite Photos into a Screensaver (on Windows 7) Step 2.jpgFind an "Appearance and Personalization" section and click on it.
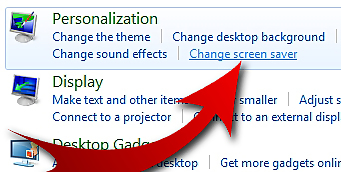
Turn Your Favorite Photos into a Screensaver (on Windows 7) Step 3.jpgFind a "Change Screen Saver" option and click on it.
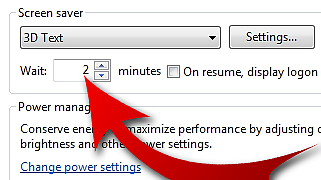
Turn Your Favorite Photos into a Screensaver (on Windows 7) Step 4.jpgEnter how many minutes you want to wait before the screen saver gets activated.
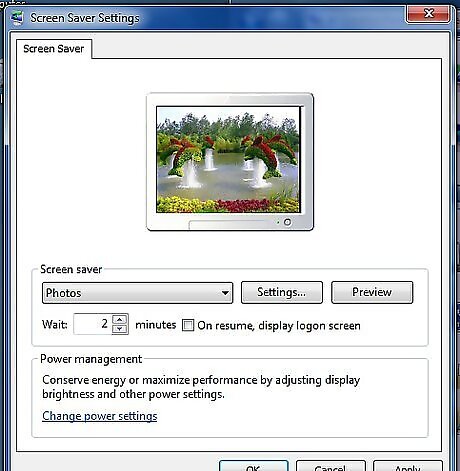
[[Image:Turn Your Favorite Photos into a Screensaver (on Windows 7) Step 5.jpg|center]In the left (bigger) window change a screen saver to "Photos" using a tiny arrow on the right.
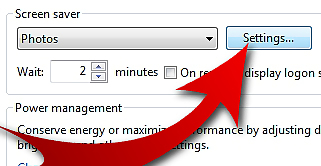
Turn Your Favorite Photos into a Screensaver (on Windows 7) Step 6.jpgClick on "Settings" button to select a folder with photos.
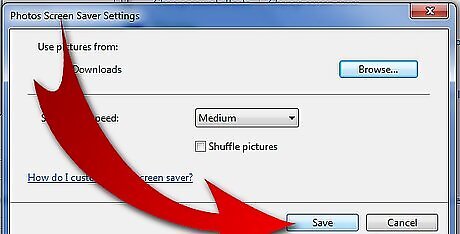
Click on Save button to save your work when you done.
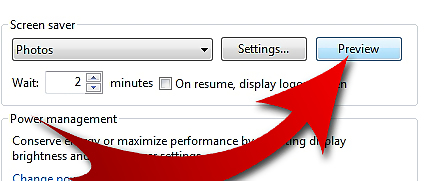
Return to "Settings" screen and click a Preview button to test how it works.
Determine if it looks good to you. If it does, click on Apply button and then click on OK. If it does not look good, return to step 6 and continue go from there.
The example used here used a folder "Downloads" for the screen saver.


Comments
0 comment