
Installing Microsoft Whiteboard
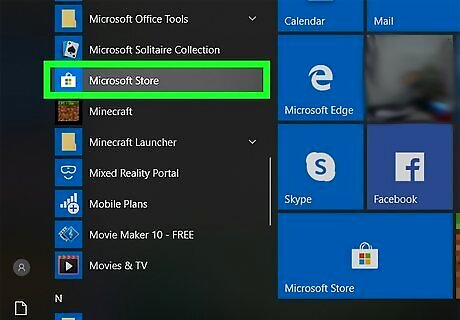
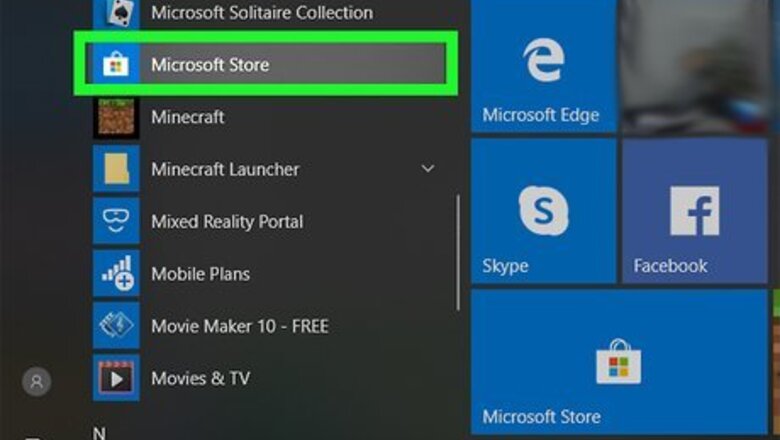
Open the Microsoft Store app. You'll find it in your Start menu. If you have tiles enabled, look for the icon that looks like a shopping bag. Microsoft Whiteboard is available as a Windows 10 app at no cost. If you don't have Windows 10 but want to join someone's Whiteboard session, ask them to send you the board's URL, which you can then access in any web browser. When you visit the URL in your browser, click View on the web and then sign in with your Microsoft account. If you have an iPhone or iPad, you can install the free Microsoft Whiteboard app from the App Store. When launching the app, you'll be prompted to sign in with your Microsoft account.
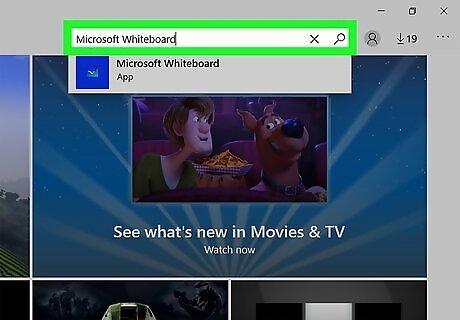
Search for the Microsoft Whiteboard app. To do this, click your mouse in the "Search" box at the top-right corner of the window, type Microsoft whiteboard, and then press ↵ Enter.
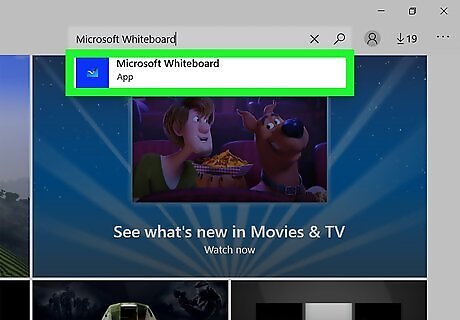
Click Microsoft Whiteboard. It should the first app in the list of results. Look for a blue tile with an icon of a whiteboard and a pencil inside.

Click the blue Get button. It's at the top-right corner of the window. This downloads and installs the app on your PC. When the download is complete, Microsoft Whiteboard will be added to the Start menu.
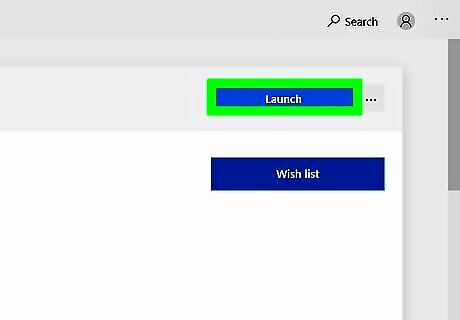
Launch the app. If you're still in the Microsoft Store, click the blue Launch button at the top-right corner to open the app. Otherwise, open the Start menu and click Microsoft Whiteboard in the app list. You may have to accept an agreement the first time you open the app.
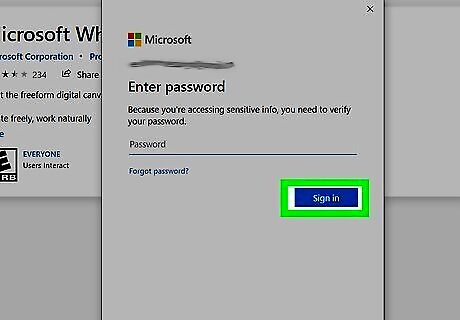
Sign in with your Microsoft account. If you're already logged in to Windows with your Microsoft account, you can skip this step. If not, click the grey circle with a white outline of a person at the top-right corner and follow the on-screen instructions to sign in.
Creating a Whiteboard
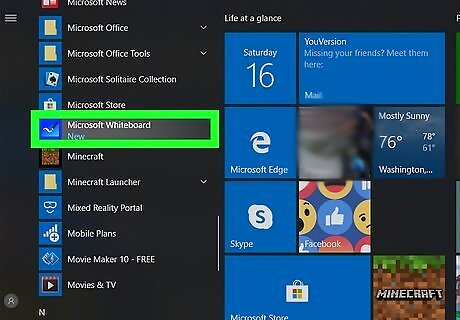
Open Microsoft Whiteboard on your computer. You'll find it in the Start menu.

Click + Create New Whiteboard. It's the large purple tile. This opens a blank new whiteboard.
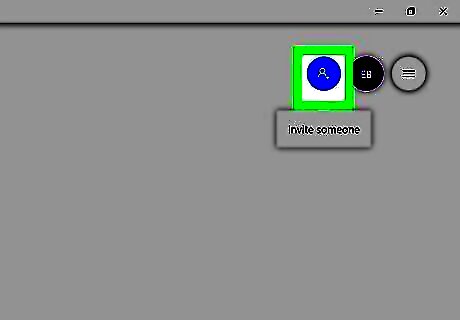
Click the Add icon. It's near the top-right corner of the whiteboard—look for a purple circle with the outline of a person and a plus (+) symbol inside.
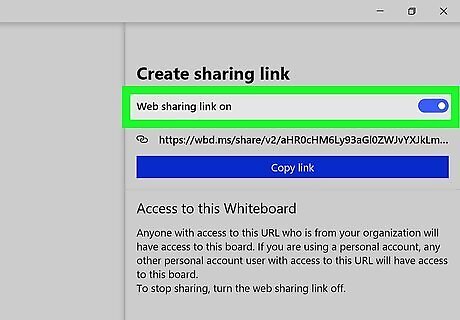
Slide the "Web sharing link off" switch to On Windows Switch On. This makes it so you can create an invitation link to your whiteboard. After a few moments, the link will appear below the toggle switch. If you want to disable the sharing link at any point, return to this menu and toggle the switch back off.
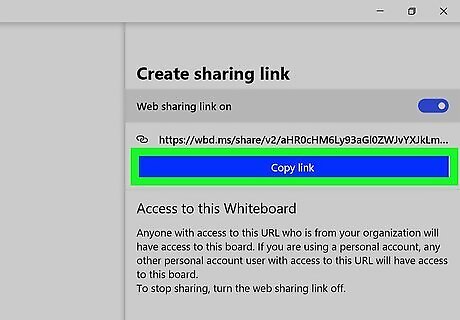
Click Copy Link. It's the large button below the link. This copies the direct URL to your clipboard.
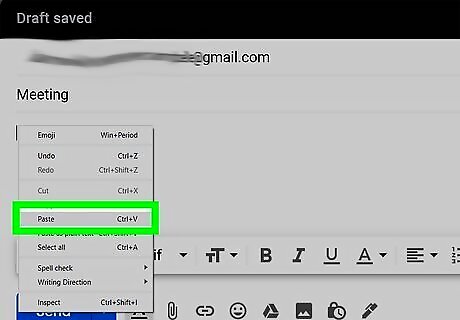
Send the link to anyone you want to join. To paste the link into an email or social media post, right-click the typing area and select Paste from the menu. Anyone who has the link can then click it to open the whiteboard in their web browser.
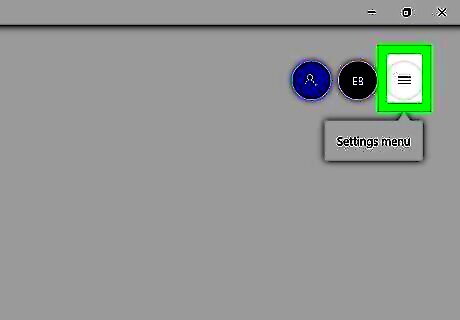
Click the ☰ menu to format the whiteboard. The three-line menu is at the top-right corner of the whiteboard. This opens the Settings menu, where you'll find some settings you can change for this particular whiteboard session: If you have an active pen tool (such as a stylus that came with your computer or tablet), you can enable Active pen mode. This allows you to make marks with the pen but use your fingers to zoom and pan around the board. If you want the lines and shapes you draw with the drawing tool to turn into perfect shapes, you can toggle on Ink to Shape. To create organized tables automatically from your hand-drawn lines, you can also toggle on Ink to Table. To set the background color to something other than white, and/or to add or remove gridlines, click Format background and make your selections. When you're done with your whiteboard, you can save it as an image on this menu by clicking Export and choosing an image type.
Marking the Whiteboard
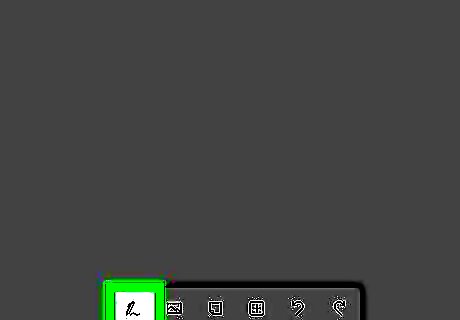
Click the Inking Mode icon to open the drawing toolbar. It's the first icon in the toolbar at the bottom of the screen. This opens a variety of drawing tools you can use to mark up the board.
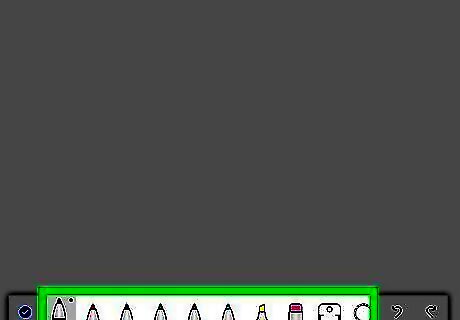
Click a drawing tool. There are a variety of options in the toolbar, including colored pens, a highlighter, an eraser, and a ruler, and a selection tool.
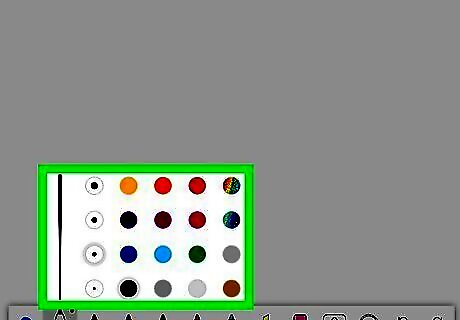
Select a line style and color. After selecting something to draw with, click and hold its icon again to view the tool's color palette and line thickness settings. To change the width of the line, click the black circle that represents your desired width. Click a color in the palette to select a different color.

Click and drag on the whiteboard to draw with the selected tool. As you drag, you will see the line appear in the selected color and width. Use the ruler tool at the bottom if you need to show the scale on the whiteboard. If you're using a touchscreen, you can draw with your finger or a compatible stylus. If you're dissatisfied with the last action, the last two icons on the bottom toolbar are Undo and Redo shortcuts. Click the left curved arrow to undo, and the right curved arrow to redo.
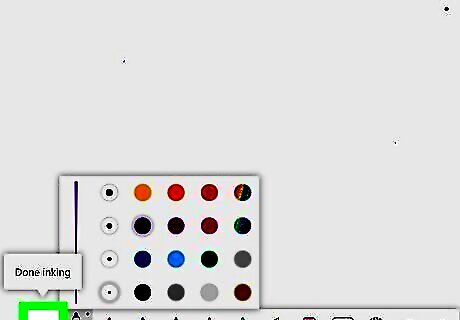
Click the checkmark to exit Inking Mode. It's at the bottom-left corner of the Inking Mode toolbar at the bottom.
Working with Objects
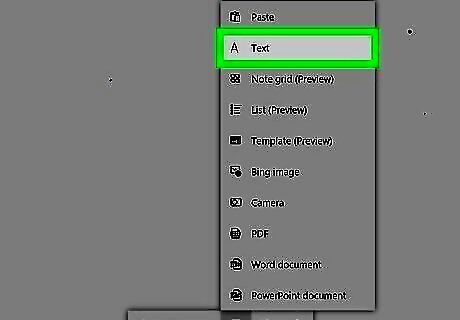
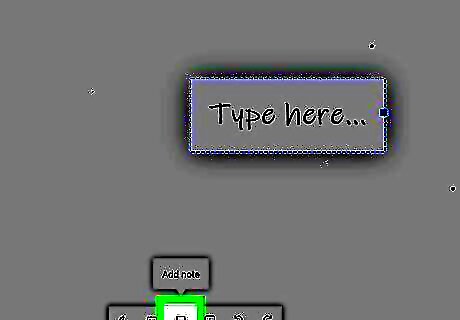
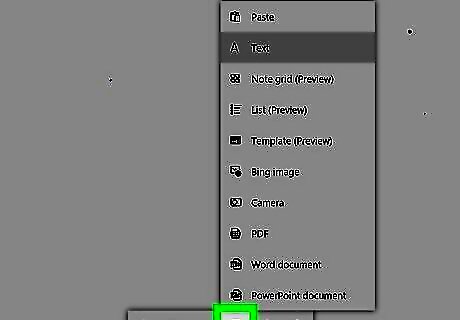
Click the A to insert text. It's the second icon in the bottom toolbar. This creates a text box, in which you can type whatever you'd like in a default font. To increase the size of the text box, drag the circle at the bottom-right corner outward.
Click the notepad icon to add a sticky-style note. It's the third icon in the bottom toolbar. This adds a small notepad sheet to the whiteboard, on which you can type whatever you wish. To change the color of the sticky note, click the note once to select it, and then click the palette icon that appears above it to access the color options.
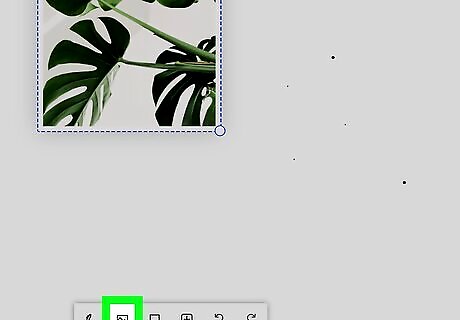
Click the Add image icon to insert an image. It's the fourth icon on the toolbar. This opens your computer's file browser, in which you can select and open an image file. To resize an image, click it once to select it, and then drag the circle at the bottom-right corner inward or outward. To move the image, click it once, and then drag it to the desired location.
Click the + to insert a file or template. It's the fifth option in the bottom toolbar. This opens another menu, which lets you insert a variety of objects: Click Note grid or List to insert some basic note-taking tools. Click Templates to select a premade template to use as the basis of your whiteboard. Click PDF, Word document, or PowerPoint Document to insert one of these file types.

Right-click the canvas to view additional options. Here you'll find some of the same tools that are in the toolbar, plus some new options: Click the clipboard icon (Paste) to paste the last thing you copied to your computer's clipboard. Click the … icon to expand other insert options, including adding Word and PowerPoint documents, taking a photo with your webcam, or doing an image search on Bing. You'll also find the option to clear the whole canvas here.


Comments
0 comment