views
Using a Minecraft Server
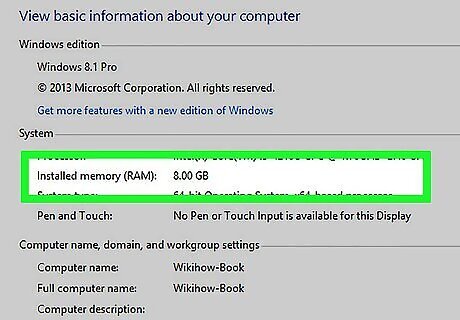
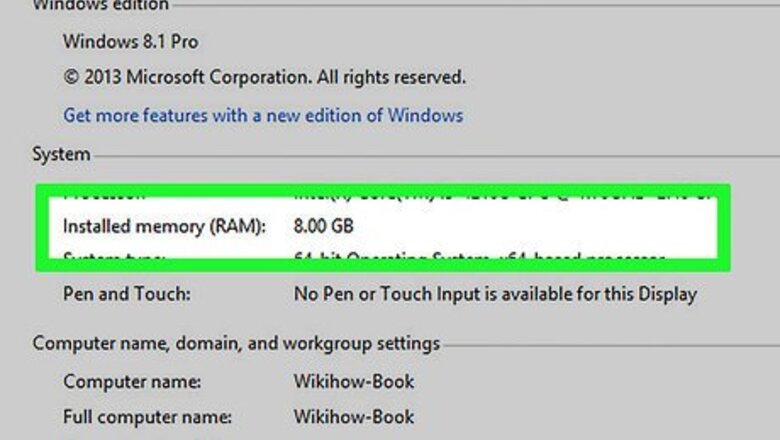
Check your computer's available RAM. The amount of available RAM will dictate how much memory you can allocate to Minecraft. To check RAM: Windows - Open Start, click the Settings gear, click System, click About, and look at the number next to "Installed RAM". Mac - Open the Apple menu, click About This Mac, and look at the number to the right of the "Memory" heading.
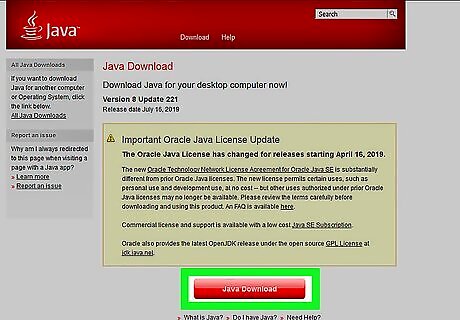
Update your Java program. Go to Java's website at https://www.java.com/en/download/ and click the "Download" button below the latest version of Java. This will ensure that your Java version is up-to-date and ready for RAM allocation. If you're on Windows, make sure you download the correct bit version for your operating system. You can only allocate 1 GB of RAM on a 32-bit computer.
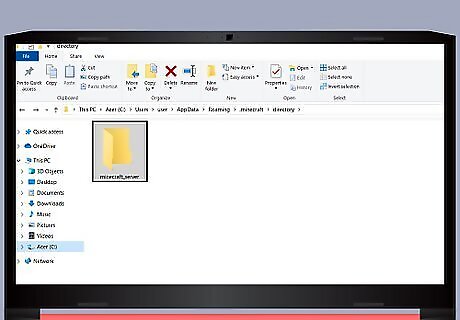
Open your Minecraft server directory. This is the folder that contains the Minecraft_server.exe file that you launch to start your Minecraft server. The easiest way to find this is by searching for the "Minecraft_server" file and then opening its file location.
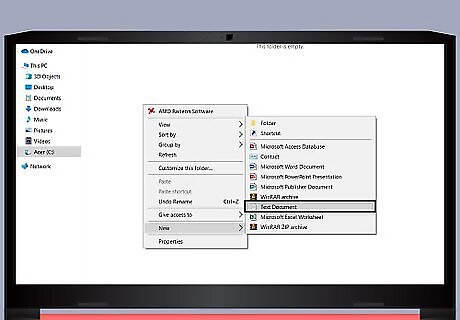
Create a text document in your server folder. Click either Home (Windows) or File (Mac), then either click New item (Windows) or select New (Mac) and click Text Document. This will create a new text document in the same location as the minecraft_server.exe file.
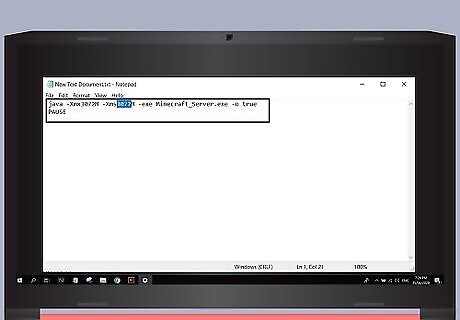
Enter in the code to allocate more RAM. Enter the following code into your text document depending on the operating system you are using: Windows java -Xmx####M -Xms####M -exe Minecraft_Server.exe -o true PAUSE OS X #!/bin/bash cd "$( dirname "$0" )" java -Xms####M -Xmx####M -exe Minecraft_Server.exe -o true Linux #!/bin/sh BINDIR=$(dirname "$(readlink -fn "$0")") cd "$BINDIR" java -Xms####M -Xmx####M -exe Minecraft_Server.exe -o true Change #### to the value in megabytes that you want to allocate. To allocate 2 GB, type 2048. To allocate 3 GB, type 3072. To allocate 4 GB, type 4096. To allocate 5 GB, type 5120.
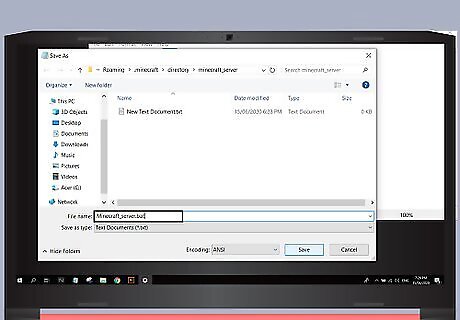
Save the file. If you are using windows, save the file as a ".bat" file. Click File and select Save As.... Change the file extension from ".txt" to ".bat". If you are using OS X, save the file as a ".command" file. If you are running Linux, save the file as a ".sh" file. You may first have to enable file extensions on Windows to view them.
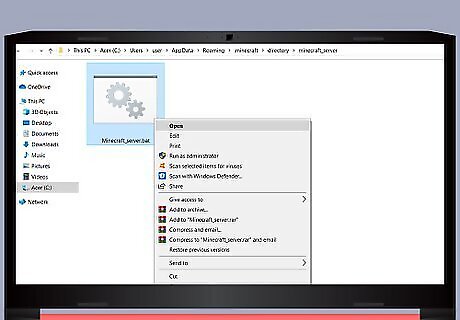
Run the new file to start Minecraft. The file you create will be the new launcher for your Minecraft server. Launching with the new file (.bat for Windows, .command for Mac, or .sh for Linux) will allocate the new amount of RAM to the server.
Using Launcher Version 2.0.X
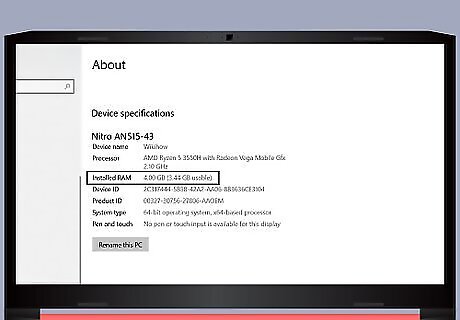
Check your computer's available RAM. The amount of available RAM will dictate how much memory you can allocate to Minecraft. To check RAM: Windows - Open Start, click the Settings gear, click System, click About, and look at the number next to "Installed RAM". Mac - Open the Apple menu, click About This Mac, and look at the number to the right of the "Memory" heading.

Update your Java program. Go to Java's website at https://www.java.com/en/download/ and click the "Download" button below the latest version of Java. This will ensure that your Java version is up-to-date and ready for RAM allocation. If you're on Windows, make sure you download the correct bit version for your operating system.
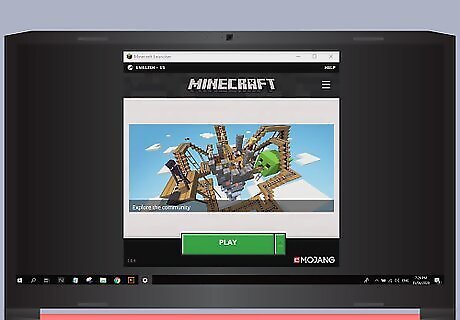
Open the Minecraft launcher. Double-click the Minecraft icon to do so. If the launcher window has "1.6..." in the bottom-left corner (or at the top of the window), use the launcher version 1.6.X method instead.
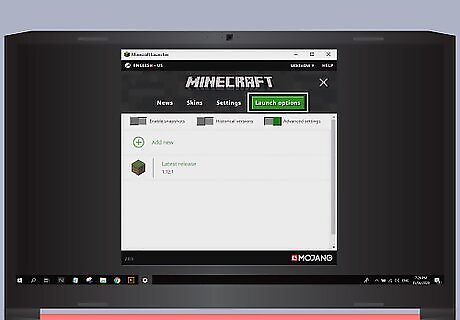
Click the Installations tab. It's at the top of the launcher.
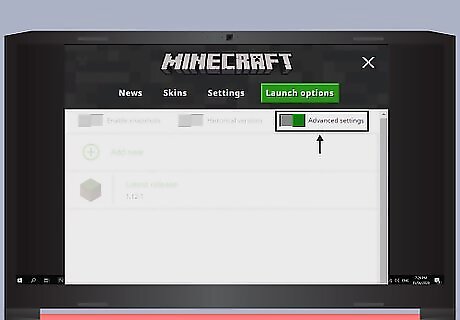
Make sure the Advanced settings switch is on. This switch is in the top-right side of the Launch Options page. If the switch isn't green, click it before continuing.
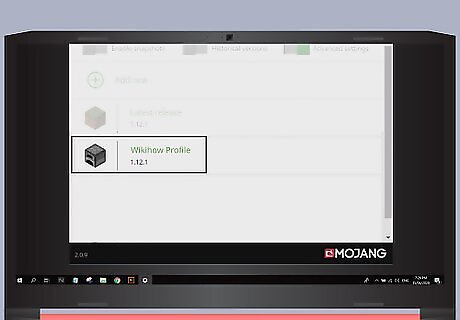
Click the profile you want to change. If you only see one option on this page, just click that option.
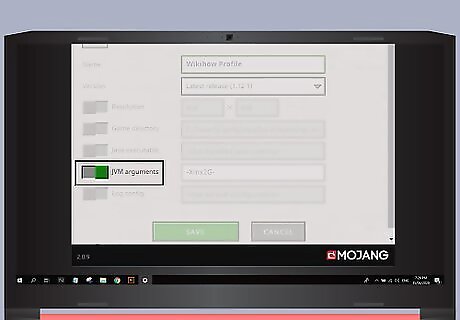
Ensure the JVM arguments are enabled. See the text box called JVM arguments to enable this feature.
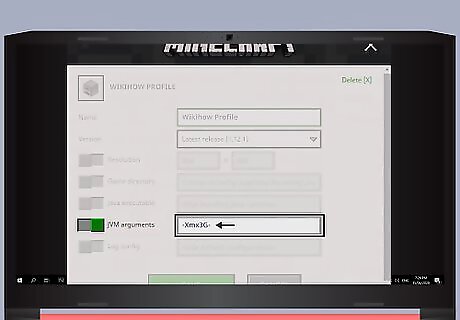
Edit the amount of RAM that Minecraft can use. You'll see a line of text in the "JVM arguments" text field, the first section of which says -Xmx1G; change the "1" to the number of gigabytes of RAM you want to use for Minecraft. For example, you would change this text to say "-Xmx4G" to use four gigabytes of RAM with Minecraft.
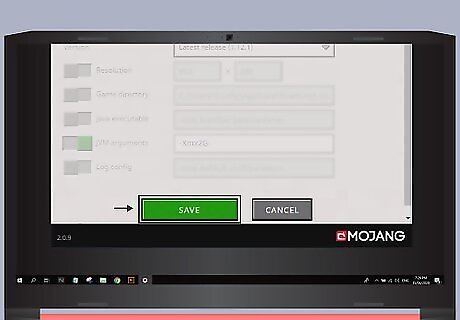
Click SAVE. It's at the bottom of the window. Minecraft will now use your selected amount of RAM for the specified profile.
Using Launcher Version 1.6.X
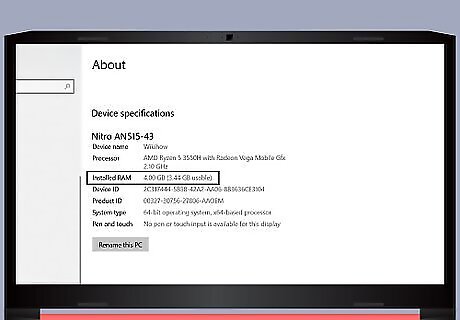
Check your computer's available RAM. The amount of available RAM will dictate how much memory you can allocate to Minecraft. To check RAM: Windows - Open Start, click the Settings gear, click System, click About, and look at the number next to "Installed RAM". Mac - Open the Apple menu, click About This Mac, and look at the number to the right of the "Memory" heading.
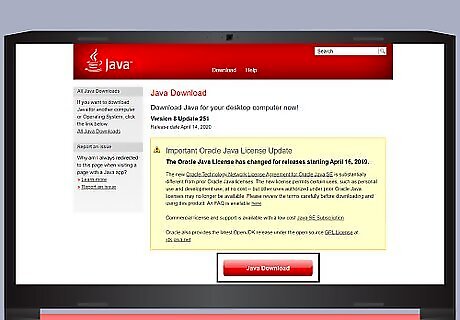
Update your Java program. Go to Java's website at https://www.java.com/en/download/ and click the "Download" button below the latest version of Java. This will ensure that your Java version is up-to-date and ready for RAM allocation. If you're on Windows, make sure you download the correct bit version for your operating system.
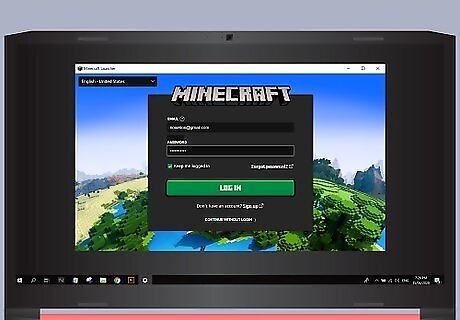
Start the Minecraft launcher. In 1.6.X and newer, you can allocate more RAM directly from the Minecraft launcher. If you are using an older version, see the next section. If the launcher window has "2.0..." in the bottom-left corner, use the launcher version 2.0.X method instead.
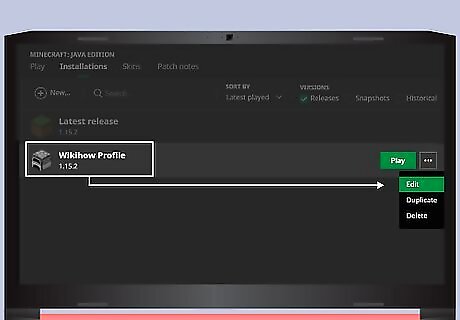
Select your profile. Click Edit Profile and select a profile from the list.
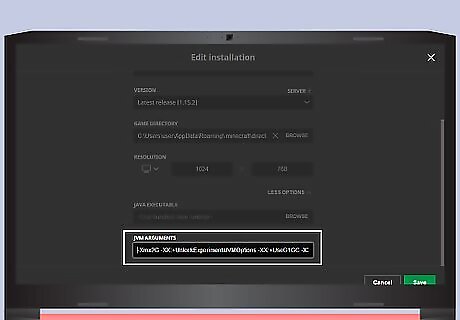
Enable JVM Arguments. In the "Java Settings (Advanced)" section, check the "JVM Arguments" box. This will allow you to enter commands to modify the Minecraft program.
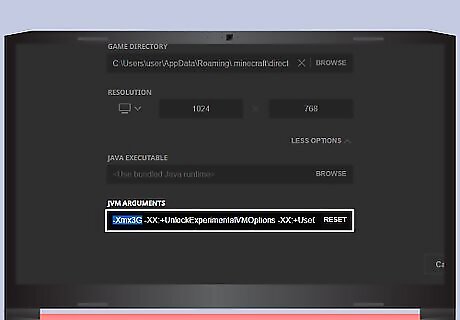
Allocate more RAM. By default, Minecraft will allocate 1 GB of RAM for itself. You can increase this by typing -Xmx#G. Replace # with the number of gigabytes you want to allocate. For example, if you wanted to allocate 18 GB, you would type -Xmx18G.
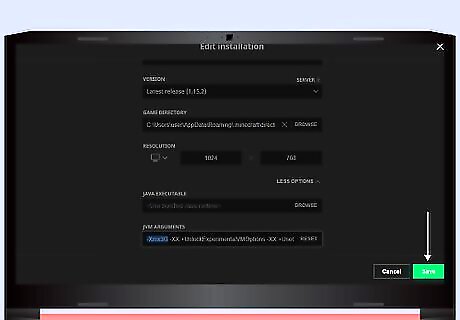
Save your profile. Click Save Profile to save your settings. Your specified amount of RAM will now be applied to your selected profile.



Comments
0 comment