
Using a Battery

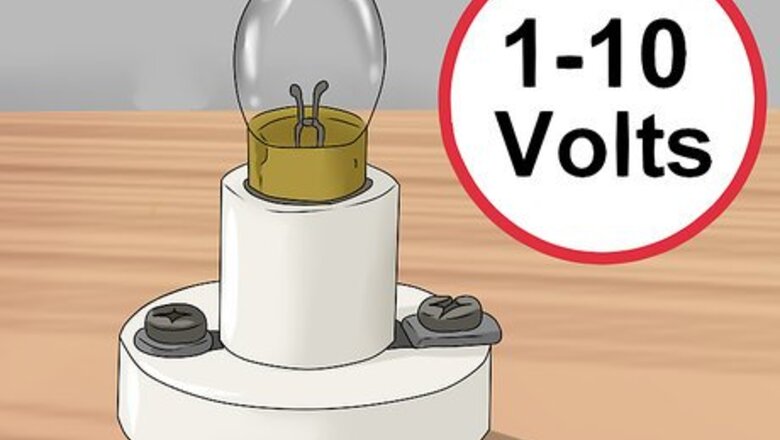
Screw a bulb into a bulb holder. A bulb holder is a device made to hold a light bulb. It also has 2 terminals. One is for a positive lead and the other is for a negative lead. This allows you to pass a current through the light bulb in the holder. Be sure to use a low-powered light bulb (e.g., in the range of 1-10 volts).

Remove about 1 inch (2.5 cm) of wire covering from each end of 2 copper wires. You should use 2 different colored copper wires. This will help you differentiate between the positive and negative lead. Use a knife or wire strippers to cut 1 inch (2.5 cm) of the plastic insulation (the colored part) off of each end of both wires. This exposes the copper wire underneath. Red and black wires are the most common, but you can use other colors too, like red and white. Don't cut through the actual wire. You just need to cut through the plastic insulation that is covering the wire. Once you have cut it, you can peel or slide it off of the wire. Take care not to cut too deep as you are cutting through the plastic insulation over the wire. If you cut into the copper wire itself, you could weaken it and cause it to break.
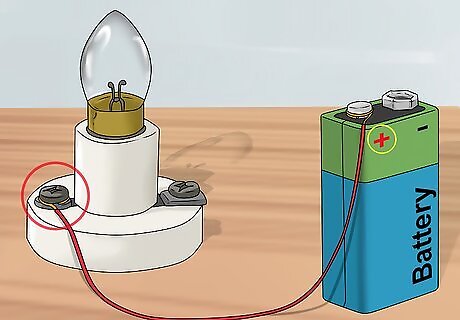
Connect the positive lead. Generally, red wire is used to connect the positive end. One end of the red wire will connect to one side of the bulb holder. The other end of the red wire should touch the positive lead on the battery. If you weren't able to get any red wires, then choose 1 of your 2 colors to be the positive wire.

Connect the negative lead. Black wire is usually used to connect the negative end. Again, one end of the wire should touch the terminal on the bulb holder (not the same terminal as the positive wire). The other end of the wire can be left unattached until you are ready to light the bulb.
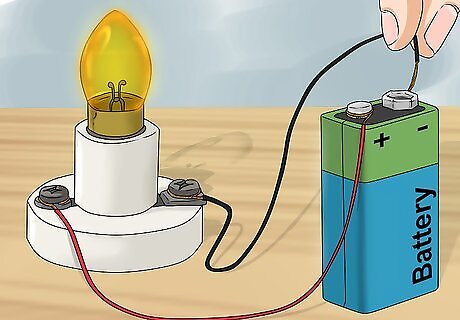
Light the bulb. Touch the unattached end of the negative (black) wire to the negative terminal on the battery. This completes the circuit and allows electricity to flow. The electricity is forced to flow through the light bulb, which causes the bulb to light up.
Using a Power Pack
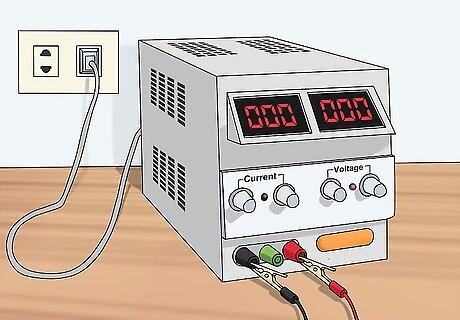
Set up the power pack. The power pack should be on a flat, level surface. Plug the power pack into an outlet. This will provide a steady supply of power to your circuit. Plug the wire leads into the power pack. Make sure to choose a light bulb with a voltage that’s within the voltage range of the power pack. If the power pack has an adjustable voltage range, set it to the lowest possible voltage when you turn on the power so that you don’t burn the bulb.

Connect the light. Screw the light into a bulb holder. Then connect each lead from the power pack to one of the terminals on the bulb holder. Once both leads are connected, the light will light up. If the light does not light up, check that the leads are well connected and the power pack is plugged in and turned on.

Adjust the voltage. You can turn a dial on your power pack to cause the voltage to fluctuate. Doing this can demonstrate how the brightness of the light changes as a result of higher or lower voltages. The light should get dimmer as the voltage goes down, and brighter as the voltage goes up. Don’t turn on the voltage any higher than what the bulb is rated for.
Adding a Switch
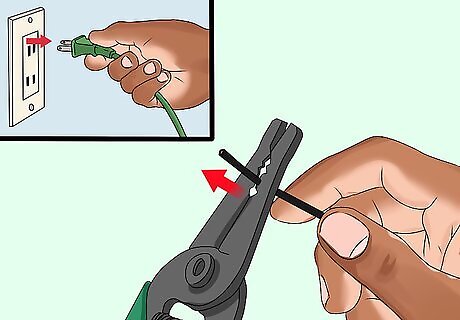
Cut 1 wire lead. Remove power from the circuit before cutting any leads. It does not matter if you cut the positive or negative lead. You can use a pair of wire cutters to cut the lead anywhere in the circuit. The switch will provide control of the circuit no matter where it is located. It is dangerous to cut into a live wire (one with power on it). Always disconnect the circuit before cutting leads.
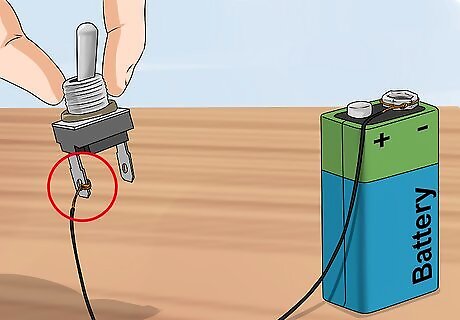
Attach the lead wire from the battery to the switch. Once you have cut 1 of the lead wires, you can attach it to the switch. The switch will have 2 simple terminals. Attach the lead wire coming from the battery to one of these terminals. Leave the other terminal alone for right now.
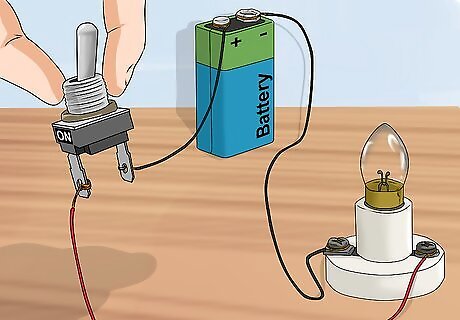
Attach the lead wire from the switch to the bulb. The second piece of wire should be attached to the bulb holder terminal. Attach this piece of wire to the second terminal on the switch. This will again complete the circuit. Unlike in the previous experiment, this will not complete the circuit and turn the bulb on. In order for that to happen, you have to flip the switch! When you attach the switch to the circuit, make sure the switch is off (open). If you leave the switch on (closed), there will be voltage present when you attach the wire from the switch to the bulb holder terminal. You can also open the circuit by removing the light bulb from the holder.

Toggle the switch. As you flip the switch on and off, it will open (break) and close (complete) the circuit. This will either prevent or allow electricity to flow. When the circuit is open, the light will be off. When the circuit is closed, the light will turn on.


Comments
0 comment