
Cleaning Your Car's Rotors

Park your car on a level surface. Accessing the rotors requires lifting the car with a jack, and lifting on an unlevel plane is very dangerous. You should place the car in park, turn off the vehicle and place tire blocks around all tires to prevent movement during jacking.

Loosen the lug nuts. Before lifting the car, it is best to loosen stubborn lug nuts while the tires are firmly fixed on the ground. A raised tire will have some give and rotate which can make fighting a lug nut all the more difficult.

Set your car on jack stands. It is best to consult your vehicle's manual for the best placement on jack stands. However, it is typically the case that one jack point exists per wheel. Just be sure you are setting the jack on a solid and secure point on the frame as opposed to paneling. Jacking on the paneling will not be able to support the weight of the car and will cause damage to the paneling as well as cause the jack to fall. If you are unsure about jack points, check online for your model's manual or consult a mechanic. The more jack stands, the better. Adding breeze blocks as a failsafe can also help make sure that if the car does move enough to come off a stand, you are still going to be safe.
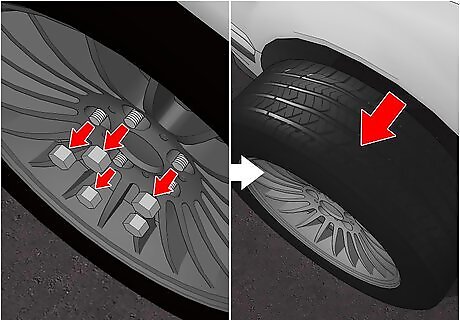
Remove the tire(s). Once the car is securely raised, you can finish removing the lug nuts. You should remove all the tires before cleaning so that you do not have to repeatedly prepare and set aside your tools.
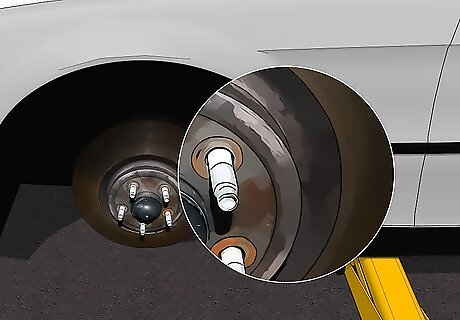
Check that the rotors are worth cleaning. It is not until you can access the rotors that you can truly know the condition they are in. Often, rotors can experience “lateral brake run-out” in which the rotor wobbles and unevenly wears down. If the rotor has worn unevenly, it means the brake pads will not make contact evenly or as soon as expected. Although it may not be immediately apparent, over time it can be dangerous. Rotors are expected to last between 40,000-60,000 miles for typical use, so be open-minded to the idea that your rotors may be worn or past their days of good use. They might need replacing.
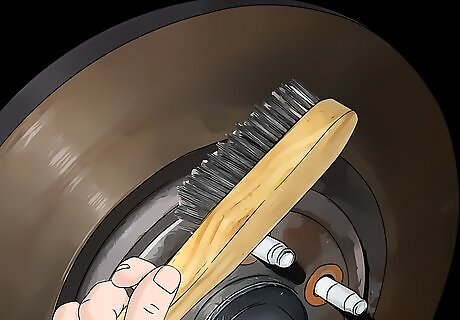
Use a stainless steel brush to clean the rotor. Build-up and rust can usually be removed by simple abrasion from a stainless steel brush. A “caliper brush” can also help to access more intricate parts of your rotor, if needed.

Lathe additional buildup if needed. If you are experienced enough to use a lathe, you can essentially grind away any more stubborn buildup. Be careful not to create unevenness when grinding as this will create the same issue as brake run-outs.
Cleaning Your Bike's Rotors
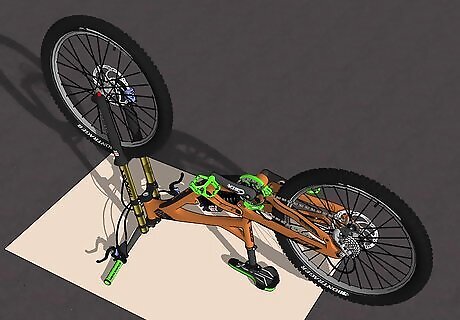
Flip your bike over. Finding a solid, flat surface to flip your bike over onto will make working on the wheels much easier. With the wheels up in the air, you can better spin the tire and handle as you work.

Locate your disc rotor. Following your brake cables, you will find the brake pads themselves. For disc rotors, the rotor will be what the brake pads are clamping on themselves when you press the brakes.

Assess the mess. If your rotors just need a bit of touching up, you can clean them while they are still fully attached. However, if your recent ride has left them in a much messier condition, it may be required to take them off. To remove your bike's rotors, you will need to consult the manual of your particular model. Rotor removal usually entails removing the wheel, and then detaching the braking system and rotor itself depending on how it has been attached. Make sure to pay attention to the order you remove things so that you can reverse it when reassembling.
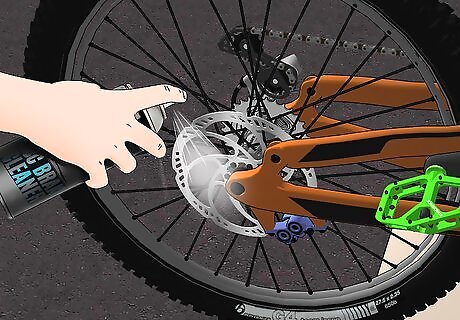
Use a dedicated brake cleaner or soap with water. Brake rotors are very sensitive to certain products, so be sure NOT to use products like WD-40 or other oil-based cleaners. These can be even more difficult to clean off the rotor and make braking less effective or efficient. Spray the rotor with your can of brake cleaner, per the can's instructions. If using soap and water, spray or dip a rag into the solution and wipe the entire rotor down. Some brake cleaners simply require a good wipe down with an industrial towel after using the spray. Make sure to remove all the residue so that your brake pads will only be hitting the rotors - not greasy cleaner. If you've used soapy water, use some clean water to rinse away the solution and then a towel to completely dry the rotor itself.

Reassemble your brakes. If you've removed the rotor, reverse the steps you took to remove it and reassemble the brake fixtures. Tighten and align everything as the manual recommends. Then flip your bike back over, and you're ready to ride!
Dealing with Rust on Your Car's Rotors

Brake away the rust. Most rust that builds up can easily be removed by regular usage. Find an empty parking lot or open road and travel at about 5-10 miles per hour. Press your brakes about a half dozen times with enough pressure to stop the car slightly more abruptly than normal driving. This will knock loose and rub away buildup. Make sure to do this in a safe, undisturbed location. You do not want to be in the way of traffic or create the potential for an accident.
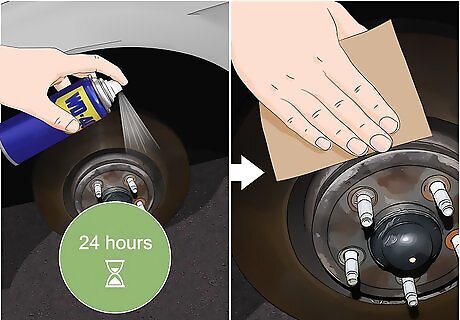
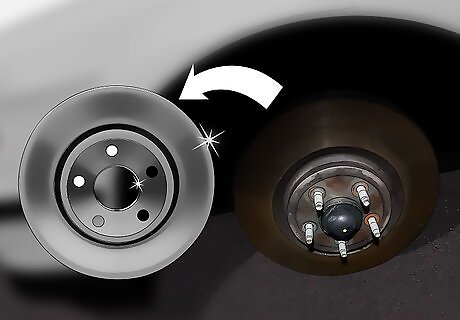
Use WD-40 to dissolve some rust. Another option is to remove the tires as you would to clean your rotors with a steel brush. Spray the rotors with WD-40, or a similar penetrating oil, and let it set for 24 hours. Then use a very light, fine grain sanding paper to wipe away the dissolved material. Wipe clean with a rag to remove any additional oil or residual. There are also a number of products on the market to use after cleaning a rotor to prevent further buildup. This can help offset the next time rather extensively or altogether, depending on driving conditions.
Replace your rotors. As with damaged or worn rotors, often a rotor has become too old and rusted to serve its intended purpose safely. Although a pricier solution than replacing a tire, you sometimes need to face the facts and choose the safest option.


Comments
0 comment